Measuring Home Networks With BISMark

The Broadband Internet Service BenchMARK is an open source initiative to put tools in the hands of the common Internet user that will make measurement and analyzation of home network traffic easier. It targets LAN and WAN network utilization by measuring latency, packet loss, jitter, upstream throughput, and downstream throughput. Of course gathering data isn’t worth anything unless you have a way to present it, and to that end the Project BISMark team has been developing a web interface where you can view the usage of anyone who’s running the firmware.

The project builds on top of OpenWRT, which means that you should be able to run it on any router that’s OpenWRT compatible. This includes the ubiquitous WRT54G routers and many others. We remember when DD-WRT added bandwidth monitoring as part of the standard release, which really came in handy when the stories about ISP bandwidth capping started to hit. We’re glad to see even more functionality with this package as it can be hard to really understand what is going on in your network. After the break you’ll find a video detailing the features of BISMark.

Continue reading “Measuring Home Networks With BISMark”

Reverse Engineering VxWorks (which Replaces Linux On Newer Routers)

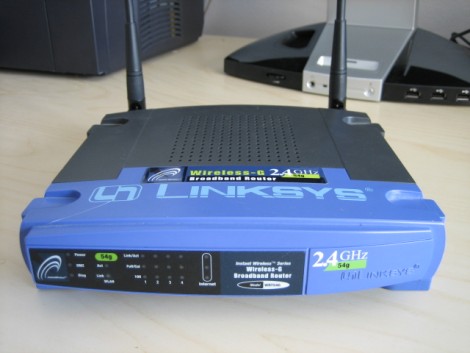
The Linksys router seen about is a WRT54G version 1. It famously runs Linux and was the source of much hacking back in the heyday, leading to popular alternative firmware packages such as DD-WRT and Tomato. But the company went away from a Linux-based firmware starting with version 8 of the hardware. Now they are using a proprietary Real Time Operating System called VxWorks.

[Craig] recently put together a reverse engineering guide for WRT54Gv8 and newer routers. His approach is purely firmware based since he doesn’t actually own a router that runs VxWorks. A bit of poking around in the hex dump lets him identify different parts of the files, leading to an ELF header that really starts to unlock the secrets within. From there he carries out a rather lengthy process of accurately disassembling the code into something that makes sense. The tool of choice used for this is IDA Pro diassembler and debugger. We weren’t previously familiar with it, but having seen what it can do we’re quite impressed.

[Image via Wikimedia Commons]

Retro-radio: Building On Another WiFi Radio Hack

[Jay Collett] likes listening to Internet radio stations and decided to build his own standalone hardware that lets him listen without being at his computer. But he wasn’t starting from square one on this project. [Jay] built on the epic instruction set that [Mighty Ohm] published when he first built his own WiFi radio.

Both of these radios used the same method of getting onto the internet; a hacked router. We kind of like this because it means you should be able to use the radio as a bridge for wired Ethernet devices. But we digress. [Jay] departs from the instructions by using an Arduino and its IDE to interface an LCD screen with a different line/column orientation than the original, and to implement a different control scheme. This makes the project a bit more approachable if you prefer not to roll your own electronics.

Take a look at the video after the break. The router takes quite a while to boot, but once it does it seems that the controls are both intuitive and responsive.

Continue reading “Retro-radio: Building On Another WiFi Radio Hack”

Hacking Into Your Router’s Administrative Interface

zte_zxdsl_router_hack

[Arto] recently upgraded his home Internet subscription from an ADSL to VDSL, and with that change received a shiny new ZTE ZXDSL 931WII modem/wireless router. Once he had it installed, he started to go about his normal routine of changing the administrator password, setting up port forwarding, and configuring the wireless security settings…or at least he tried to.

It seems that he was completely unable to access the router’s configuration panel, and after sitting on the phone with his ISP’s “support” personnel, he was informed that there was no way for him to tweak even a single setting.

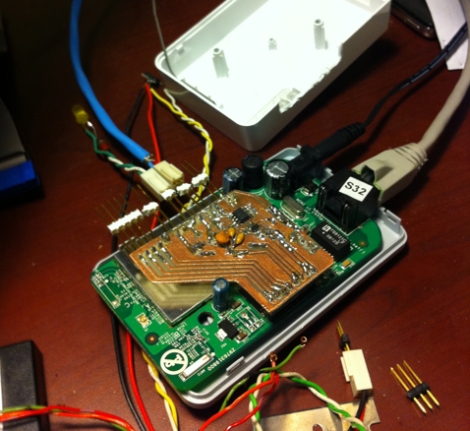
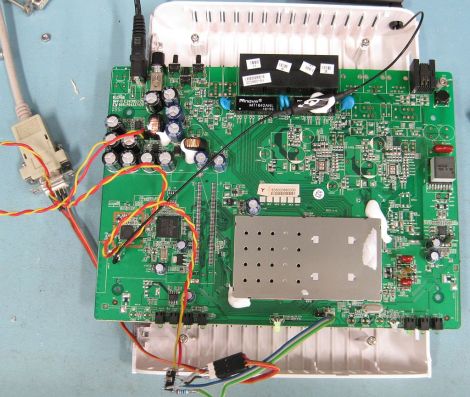
Undaunted, he cracked the router open and started poking around. He quickly identified a serial port, and after putting together a simple RS232 transceiver, was able to access the router’s telnet interface. It took quite a bit of experimentation and a good handful of help from online forums, but [Arto] was eventually able to upload an older firmware image to the device which gave him the configuration tools he was looking for.

Aside from a few Ethernet timeout issues, the router is now performing to his satisfaction. However, as a final bit of salt in his wounds, he recently read that the admin panel he was originally seeking can be accessed via the router’s WAN interface using a well-known default password – frustrating and incredibly insecure, all at the same time! He says that he learned quite a few things along the way, so not all was lost.

DIY Bolt Together CNC Router

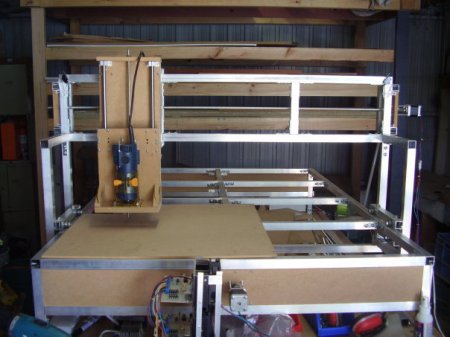
Before I decided to build my own CNC machine I had seen a few bolt together machines on the internet, usually constructed using 80/20 aluminum extrusion. My write up describes my attempt at a completely DIY bolt together machine made from 25mm aluminum SHS, 50mm shelving brackets and lots and lots of gutter bolts.

Building the machine involved drilling and tapping about 400 holes (if I can still count) and assembling the machine over a 3 month period. I designed it mostly on the fly which lead to a few headaches, but in the end a machine that works quite well (if slowly and noisily). I go through each major component of the machine and describe how and why I would have changed it if I had followed the normal plan-design-build methodology.

I have tried two versions of stepper motor drivers and you can find the schematics for the DIY version on my site. The entire thing runs from a Linux PC running EMC2, check out a video after the break to see it in action and here are some photos of a few of my machined items.

Continue reading “DIY Bolt Together CNC Router”

Building Your Own Router Lift-out Mechanism

Adjusting the bit height on a router table can be a pain in the butt. Traditionally you needed to get into the cavity under the table top in order to make these adjustments, and it’s hard to make the adjustment and measure the height at the same time. Modern routers now offer the option to adjust height through a hole in the plate that sits in the router table, but this is usually only found on the more expensive models. Rather than buy a new tool [Urant] built his own router lift.

He’s using recycled closet rails to give his rig some smooth operation. These are the rails and runners that let closet doors hang from the top jamb. He saved them when replacing the closet doors in one of his rooms. There’s a triangular gantry which hosts the router, allowing it to move vertically on the three sets of rails. The threaded rod in the foreground of the picture above lets the woodworker adjust bit height by turning the nut at the top. Once mounted in the router table the nut is accessible through a small hole in the table surface.

PC Case Using CNC Router And Home Building Products

[Reinventing Science] needed a project that he could use to test out his skills on a new CNC routing machine he recently acquire. He settled on building a PC case using easily obtained materials. What he ended up with is the clean-looking case seen above that was machined from materials you can pick up at the home store.

The bulk of the case is made from extruded PVC which is designed to perform like solid wood trim. He picked up one piece of the ‘lumber’ and cut out the front, back, top, bottom, and drive bay bezel. We expected the joints between the horizontal and vertical pieces to either be butt joints, or rabbits. But [Reinventing Science] wanted a cleaner look and managed to mill mortise and tenon joints. These are strong joints that leave a very nice finished look. Since the material is designed as a lumber replacement it shouldn’t be too surprising to see drywall screws used as the fasteners.

In addition to joinery, some other CNC tricks were used. The sides of the case were cut from clear acrylic, with a decorative bead milled in the surface. There’s also fan ports cut in the top and vents on the bottom, as well as some engraving with the name of the project just above the optical drive. The wood-grain embossing makes for an interesting final look; we’d like to see how this takes a few careful coats of paint.

If you’re interested in the CNC hardware used, take a look at the unboxing post that shares a few details.