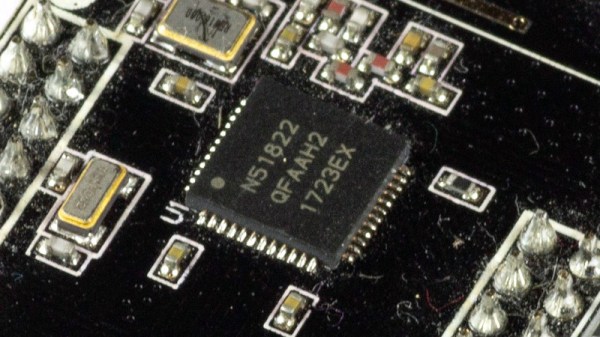
Capacitive Touch Controller For FPGAs

Most projects that interface with the real world need some sort of input device. Obviously this article is being written from a standardized “human interface device” but when the computers become smaller the problem can get more complicated. We can’t hook up a USB keyboard to every microcontroller since we often only need a few buttons, but even buttons can be a little bit too cumbersome for some applications. For something even simpler, we would like to turn your attention to capacitive touch controllers.

Granted, these devices are really only simpler from a hardware perspective. Rather than a switch that can be prone to failure either when its moving parts break or its contacts become corroded, a capacitive touch button only needs a certain conductive area on something like a PCB, along with a few passive components, to work. The real difficulty is in the software, so this project aims to make it simpler to bring these sort of devices to any FPGA that needs some sort of interface like this. It can operate in stand-alone mode or in a custom user interface, and was written to be platform-independent in VHDL without the need for any dependencies or macros.

The project’s page goes into a great amount of detail on how capacitive touch sensors like these work in general, and describes the operation of this specific code as well. Everything is open source, so it’s ready to be put to work right away. If you need capacitive touch capabilities on something like a microcontroller, though, take a look at this tiny Atmel-powered musical instrument instead.

Using Arduinos To Drive Undocumented Displays

For those of us old enough to remember the VCR (and the difficulty of programming one), the ubiquitous vacuum fluorescent display, or VFD, is burned into our memories, mostly because of their brightness and contrast when compared to the superficially-similar LCD. These displays are incredibly common even apart from VCRs, though, and it’s easy to find them for next to no cost, but figuring out how to drive one if you just pulled it out of a 30-year-old VCR is going to take some effort. In this build, [mircemk] shows us how he drives unknown VFD displays using an Arduino in order to build his own weather forecasting station.

For this demonstration [mircemk] decided to turn a VFD into a weather forecasting station. First of all, though, he had to get the VFD up and running. For this unit, which came from a point-of-sale (POS) terminal, simply connecting power to the device turned on a demo mode for the display which let him know some information about it. From there, and with the knowledge that most POS terminals use RS232 to communicate, he was able to zero in on the Rx and Tx pins on the on-board microcontroller and interface them with an Arduino. From there it’s a short step to being able to output whatever he wanted to this display.

For this project, [mircemk] wanted the display to output information about weather, but rather than simply pull data from some weather API he is actually using a sensor suite connected to the Arduino to measure things like barometric pressure in order to make a 12-hour forecast. The design is inspired by old Zambretti weather forecasters which used analog wheels to input local weather data. It’s an interesting build not only for the VFD implementation but also for attempting to forecast the weather directly with just a tiny sensor set instead of downloading a forecast to display. To do any better with your own forecasts, you’d likely need your own weather station.

Continue reading “Using Arduinos To Drive Undocumented Displays”

3D Printed Sensor Detects Glyphosate

Typically, detecting glyphosate — a herbicide — in a beverage requires a sophisticated test setup. But Washington State University has a 3D printed sensor that uses nanotubes to simplify the detection of the toxin.

The idea is very similar to inexpensive blood glucose monitors. The test will eventually find use for human samples, but the initial testing was for detecting contamination in orange juice.

Continue reading “3D Printed Sensor Detects Glyphosate”

A MetaSense joystick

3D-Printing Complex Sensors And Controls With Metamaterials

If you’ve got a mechatronic project in mind, a 3D printer can be a big help. Gears, levers, adapters, enclosures — if you can dream it up, a 3D printer can probably churn out a useful part for you. But what about more complicated parts, like sensors and user-input devices? Surely you’ll always be stuck buying stuff like that from a commercial supplier. Right?

Maybe not, if a new 3D-printed metamaterial method out of MIT gets any traction. The project is called “MetaSense” and seeks to make 3D-printed compliant structures that have built-in elements to sense their deformation. According to [Cedric Honnet], MetaSense structures are based on a grid of shear cells, printed from flexible filament. Some of the shear cells are simply structural, but some have opposing walls printed from a conductive filament material. These form a capacitor whose value changes as the distance between the plates and their orientation to each other change when the structure is deformed.

The video below shows some simple examples of monolithic MetaSense structures, like switches, accelerometers, and even a complete joystick, all printed with a multimaterial printer. Designing these structures is made easier by software that the MetaSense team developed which models the deformation of a structure and automatically selects the best location for conductive cells to be added. The full documentation for the project has some interesting future directions, including monolithic printed actuators.

Continue reading “3D-Printing Complex Sensors And Controls With Metamaterials”

SYPHCOM, the compact CO2 sensor

Compact Sensor Keeps You Safe By Watching CO2 Levels

Remember when work meetings were just a bunch of people filling up a small, poorly ventilated room with their exhaled breath? Back in the good old days, all you had to worry about was being lulled to sleep by a combination of the endless slide deck and the accumulation of carbon dioxide. Now? Well, the stakes may just be a little bit higher.

In either situation, knowing the CO2 level in a room could be a handy data point, which is where a portable CO2 sensor like this one could be useful. Or at least that’s [KaRMaN]’s justification for SYPHCOM, the “simple yet powerful handheld carbon dioxide meter.” The guts of the sensor are pretty much what you’d expect — an Arduino Pro Micro, a SenseAir S8 CO2 sensor board, and the necessary battery and charging circuits. But the build does break the mold in a couple of interesting places. One is in the choice of display — a 1980s-era LED matrix display. The HDSP2000 looks like it belongs in a nice bench meter, and is surprisingly legible without a filter. It looks like it flickers a bit in the video below, but chances are that’s just a camera artifact.

The other nice part of this build is the obvious care [KaRMaN] put into making it as small as possible. The layout of boards and components is very clever, making this a solid, compact package, even without an enclosure. We’ve seen CO2 sensors with more features, but for a quick check on air quality, SYPHCOM looks like a great tool.

Continue reading “Compact Sensor Keeps You Safe By Watching CO2 Levels”

Occam’s Razor: Gardening Edition

While the impulse to solving problems in complex systems is often to grab a microcontroller and some sensors to automate the problem away, interfacing with the real world is often a lot more difficult than it appears. Measuring soil moisture, for example, seems like it would be an easy way of ensuring plants get the proper amount of water, but soil is a challenging environment for electronics and this solution often causes more problems than it solves. [Kevin] noticed this problem with soil moisture sensors and set about solving this problem with a much simpler, though indirect, method of monitoring his plants electronically.

Rather than relying on soil conductivity for testing soil moisture levels, he has developed an alternate method of determining if the plants need to be watered simply by continuously weighing them. The hypothesis that he had was that a plant that needs water will weigh less as the available water respirates out of the plant or evaporates from the soil. This means that using a reliable sensor like a load cell to measure weight rather than an unreliable one like a soil moisture sensor will result in more reliable data he can use to automate his plants’ watering.

[Kevin]’s build is based around an ESP32 and a commercially-available load cell which are all built into the base of the plant’s pot. The design hides all of the electronics in a pleasant enclosure and is able to communicate relevant info wirelessly as well. The real story here, however, isn’t a novel use of an ESP32 chip, but rather out-of-the-box problem solving by using an atypical sensor to solve this problem. That’s not to say that you can’t ever use other sensors to directly monitor your garden and automate its health, though.

Hacked IKEA Air Quality Sensor Gets Custom PCB

Last month we brought word of the IKEA VINDRIKTNING, a $12 USD air quality sensor that could easily be upgraded to log data over the network with the addition of an ESP8266. It only took a couple of wires soldered to the original PCB, and since there was so much free space inside the enclosure, you didn’t even have to worry about fitting the parasitic microcontroller; just tape it to the inside of the case and button it back up.

Now we’ve got nothing against the quick and dirty method around these parts, but if you’re looking for a slightly more tidy VINDRIKTNING modification, then check out this custom PCB designed by [lond]. This ESP-12F board features a AP2202 voltage regulator, Molex PicoBlade connectors, and a clever design that lets it slip right into a free area inside the sensor’s case. The project description says the finished product looks like it was installed from the factory, and we’re inclined to agree.

Nothing has changed on the software side, in fact, the ESP-12F gets flashed with the same firmware [Sören Beye] wrote for the Wemos D1 Mini used in his original modification. That said [lond] designed the circuit so the MCU can be easily reprogrammed with an FTDI cable, so just because you’re leaving the development board behind doesn’t mean you can’t continue to experiment with different firmware builds.

It’s always gratifying to see this kind of community development, whether or not it was intentionally organized. [lond] saw an interesting idea, found a way to improve its execution, and released the result out into the wild for others to benefit from. It wouldn’t be much of a stretch to say that this is exactly the kind of thing Hackaday is here to promote and facilitate, so if you ever find yourself inspired to take on a project by something you saw on these pages, be sure to drop us a line.