OpenExposer, The DIY SLA Printer

printer

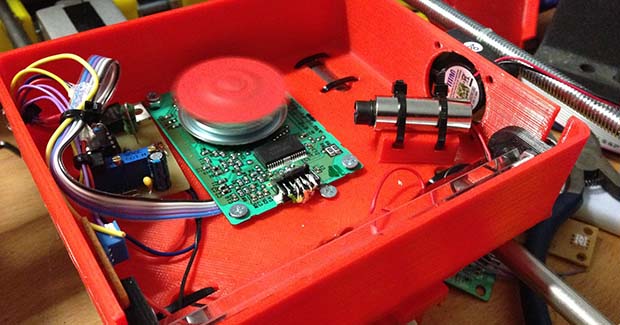
Precisely applied ultraviolet light is an amazing thing. You can expose PCBs, print 3D objects, and even make a laser light show. Over on the Projects site, [Mario] is building a machine that does all of these things. It’s called the OpenExposer, and even if it doesn’t win the Hackaday Prize, it’s a great example of how far you can go with some salvaged electronics and a 3D printer.

The basic plan of the OpenExposer is a 3D printer with a small slit cut into the bed, and a build platform that moves in the Z axis. The bed contains a small UV laser and a polygon mirror ripped from a dead tree laser printer. By moving the bed in the Y direction, [Mario] shoot his laser anywhere on an XY plane. Put a tank filled with UV curing resin on the bed, and he has an SLA printer. Put a mounting bracket on the bed, and double-sided PCBs are a cinch.

The frame is made of 3D printed parts and standard RepRap rods, with the only hard to source component being the polygonal mirror. These can be sourced from scrounged laser printers, but there’s probably some company in China that will sell them bulk. The age of cheap SLA printers is dawning, friends. Video below, github here.

Continue reading “OpenExposer, The DIY SLA Printer”

Creating PCBs With 3D Resin Printers

PCB

The folks over at Full Spectrum Laser are Kickstarting their own 3D printer – a stereolithography machine like the Form 1 and B9 Creator printers. During their testing, they discovered a new application for these SLA printers that should prove to be very useful for the makers and builders using machines – manufacturing PCBs with UV-sensitized copper clad boards.

Full Spectrum Laser’s printer – the Pegasus Touch – uses a near UV laser and a galvo system to build objects in UV-curing resin layer by layer. In retrospect it seems pretty obvious a UV laser would expose UV sensitive boards, but this discovery simply reeks of cleverness and is a nice ‘value added’ feature for the Pegasus printer.

The Pegasus printer has a laser spot size of 0.25mm, meaning the separation between traces on Pegasus-produced PCBs will be just under 10 mils. That’s a bit larger than the limits of laser printer-based PCB fabrication but far, far less complicated. Making a PCB on an SLA printer is as easy as removing the resin tank and putting a sensitized board on the build platform. Draw some traces with the printer, and in a few minutes you have an exposed board.

We’d really like to see if this technique can also be used with other SLA printers. if anyone out there would like to experiment, be sure to send the results into the tip line.

Video from Full Spectrum Laser below.

Continue reading “Creating PCBs With 3D Resin Printers”

Build Your Own Stereolithographic 3D Printer

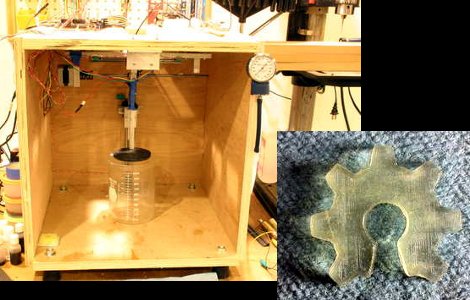
[Andy’s] 3D printer build uses lasers to create objects from goo. The Stereolithographic process uses resin that is cured by UV light to create the finished product. A single laser mounted to a CNC gantry is able to precisely target a point on the surface of the resin to begin the printing process. As the layers are built up, the stage, which is mounted on the Z axis, slowly sinks into the resin vat. So basically you’re printing from the bottom up but the laser never moves up or down. There’s a time-compressed video of an object being printed embedded after the break. It illustrates the process better than we can describe it.

We think [Andy] really went all out with his write-up of the build process. The quality he achieves in his prints is quite excellent, but you must consider the cost versus an extrusion-based 3D printer. One liter of the UV resin he prints from can cost over $200.

If this sounds familiar it’s because we got a sneak peek at it back when we looked in on his Delta robot work.

Continue reading “Build Your Own Stereolithographic 3D Printer”

Delta Robot 3D Printer

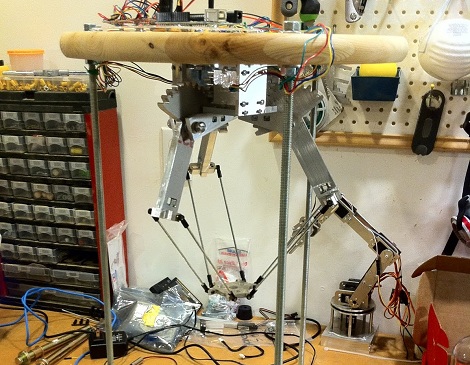
Sometimes, not all our builds work out the way we hoped. That’s what happened to [Rob] and his attempt at a Delta robot that does stereo lithography. A Delta robot is capable of very fast and precise movements, so [Rob] slapped a laser module on the end of the arms. After putting some UV curing resin in front of the laser, he was left with a blob of goo and we’re trying to figure out why.

[Rob] thinks the admittedly terrible print quality was due to diffraction and the reflective build plate. If this were the case, we’d agree with the assessment that adding some dye to the resin would help. Some commentors on [Rob]’s blog have suggested that he’s running the laser too slowly. It’s a shame [Rob] scrapped his build and turned it into a plain-jane X & Y axis build. Delta robots can be really damn fast, and adding a printer to one might mean prints that take minutes instead of hours. There are a few people working to get a Delta RepRap off the ground, but this project still has another prototype or two before that happens. Check out [Rob]’s attempt at Delta robot stereolithography after the break.

Thanks to [techartisan] for sending this one in.

Continue reading “Delta Robot 3D Printer”

Fixing Motorized Window Shutter Battery Problems

rolling_shutter_battery_fix

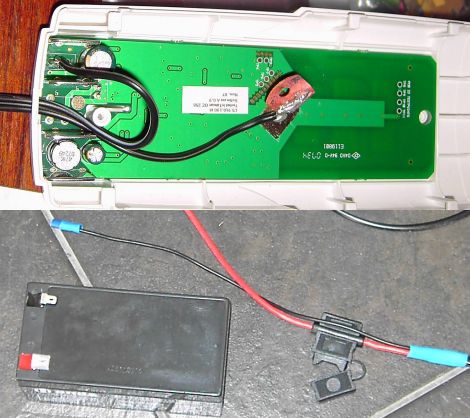
Living in a brushfire-prone area, [Erich] had a set of roller shutters installed to protect his home. Mains power can be spotty in emergencies, so the shutters are powered by NiMH batteries which are housed inside the shutters’ remote control units. After encountering a good handful of dead batteries, he decided it was time to search around for a better means of powering the shutters rather than pay another $80 AUD for batteries that he knew would fail in short order.

After disassembling the shutters and the remotes, he found a litany of problems. The remotes are ATMega-based, so he assumed the programming was robust, but he found that the charging algorithm was quite poorly implemented. The batteries were allowed to get extremely hot while charging, a result of the fact that charging was done for a set period of time rather than monitoring battery voltage. Additionally, the shutter motors required a 4 amp instantaneous current when activated, something that seemed to contribute to the quick draining of the 1500 mAH battery packs.

To remedy his issues, he upgraded to a much larger sealed lead acid battery pack, which he mounted in a wall cavity. The remotes were tweaked to add a modular power plug, enabling him to easily connect and disconnect the remotes as needed. Not only did he save a ton of money on constantly replacing batteries, he’s got a nice 12v power supply in the wall that he can tap into at will.

Remote Operated Underwater Vehicle

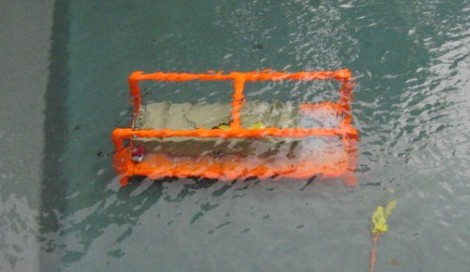
PVC hull, SLA batteries, Bilge Pumps, sounds like a good start to [Jimmy’s] ROV project. Paintball gun (as a BCD), dual live cameras paired with an Arduino making it internet controlled, all tethered with a fiber optic cable, sounds like [Jimmy’s] ROV got a whole lot more astounding.

While some very important parts have yet to be implemented, like the leak detectors, the project looks to be going quite smoothly. With updates promised, we can’t wait to watch this continue until the end.

Related: Yellow Subs and double ROVs

Laptop Running On A Sealed Lead Acid Battery

steupup_box

[Viktor’s] laptop needed a new battery; he had the trade off between carrying around a cheap but heavy sealed lead acid (SLA) battery, or buying an expensive but light Li-Ion battery. Figuring his old laptop was pretty heavy already, and having an unused SLA available, re-purposing it for his laptop wouldn’t be too much of a hassle. Using a boost converter he built out of a custom dip MAX668, he is able to output the necessary 5 amps required. An MC 34161 voltage monitor chip is planned for future revisions, but he’s currently running it just fine. Check out some of his other cool hacks on Karosium.

Related: MSI Wind extended battery