Nose Cone Parachute Deployment From A Soda Bottle, Rubber Band, And Servo

nose-cone-parachte

This piece of engineering is so simple and elegant, you’ll want to build a pretty serious water rocket just so you can try it out. It’s an automatic parachute deployment system that you build into the nose-cone of your rocket. The main portion of the build is made out of plastic soda bottles (2 liter size) to end up with a chamber to store the chute, as well as a friction joint that holds the thing together.

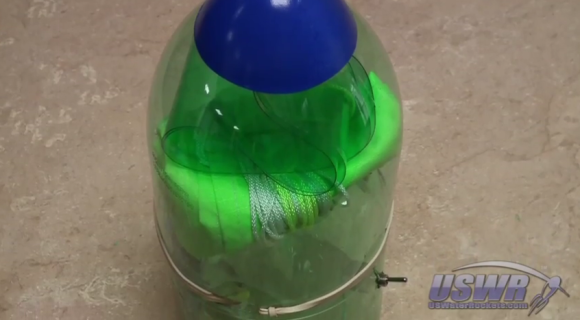
The video after the break shows a complete tutorial on how to build one of these. It starts by tracing out a sine-wave-like pattern on the wall of the bottle. The staggered tongues that are left after cutting along this line make up the friction joint. After gluing a cone (the blue thing) to the bottom of the bottle, it receives the parachute and is then slipped over another bottle that makes up the body of the rocket. The rubber band wraps around the outside of the chassis, holding those plastic tongues in place. The loose end of the rubber band is hooked around the horn of a servo motor, which can then be triggered remotely, or by using a sensor of your choosing. There is even a spring made out of a loop of plastic bottle — you can see it just on top of the chute in the image above.

Need a launching system that is as fancy as the parachute system? Here you go.

Continue reading “Nose Cone Parachute Deployment From A Soda Bottle, Rubber Band, And Servo”

Lens Adapter From A Plastic Soda Bottle

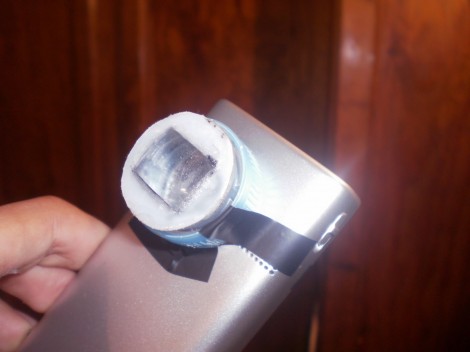
This lens adapter makes a lot of sense if you’re looking to interface with cameras that don’t have an in-built mounting option. It uses the cap and threaded neck from a soda bottle (translated) to make the lens adjustable and removable.

In the past we’ve seen this hack using a lens cap with a hole drilled in it as the mounting bracket. But that’s only useful if the lens you’ve chosen actually has a cap to use. This method lets you cut the top off of a the soda cap and mount it on the camera. Now each lens can be affixed to the threaded neck of the bottle, allowing for some adjustment of the focal point by screwing the add-on in or out.

Obviously this would work well for macro or fish-eye lenses. But there’s all kinds of other options out there like adding a microscope lens adapter, or actually attaching quality optics to your device.

Make Your Own Spray Paint Cans

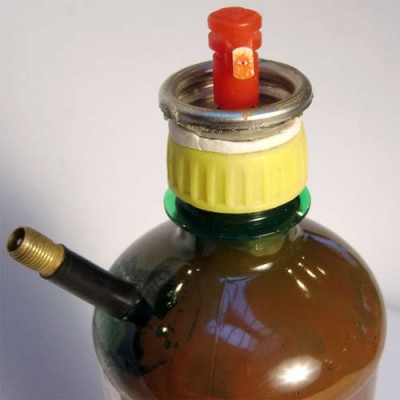
[Mikeasaurus] found a way to build his own refillable spraypaint canister. The donor vessel used here is a plastic soda bottle. It’s a great choice since it is engineered to house a pressurized liquid and you can find them for free by intercepting a satisfied soda consumer before they reach the recycling bin.

He repurposed the spray nozzle from a commercial spray paint can. By first releasing all of the pressure from the empty paint he could then use a hack saw to remove the top disk. He used Sugru to attach it to the bottle cap which has a hole drilled in the center to accept the feed straw. We wonder if there wouldn’t be a better way to attach this from the inside of the cap for better resistance to bottle pressure?

The final piece of hardware is a Shrader valve from a bicycle inner tube. This lets you pump up the pressure in the bottle. You’ll need to dilute the paint you use to make it sprayer-friendly. [Mikeasaurus] diluted his six to one which might have been a bit too much judging from the drips seen in the video after the break.

Continue reading “Make Your Own Spray Paint Cans”

Learn A New Fabrication Technique From DIY Prosthetics Builders

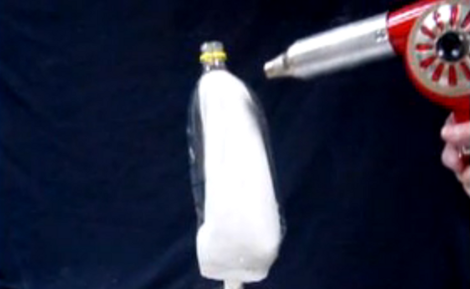
This is a screenshot from a video tutorial on making your own prosthetic parts from 2-liter soda bottles. The opaque white part is a mold made of plaster. It’s a representation of the wearer’s limb, and provides the hard, heat-resistant form necessary for this manufacturing technique. You can see the clear plastic soda bottle which fits over the form after the bottom was removed. A heat gun causes the plastic to shrink to the shape of the plaster model.

Once formed, the threaded neck is split down the middle with a band saw. This will receive a piece of 1/2″ PVC pipe to be held in place by the neck and a pipe clamp. It’s possible to stop there, but a second video details an additional bottle used to make the device more rigid. See both videos after the break.

This manufacturing process is aimed at parts of the world that don’t have access to advanced prosthetics. We think it’s a wonderful demonstration of what can be done to improve the lives of amputees. We also think it’s a technique that can be used in other projects… we just haven’t figured out what those are as of yet.

It’s amazing how versatile this plastic waste can be if you put your mind to it.

Continue reading “Learn A New Fabrication Technique From DIY Prosthetics Builders”

Pressurized PVC Water Gun

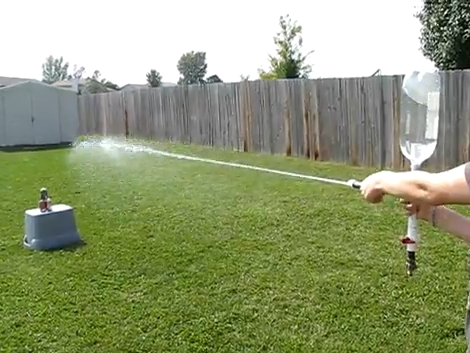
Hackaday’s [Caleb Kraft] has branded today “kiddie d-day” after seeing this PVC water gun follow close on the heals of the LEGO sniper rifle. This is a great summer project if you don’t mind letting the kids use the quick connect on your air compressor. It’s really just a ‘T’ made of PVC with two valves for air and water management and a soda bottle on the third leg as a reservoir. In the short clip after the break you can see that you don’t get a lot of shooting time out of each charge compared to the DIY Super Soaker, but this build is also a lot less complicated.

Continue reading “Pressurized PVC Water Gun”