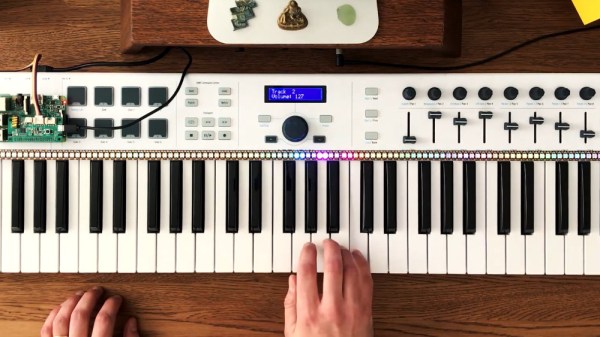
Stanislaw playing notes on his MIDI keyboard, with the LEDs on the LED strip lighting up right above the note he's playing, driven by the Raspberry Pi that runs a script based on the Pianolizer toolkit

Pianolizer Helps Your Musical Projects Distinguish Notes

[Stanislaw Pusep] has gifted us with the Pianolizer project – an easy-to-use toolkit for music exploration and visualization, an audio spectrum analyzer helping you turn sounds into piano notes. You can run his toolkit on a variety of different devices, from Raspberry Pi and PCs, to any browser-equipped device including smartphones, and use its note output however your heart desires. To show off his toolkit in action, he set it up on a Raspberry Pi, with Python code taking the note data and sending color information to the LED strip, displaying the notes in real time as he plays them on a MIDI keyboard! He also created a browser version that you can use with a microphone input or an audio file of your choosing, so you only need to open a webpage to play with this toolkit’s capabilities.

He took time to make sure you can build your projects with this toolkit’s help, providing usage instructions with command-line and Python examples, and even shared all the code used in the making of the demonstration video. Thanks to everything that he’s shared, now you can add piano note recognition to any project of yours! Pianolizer is a self-contained library implemented in JavaScript and C++ (which in turn compiles into WebAssembly), and the examples show how it can be used from Python or some other language.

[Stanislaw] also documented the principles behind the code, explaining how the note recognition does its magic in simple terms, yet giving many insights. We are used to Fast Fourier Transform (FFT) being our go-to approach for spectral analysis, aka, recognizing different frequencies in a stream of data. However, a general-purpose FFT algorithm is not as good for musical notes, since intervals between note frequencies become wider as frequency increases, and you need to do more work to distinguish the notes. In this toolkit, he used a Sliding Discrete Fourier Transform (SDFT) algorithm, and explains to us how he derived the parameters for it from musical note frequencies. In the end of the documentation, he also gives you a lot of useful references if you would like to explore this topic further!

What are you going to build with this? Maybe, a box that records you playing the flute and instantly turns it into sheet music? Or, perhaps, an AI that continues the song for you when you stop?

Continue reading “Pianolizer Helps Your Musical Projects Distinguish Notes”

Drawing On An OLED With An ATtiny85, No RAM Buffers Allowed

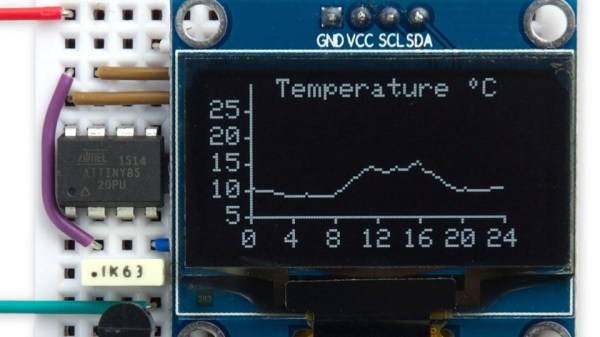
Small I2C OLED displays are common nowadays, and thanks to the work of helpful developers, there are also a variety of graphics libraries for using them. Most of them work by using a RAM buffer, which means that anything one wants to draw gets written to a buffer representing the screen, and the contents of that buffer are copied out to the display whenever it is updated. The drawback is that for some microcontrollers, there simply isn’t enough RAM for this approach to work. For example, a 128×64 monochrome OLED requires a 1024 byte buffer, but that’s bad news if a microcontroller has only 512 bytes of RAM in total like the ATtiny85. [David Johnson-Davies] has two solutions: a Tiny Graphics Library that needs no RAM buffer and an even slimmer Tiny Function Plotter, which we’ll discuss in order.

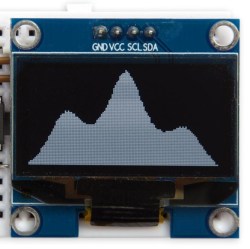
Tiny Function Plotter works on both SSD1306 and SH1106-based displays.

[David]’s Tiny Graphics Library works by taking advantage of a feature of SH1106 driver-based displays: the ability to read the display over I2C as well as write to it. With the ability to perform read-modify-write on a section at a time, using a large RAM buffer can be avoided. The only catch is that the library only works with OLEDs using the SH1106, but the good news is that these are very common at the usual Chinese resellers. ([David] notes that SH1106 is sometimes misspelled as “SSH1106”, so keep that in mind when searching.)

What about all those other SSD1306-based OLED displays out there? Are they out of luck? Not quite. [David] has one more trick up his sleeve: his Tiny Function Plotter works on the SSD1306 and also requires no RAM buffer. It’s unable to write text, but it can easily handle drawing graphs plotting things like values over time while needing very little overhead.

Another approach we’ve seen for using OLEDs driven by microcontrollers with limited memory is the solution [Michael] used in Tiny Sideways Tetris, which was done in part by realizing the smallest screen element he needed was a 4×4 block, and using that premise as the basis of a simple compression scheme.

It’s All In The Libs – Building A Plugin System Using Dynamic Loading

Shared libraries are our best friends to extend the functionality of C programs without reinventing the wheel. They offer a collection of exported functions, variables, and other symbols that we can use inside our own program as if the content of the shared library was a direct part of our code. The usual way to use such libraries is to simply link against them at compile time, and let the linker resolve all external symbols and make sure everything is in place when creating our executable file. Whenever we then run our executable, the loader, a part of the operating system, will try to resolve again all the symbols, and load every required library into memory, along with our executable itself.

But what if we didn’t want to add libraries at compile time, but instead load them ourselves as needed during runtime? Instead of a predefined dependency on a library, we could make its presence optional and adjust our program’s functionality accordingly. Well, we can do just that with the concept of dynamic loading. In this article, we will look into dynamic loading, how to use it, and what to do with it — including building our own plugin system. But first, we will have a closer look at shared libraries and create one ourselves.

Continue reading “It’s All In The Libs – Building A Plugin System Using Dynamic Loading”

Hacklet 31 – Software Tools

For every computer error, there are two human errors, and one of them is blaming the computer. Whenever a human blames a computer for something, there are two tools, and one of them is the computer.

Not all of your nifty tools need to be fancy robots, CNC machines, or nifty Robertson screwdrivers; a computer is equally capable of being a fantastic tool, provided it has the right software. For this week’s Hacklet, we’re going through some of the best software tools on hackaday.io.

6653681421957570397[Alan] was inspired to build a software tool for making sewing patterns. Sewing patterns are usually designed for the ‘average’ person, but if you’re making custom wearables, you should end up with a piece of clothing that fits perfectly.

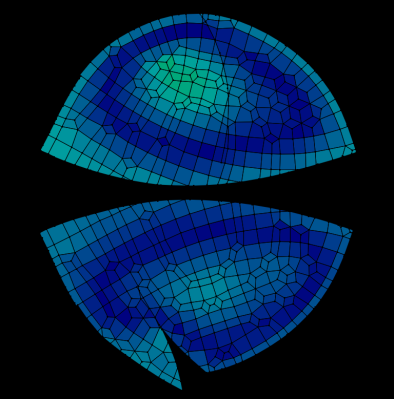
The first project [Alan] is using this tool for is a fleece cap that fits the contour of his head. He captured a 3D mesh of his head, imported the mesh into Blender, and unwrapped the resulting mesh. The two halves of the hat were then plotted with a Silhouette Cameo, cut out of fleece, and sewn together. The result is a beanie that fits perfectly around [Alan]’s head. It’s an extremely cool and novel application of 3D modeling, and if you ever need to wrap a 3D object with a 2D material, this is the project you want to check out.

5869061407871295021 And you thought the autorouter in Eagle was bad.
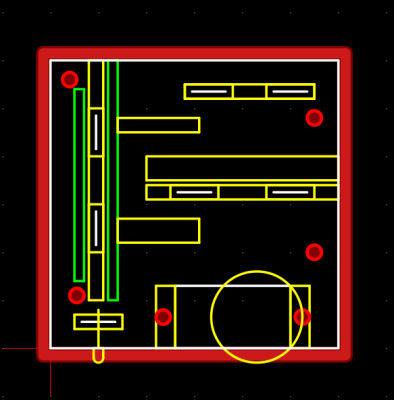
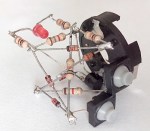
[Anderson] built a tool called Pyrite that will take a schematic and build a layout in three-dimensional space. He calls them Volumetric Circuits, and it’s basically the point-to-point wiring found in old radios and amplifiers taken to the next level. We featured this project before, and there haven’t been many updates since then. Maybe giving [Anderson]’s project a few skulls will help motivate him to get back to the project.

133031421839442989 Not satisfied with the existing free and open source CAM programs, [Snegovick] started work on his own.

[Snegovick] calls his project BCAM, and it’s exactly what you need to mill holes in PCBs, cut gears with a CNC router, engrave plastic, and anything else a 2.5 axis CNC machine can do. The project is written in Python, and yes, the source is available. Supported operations include drilling, path following, offset path following, and pocketing.

Write enough microcontroller projects, and you’ll eventually come up with your own library of common code that does one thing and one thing well. If you’re smart, you’ll reuse that code in future projects. [ericwazhung] is cutting through the hard part of developing all this code and released some things that are useful in a whole lot of projects.

Included in the commonCode library are the usual ‘heartbeat LED’, non-blocking input, a standard interface for AVR timers, bitmaps of text characters, DC motor control, and a whole bunch more. Extremely useful in any event.

That’s it for this round of the Hacklet, bringing you the best hackaday.io has to offer.