3D Print A Stenciling Frame For Your PCB

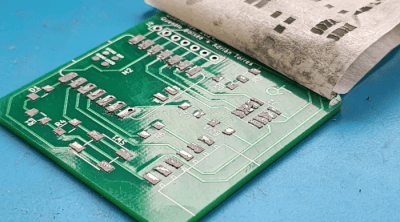
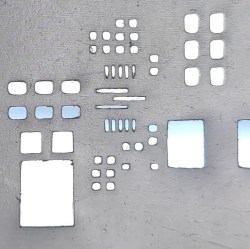
For many a hacker, stenciling a board for the first time is a game-changing experience – the solder joints you get, sure do give your PCB the aura of a mass-manufactured device. Now, you might not get a perfect print – and neither did [Atul R]. Not to worry, because if you have a 3D printer handy, he’s showing you how to design a 3D-printed frame using Blender and TinkerCAD, making your solder paste print well even if you’re trying to rest a giant stencil on top of a tiny board.

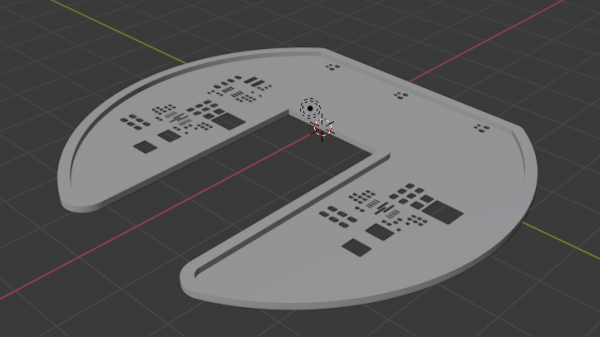
[Atul]’s situation was non-characteristic – the project is a 2mm thick PCB designed to plug right into a USB port, so the usual trick of using some scrap PCBs wouldn’t work, and using a 3D-printed frame turned out to be key. To get it done, he exported a .wrl from KiCad, processed it in Blender, and then designed a frame with help of TinkerCAD. These techniques, no doubt, will translate into your CAD of choice – especially if you go with .step export instead of .wrl.

This kind of frame design will get you far, especially for boards where the more common techniques fail – say, if you need to assemble a double-sided board and one side is already populated. Don’t have a stencil? You could surely make a 3D printed stencil, too, both for KiCad boards and for random Gerber files. Oh, and don’t forget this 3D-printable stencil alignment jig, while you’re at it – looks like it ought to save you quite a bit of trouble.

RC Car Repair With Beer Can Solder Stencil

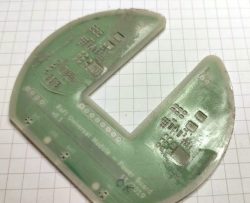
Sometimes it might seem as if your electronics are just jinxed. For [Niva_v_kopirce] it was the control board of his nephew’s RC car that kept frying the transistors. In situations like this, you can either throw it in the bin, invest your time in troubleshooting, hoping to find the error and try to fix it then, or get creative. He chose the latter, and designed and etched a replacement board.

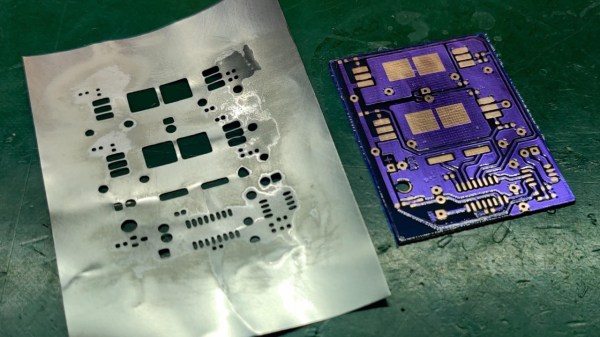
Of course, etching your own PCB isn’t that noteworthy for the average Hackaday reader, although [Niva_v_kopirce] did go the extra mile and added purple solder mask to it, turning the stylishness definitely up to 11. This is also where it gets interesting, when you think of the solder mask as complementary layer for a solder paste stencil. Growing tired of manually applying solder paste, he thought to give a DIY stencil a try this time — using a beer can.

After cutting the can open and flattening it, along with some sanding, he transferred the cutouts from the solder mask onto it, and started etching holes in it. While the result may not be exactly precise, it did the job, especially for a homemade built.

Despite their convenience, stencils are still a rather exotic addition for hobbyists as they rarely pay off for a one-off project with limited SMD component usage. But maybe this was a new inspiration for you now. And if etching metal is outside your comfort zone, cutting plastic can be an alternative, as well as 3d printing.

This Four-Axis Stencil Printer Is The Ultimate In SMD Alignment Tools

Here at Hackaday we love all kinds of builds, and we celebrate anytime anyone puts parts together into something else. And while we love the quick and dirty builds, there’s just something about the fit and finish of this four-axis SMD stencil printer that really pushes our buttons.

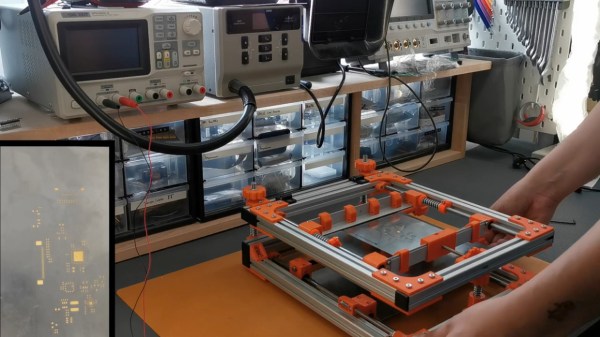
This build comes to us from [Phillip], who like many surface-mount users was sick of the various tape-and-PCB methods that are commonly used to align the solder stencil with the PCB traces. His solution is this fully adjustable stencil holder made from aluminum extrusions joined by 3D-printed parts. The flip-up frame of the device has a pair of clamps for securely holding the stainless steel stencil. Springs on the clamp guide rods provide some preload to keep the stencil taut as well as protection from overtensioning.

The stencil can move in the X-, Y-, and Z-axes to line up with a PCB held with 3D-printed standoffs on a bed below the top frame. The bed itself rotates slightly to overcome any skew in alignment of the PCB. [Phillip] was aghast at the price of an off-the-shelf slew-ring bearing for that axis, but luckily was able to print up some parts and just use simple roller bearing to do the same thing for a fraction of the cost. The frame is shown in use below; the moment when the pads line up perfectly through the stencil holds is oddly satisfying.

This puts us in mind of a recent, similar stencil printer we covered. That one was far simpler, but either one of these beats the expedient alignment methods hands down.

Continue reading “This Four-Axis Stencil Printer Is The Ultimate In SMD Alignment Tools”

Hackaday Podcast 061: Runaway Soldering Irons, Open Source Ventilators, 3D Printed Solder Stencils, And Radar Motion

Hackaday editors Mike Szczys and Elliot Williams sort through the hardware hacking gems of the week. There was a kerfuffle about whether a ventilator data dump from Medtronics was open source or not, and cool hacks from machine-learning soldering iron controllers to 3D-printing your own solder paste stencils. A motion light teardown shows it’s not being done with passive-infrared, we ask what’s the deal with Tim Berners-Lee’s decentralized internet, and we geek out about keyboards that aren’t QWERTY.

Take a look at the links below if you want to follow along, and as always tell us what you think about this episode in the comments!

Take a look at the links below if you want to follow along, and as always, tell us what you think about this episode in the comments!

Direct download (60 MB or so.)

Continue reading “Hackaday Podcast 061: Runaway Soldering Irons, Open Source Ventilators, 3D Printed Solder Stencils, And Radar Motion”

Can Solder Paste Stencils Be 3D Printed? They Can!

3D printed solder paste stencil, closeup.

[Jan Mrázek]’s  success with 3D printing a solder paste stencil is awfully interesting, though he makes it clear that it is only a proof of concept. There are a lot of parts to this hack, so let’s step through them one at a time.

First of all, it turns out that converting a PCB solder paste layer into a 3D model is a bit of a challenge. A tool [Jan] found online didn’t work out, so he turned to OpenSCAD and wrote a script (available on GitHub) which takes two DXF files as input: one for the board outline, and one for the hole pattern. If you’re using KiCad, he has a Python script (also on GitHub) which will export the necessary data.

The result is a 3D model that is like a solder paste mask combined with a raised border to match the board outline, so that the whole thing self-aligns by fitting on top of the PCB. A handy feature, for sure. [Jan] says the model pictured here printed in less than 10 minutes. Workflow-wise, that certainly compares favorably to waiting for a stencil to arrive in the mail. But how do the actual solder-pasting results compare?

3D printed solder stencil on PCB, after applying solder paste.

[Jan] says that the printed stencil had a few defects but it otherwise worked fine for 0.5 mm pitch ICs and 0402 resistors, and the fact that the 3D printed stencil self-registered onto the board was a welcome feature. That being said, it took a lot of work to get such results. [Jan]’s SLA printer is an Elegoo Mars, and he wasn’t able to have it create holes for 0.2 mm x 0.5 mm pads without first modifying his printer for better X/Y accuracy.

In the end, he admits that while a functional DIY solder stencil can be 3D printed in about 10 minutes, it’s not as though professionally-made stencils that give better results are particularly expensive or hard to get. Still, it’s a neat trick that could come in handy. Also, a quick reminder that we stepped through how to make a part in OpenSCAD in the past, which should help folks new to OpenSCAD make sense of [Jan]’s script.

Tools Of The Trade – Solder Paste Dispensing

The general process of circuit board assembly goes like this: You order your PCBs. You also order your components. For surface mount components, you apply solder paste to the pads, put the components on top, and then heat the board up so the solder paste flows and makes a bond. Then for through hole components you put the leads through the holes, and solder them with an iron or a solder wave or dip. Then you do an inspection for defects, program any microcontrollers, and finally test the completed board to make sure everything runs.

The tricky part is in volumes. If you’re only doing a few boards, it’s usually easiest to assemble them by hand. In the thousands you usually outsource. But new tools, and cheap hacked tools, have made it easier to automate small batches, and scale up into the thousands before outsourcing assembly.

In this new series which we’re calling Tools of the Trade we’ll be covering a variety of tools used for building products, and we’re starting with circuit board assembly. Let’s investigate our tools of the trade: solder paste dispensing. Continue reading “Tools Of The Trade – Solder Paste Dispensing”

Solder Stencils With A 3D Printer

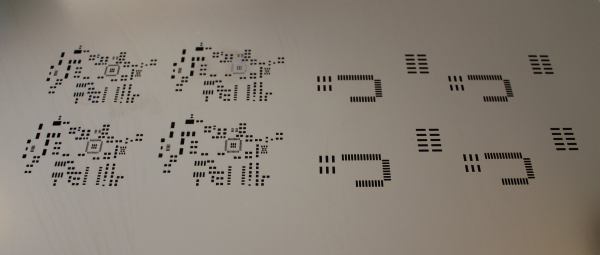
If you are soldering with paste, a stencil makes life a lot easier. Sure, you can apply paste by hand with a syringe, but a modern PCB might have hundreds or even thousands of pads. Like a lot of us, [Robert Kirberich] doesn’t like paying to have stencils made and he wondered if he could use his 3D printer to make stencils. He found the answer was yes.

Continue reading “Solder Stencils With A 3D Printer”