Expanded Memory For The Teensy++ 2.0

RAM

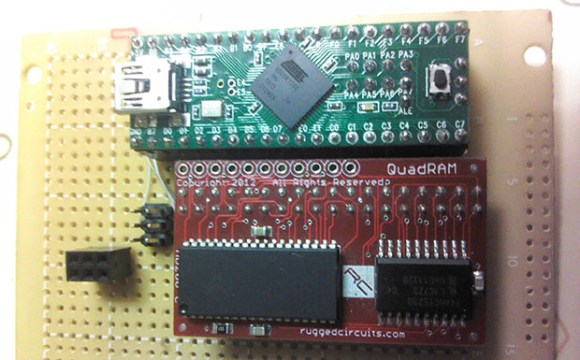
Sometimes with a microcontroller project you need to do some very RAM-hungry operations, like image and audio processing. The largish AVR chips are certainly fast enough to do these tasks, but the RAM on these chips is limited. [xxxajk] has come up with a library that allows the use of huge RAM expansions with the Teensy++ 2.0 microcontroller, making these RAM-dependant tasks easy on one of our favorite microcontroller board.

[xxajk]’s work is actually a port of XMEM2, an earlier project of his that added RAM expansion and multitasking to the Arduino Mega. Up to 255 banks of memory are available and with the supported hardware, the Teensy can address up to 512kB of RAM.

XMEM2 also features a preemptive multitasking with up to 16 tasks, the ability to pipe messages between tasks, and all the fun of malloc().

The build is fairly hardware independent, able to work with Rugged Circuits QuadRAM and MegaRAM expansions for the Arduino Mega as well as [Andy Brown]’s 512 SRAM expansion. With the right SRAM chip, etching a board at home for XMEM2 is also a possibility.

Playing Around With MRAM

For the longest time, hardware tinkerers have only been able to play around with two types of memory. RAM, including Static RAM and Dynamic RAM, can be exceedingly fast but is volatile and loses its data when power is removed. Non-volatile memory such as EPROMS, EEPROMS, and Flash memory retains its state after power is removed, but these formats are somewhat slower.

There have always been competing technologies that sought to combine the best traits of these types of memory, but not often have they been available to hobbyists. [Majenko] got his hands on a few MRAM chips – Magneto-Resistive RAM – and decided to see what they could do.

Magneto-Resistive RAM uses tiny pairs of magnetic plates to read and write 1s and 0s. [Majenko] received a sample of four MRAM chips with an SPI bus (it might be this chip, 4 Megabits for $20, although smaller capacity chips are available for about $6). After wiring these chips up on a home-made breakout board, [Majenko] had 16 Megabits of non-volatile memory that was able to run at 40 MHz.

The result was exactly what the datasheet said: very fast write and read times, with the ability to remove power. Unlike EEPROMS that can be destroyed by repeated reading and writing, MRAM has an unlimited number of write cycles.

While MRAM may be a very young technology right now, it’s a wonderful portent of things to come. In 20 (or 30, or 40) years, it’s doubtful any computer from the largest server to the smallest microcontroller will have the artificial separation between disk space and memory. The fact that any hardware hacker is able to play around with this technology today is somewhat amazing, and we look forward to more builds using MRAM in the future.

Simple Trick For Replacing Game Boy Cart Batteries While Retaining Game Saves

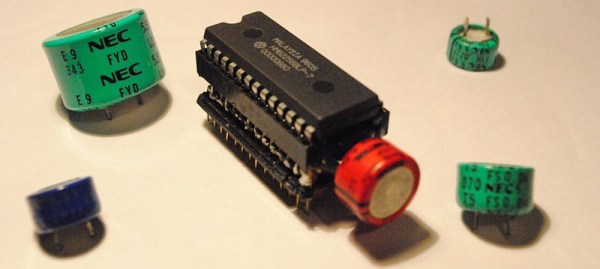
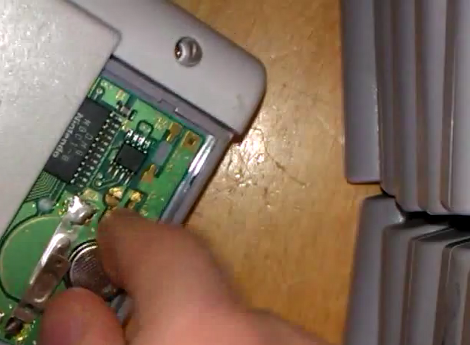
[Adr990] wants to make sure his Game Boy game saves aren’t lost to aging batteries. They’re stored in SRAM with a small coin cell inside the cartridge to keep the memory energized when the game is not being played. But if you pull out the battery in order to replace it the data will be lost in the process. It turns out that you can hot-swap the battery without too much effort. As shown in the video after the break, he disassembled the case of the cartridge, then replaced the battery while the Game Boy is switched on. The edge connector feeds power which will keep the SRAM active while the backup battery is removed. We’re sure this could be done with a bench supply as well, but you’ll need to do your own testing before risking those prized game saves.

The other option is to backup your SRAM before replacing the batteries. We’ve seen an AVR-based cartridge dumper, and also one that uses an Arduino. Both should be able to read and write SRAM data. Continue reading “Simple Trick For Replacing Game Boy Cart Batteries While Retaining Game Saves”

Veronica Gets VRAM And Its Own Boot Logo

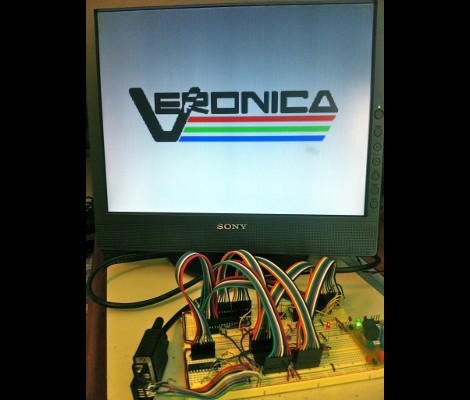
[Quinn Dunki] just reported in on the latest iteration in her computer project which is called Veronica. This time she added RAM to increase the VGA performance of her build. Like just about every other part of the project, [Quinn] knew what she wanted to do, but had to overcome a lot of issues along the way.

The goal is to implement a 256×240 display with 8-bit color depth. [Quinn] says this is on par with game console technology from the 1980’s. The problem is that the 10MHz AVR controller can’t really keep up with the scan rate of this size of display. The answer is to add RAM which stores all of the color data, the microcontroller will simply advance the address pointer on the memory chips to match the sync rate of the VGA output.

After hooking up her hardware design she gets a screen full of uninitialized pixel data. But moving from there to the final product seen above was quite frustrating. It turns out that noise on the breadboard was most of the problem, further compounded by entire breadboard row which wasn’t contacting the wires to make the temporary connections. A bit of jockeying for position and by Jove, she’s got a boot screen.

That breadboard sure has become crowded since her first VGA experiments.

Building The Worst Linux PC Ever

Linux is generally considered the go-to OS for under powered computers. Wanting to challenge the preconceived notion that Linux requires ‘a computer made in the last 20 years,’ [Dmitry] built the worst Linux PC ever around a simple 8-bit microcontroller.

The ATMega1284p [Dmitry] used doesn’t have a lot to offer as far as RAM and storage goes; just 16 kilobytes of SRAM and a paltry 128 kilobytes of Flash storage. While this may be voluminous in the embedded world, it’s peanuts compared to the gigabytes of RAM and hard drive space on even a low-end netbook. To solve this problem, [Dmitry] threw an antique 30-pin RAM SIMM at the problem. It’s wired up directly to the microcontroller, as is the 1 Gigabyte SD card that serves as the PC’s hard drive.

Linux requires a 32-bit CPU and a memory management unit, something the puny microcontroller doesn’t have. For [Dmitry], the best course of action was emulating an ARM processor on an AVR. We’re not sure if we’re dealing with genius or madness here, but it did prove to be a valuable learning exercise in writing a modular ARM emulator.

How fast is it? [Dmitry] tells us it takes two hours to boot up to a bash prompt, and four more to load up Ubuntu and login. If you want a Megahertz rating, good luck; the effective clock speed is about 6.5 kilohertz. While the worst Linux PC ever won’t win any races, its simple construction puts it within the reach of even the klutziest of hardware builders; the entire device is just a microcontroller, RAM, SD card, a few resistors, and some wire.

If you’d like to build your own worst Linux PC, [Dmitry] has the firmware and disk image available to download. If you want to watch the time-lapse of this thing booting, check out the video after the break.

Continue reading “Building The Worst Linux PC Ever”

512k SRAM Board For Your Next Prototyping Run

Find you’re running out of memory and paying for more expensive chips just to plug this feature gap? Many of the upper offering of chips have the option of adding SRAM thanks to an on-chip hardware feature, but if you don’t have that this 512k SRAM add-on board can be used with any chip that has 13 extra I/O pins available.

That use of pins may sound crippling if you usually use low pin count chips. But thanks to a write protected state option with the memory chips, nine of those thirteen pins can serve a dual use when not reading or writing from the memory. Speaking of, the address scheme is designed to access the memory in 32-bit blocks but individual bytes are accessible too if need be. [Wardy] has been testing his design using a Propeller chip running at 75 MHz so we know it’s built for speed, but he also mentions there’s no minimum clock speed for the board to function either. He used the Open Hardware guidelines when sharing his work, and if you want one for yourself you could always give the DorkBot PDX service he used for the prototypes to get your own boards too.

[via Dangerous Prototypes]

Record Sound Without A Microcontroller

For his A-level electronic course work, [Andrew] decided to build a digital sound recorder that doesn’t use a microcontroller.

[Andrew]’s build captures audio from an on board microphone at 8000 samples/second. The audio is digitized into 8-bit sound data and sent to an SRAM. The recording and playback functions are controlled entirely by 4000-series logic chips. He admits the sound quality is pretty poor; this is mostly due to the 8kHz sample rate. In some circles, though, a terrible sample rate is seen as being pretty cool so we’re not going to say [Andrew]’s build is useless.

There’s some pretty smart design choices in [Andrew]’s build, like a cut off filter on the microphone set at 4000 Hz (the Nyquist frequency of his system).  For the recording medium, he used an SRAM that can hold about half a megabyte of data. At 8000 samples/second,  [Andrew]’s build can store a little more than 60 seconds of audio. The build may not be a logic chip computer, but there’s not any question in our mind that [Andrew] learned something. Check out [Andrew]’s 66-page coursework report here (PDF warning).