The Two-Dimensional Stepper Motor

Over on hackaday.io and deep in the Hackaday Prize, a lot of cool people are playing around with the possibilities of putting coils in printed circuit boards. On the face of it, it makes sense: drawing spirals on a PCB gets you an electromagnet. This allows you to do all sorts of crazy things. You can make miniature model maglev trains using the track as a motor. Someone built a wearable Tesla coil.

The latest build to show off the possibilities of motors etched on PCBs is [bobricius]’ micro manipulator. It’s a 100 mm square board capable of moving a small magnet around the surface. The point? Well, if you have to ask that question you’re really never going to get the point.

The design of this stepper motor is simply two coils of wire, with the X axis of the grid placed on the top copper layer of the PCB and the Y axis on the bottom copper layer. There are four poles to each of these coils, and they plug right into a standard stepper driver, so to control this board all you need is a basic Arduino and a motor shield. Or a RepRap board, take your pick, you probably have something sitting around in a junk drawer.

In the test of this board, the stepper motor can move small rare earth magnets around quickly and with high repeatability. As for what use this PCB stepper motor has, if you have to ask that question, you’ll never know. Also, because it looks cool.

Continue reading “The Two-Dimensional Stepper Motor”

What Can You Learn From An Eggbot?

An eggbot is probably the easiest introduction to CNC machines that you could possibly hope for, at least in terms of the physical build. But at the same time, an eggbot can let you get your hands dirty with all of the concepts, firmware, and the toolchain that you’d need to take your CNC game to the next level, whatever that’s going to be. So if you’ve been wanting to make any kind of machine where stepper motors move, cut, trace, display, or simply whirl around, you can get a gentle introduction on the cheap with an eggbot.

Did we mention Easter? It’s apparently this weekend. Seasonal projects are the worst for the procrastinator. If you wait until the 31st to start working on your mega-awesome New Year’s Dropping Laser Ball-o-tron 3000, it’s not going to get done by midnight. Or so I’ve heard. And we’re certainly not helping by posting this tutorial so late in the season. Sorry about that. On the other hand, if you start now, you’ll have the world’s most fine-tuned eggbot for 2020. Procrastinate tomorrow!

I had two main goals with this project: getting it done quickly and getting it done easily. That was my best shot at getting it done at all. Secondary goals included making awesome designs, learning some new software toolchains, and doing the whole thing on the cheap. I succeeded on all counts, and that’s why I’m here encouraging you to build one for yourself.

Continue reading “What Can You Learn From An Eggbot?”

Arduino Drives Seventeen Stepper Motors, Carefully

It’s fair to say that building electronic gadgets is easier now than it ever has been in the past. With low-cost modular components, there’s often just a couple dozen lines of code and a few jumper wires standing between your idea and a functioning prototype. Driving stepper motors is a perfect example: you can grab a cheap controller board, hook it up to a microcontroller, and the rest is essentially just software. But recently [mechatronicsguy] wondered if even that was more hardware than was technically necessary to get the job done.

It’s not that he was intentionally looking to make things more complicated for himself, of course. His rationale was entirely economic; if you’re looking to drive a dozen or more stepper motors, even the “cheap” controllers can add up. So he started to wonder if he could skip the controller entirely and connect the stepper motor directly to the digital pins of an Arduino. Generally speaking this is a bad idea, but if you’re careful and are willing to take the risk, [mechatronicsguy] is living proof it’s possible

So what’s the trick to running a whopping seventeen individual stepper motors directly from the digital pins of an Arduino Mega? Well, to start with you’re not going to be running the beefy NEMA 17 motors like you might find in a 3D printer. [mechatronicsguy] is using the diminutive (and dirt cheap) 28BYJ-48, a light duty stepper used in many consumer products. Even with this relatively tiny motor, you need to crack open the case and cut a trace on the PCB to switch it from unipolar to bipolar.

Beyond that, you need to be careful. [mechatronicsguy] reports he’s had success running as many as ten of them at once, but realistically the fewer operating simultaneously the better. This is actually made easier due to the relatively poor specs of the 28BYJ-48 motor; its huge eleven degree step size means its not really susceptible to the same kind of slippage you’d get on a NEMA 17 when powered down. This means you can cut power to all but the actively moving motor and be fairly sure they’ll all stay where you left them.

With as popular as the 28BYJ-48 stepper is, there are several projects this “quick and dirty” method of interfacing could potentially work with. This small “barn door” star tracker is an obvious example, but we’ve also seen some very nice robotic arms built with these low-cost motors which could benefit from the technique.

This Arduino Feeds The Dog

Part of the joy of owning a dog is feeding it. How often do you get to make another living being that happy? However, sometimes you can’t be there when your best friend is hungry. [El Taller De TD] built an auto dog feeder using an Arduino and stepper motor. The video and links are in Spanish, but if your Spanish is rusty, YouTube’s caption autotranslation isn’t bad and Google Translate can help you with the web site.

The electronics are reasonably simple: an Arduino, a Bluetooth module, and a stepper motor driver. Mechanically, the motor and some PVC pipe are all you need. There’s a small phone application to drive the Bluetooth using App Inventor.

Continue reading “This Arduino Feeds The Dog”

K40 Gets A Leg Up With Open Source Z Table

If you’ve done even the most cursory research into buying a laser cutter, you’ve certainly heard of the K40. Usually selling for around $400 USD online, the K40 is not so much a single machine as a class of very similar 40 watt CO2 lasers from various Chinese manufacturers. As you might expect, it takes considerable corner cutting to drive the cost down that low, but the K40 is still arguably the most cost-effective way to get a “real” laser cutter into your shop. If you’re willing to do some modifications on the thing, even better.

One of the shortcomings of the K40 is that it lacks a Z axis, and with thick material that needs multiple cuts at increasingly deeper depths, this can be a hassle. [Aaron Peterson] decided to take it upon himself to design and build an adjustable Z table for the K40 at his local makerspace (River City Labs), and being the swell guy that he is, has made it available under an open source license so the rest of the K40-owning world can benefit from his work.

[Aaron] started the design with a number of goals which really helped elevate the project from a one-off hack to a sustainable community project. For one, he only wanted to use easily available commodity hardware to keep the cost down. The most complex components should all be 3D printable so the design would be easy to replicate by others, and finally, he wanted the user to have the ability to scale it in all dimensions. The end result is a electronically controlled lifting platform that anyone can build, for any laser cutter. It doesn’t even have to be limited to laser cutters; if you have a need for precisely raising or lowering something, this design might be exactly what you’re looking for.

The table is primarily constructed out of 15×15 aluminum extrusion, and uses standard hardware store expanded wire mesh as a top surface. Height is adjusted by rotating the four 95 mm T8 leadscrews with a GT2 belt and pulleys, which prevents any corner from getting out of sync with the others. Connected to a standard NEMA 17 stepper motor, this arrangement should easily be capable of sub-millimeter accuracy. It looks as though [Aaron] has left controlling the stepper motor as an exercise for the reader, but an Arduino with a CNC shield would likely be the easiest route.

We’ve seen a lot of hacking around the K40 over the last couple of years, from spring loaded beds to complete rebuilds which are hardly recognizable. If you’re looking for a cheap laser with a huge catalog of possible hacks and modifications, you could do a lot worse than starting with this inexpensive Chinese machine.

Sorter Uses Cardboard To Organize Card Hoard

If you collect trading cards of any kind, you know that storage quickly becomes an issue. Just ask [theguymasamato]. He used to be really into trading cards, and got back into it when his kids caught the bug. Now he’s sitting on 10,000+ cards that are largely unorganized except for a few that made it into sleeve pages.  They tried to go through them by hand, but only ended up frustrated and overwhelmed. Then he found out about [Michael Portera]’s Pi-powered LEGO card sorter and got all fired up to build a three-part system that feeds cards in one by one, scans them, and sorts them into one of 22 meticulously-constructed cardboard boxes.

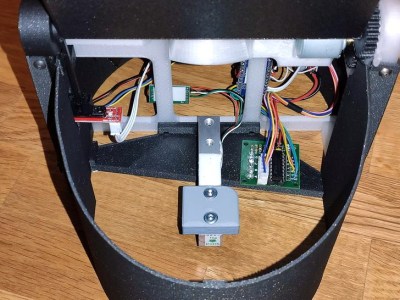
[theguymasamato]’s card sorter is the last stop for a card after the feeder has fed it in from the pile and the scanner has scanned it. The sorter lazy Susans around on a thrust bearing, which is driven by a 3D printed drive wheel attached to a stepper. The stepper is controlled with an Arduino.

Here’s where it gets crazy: the drive wheel and timing belt are made from the flutes of corrugated cardboard. As in, he used that wavy bit in the middle as gear teeth. Every one of those cardboard teeth is fortified with wood glue, a time-consuming process he vows to never repeat. Instead, [theguymasamato] recommends using shims to shore them up as he did in the card feeder. The whole thing was originally going to be made from cardboard. It proved to be too mushy to support the thrust bearing, so [theguymasamato] switched to MDF.

Right now, the sorter is homed via button press, but future plans for the device include an IR break beam switch. We’re excited for the scanner and can’t wait to see the whole system put together. While [theguymasamato] works on that, position yourself past the break to watch the build video.

Continue reading “Sorter Uses Cardboard To Organize Card Hoard”

Silent Stepper Drive Makes A Nicer Watch Winder

Mechanical watches are great in that they never need batteries, but they are simultaneously less than great in that they will lose time if not worn or otherwise regularly agitated. The ridiculous solution to this is the watch winder, which automatically rotates your mechanical watches for you, while you’re not wearing them. This is probably the item you’ll miss the least once the apocalypse hits. [Kristopher] wanted a nice quiet watch winder for his bedside table, but existing solutions were either too loud or too expensive. As is often the case, hacking ensued.

[Kristopher] had decided that starting from scratch was too much hassle. The cheaper watch winders on the market had acceptable quality enclosures, but were simply too loud. [Kristopher] sourced a $40 unit from Amazon, and proceeded to gut the drivetrain. This was replaced with a Sparkfun stepper motor and a Trinamic SilentStepStick – an advanced stepper motor driver that uses several techniques to reduce noise during operation.

An Arduino Nano was substituted as the brains of the operation, communicating with the stepper driver and allowing the winder to be configured for different wind rates. [Kristopher] reports that the device operates near-silently, and the total cost came in well below that of a high-end luxury winder.

Mechanical watches don’t always get a lot of attention these days, but we’ve seen one built from the ground up before. As always, with tips – send ’em if you got ’em.