Hack Your Stove In The Name Of Homebrewing

stovehack

[Tim] is a homebrewer. Temperature profiling during the mashing process is apparently even more critical than the temperature curve of a solder reflow oven. His stove just wasn’t giving him the level of control he needed, so [Tim] added a PID temperature controller to his stove. Electric stoves generally use an “infinite switch” to control their burners. Infinite switches are little more than a resistor and a bimetallic strip in a single package. Not very good for accurate temperature control. The tricky part of this hack was to make it reversible and to have little visual impact on the stove. A stove top with wires hanging out would not only be dangerous electrically, it would also create a hazardous situation between [Tim] and his wife.

[Tim’s] brewpot only fit on the stove’s largest burner, so that was the only one that needed PID control. To keep things simple, he kept the commercial PID controller outside the stove’s enclosure. Inside the stove, [Tim] added a solid state relay. The relay is mounted to a metal plate, which screws to the back of the stove. The relay control lines run to an audio jack on the left side of the stove. Everything can be bypassed with a switch hidden on the right side of the stove. In normal operation, the switch is in “bypass” mode, and the stove works as it always has. When mashing time comes along, [Tim] flips the switch and plugs the jack into his PID controller. The temperature sensor goes into the brewpot itself, so no stove modification was needed there.

The end result is a very clean install that both [Tim] and his wife can enjoy.  Save a few bottles for us, [Tim]!

Temp-Sensitive Automatic Blinds

blindMinder

Any opportunity to shave a few bucks off your power bill is probably worth considering, especially if it’s a device like [Steve Hoefer’s] Mini Blind Minder. This little guy staves off (or welcomes) the sun by monitoring the room with a temperature sensor and checking against a setpoint. If the room is too warm or too cool, the top-mounted servo will spin the wand and close or open the blinds, respectively.

[Steve] started by building a homemade Arduino shield from some perfboard to which he added a handful of discrete components: some current-limiting resistors for the RGB LED indicator light and a 10k trim pot for fine-tuning the temp sensor. Although this build forgoes an LCD readout to display precise information, it does provide feedback by stepping the RGB LED’s color through a spectrum of blue to red to indicate how the current room temperature compares to your setpoint. The two momentary pushbuttons beneath the light allow the user to adjust the setpoint up or down.

See the video below for a detailed guide to building your own, and take a look at a similar automatic blinds build from earlier this year that opens and closes in response to ambient light.

Continue reading “Temp-Sensitive Automatic Blinds”

Arduino-based Temp Control Via SMS

smsTempController

As connected as we are, reliable and affordable internet is still a luxury in the far reaches. [kohleick’s] country home is not just remote; with temperatures dropping to -30C in the winter, it’s practically Arctic. His solution for controlling the thermostat from afar was to take advantage of the GSM network and implement a SMS-based heater controller. The unit typically operates in “antifreeze mode,” but sending a simple text message prior to visiting causes the heater to kick it up to a more comfortable setting for your arrival. Daily logs report the system’s status, and an alert will trigger when temperatures fall below a set limit, thus indicating potential faults with the heater.

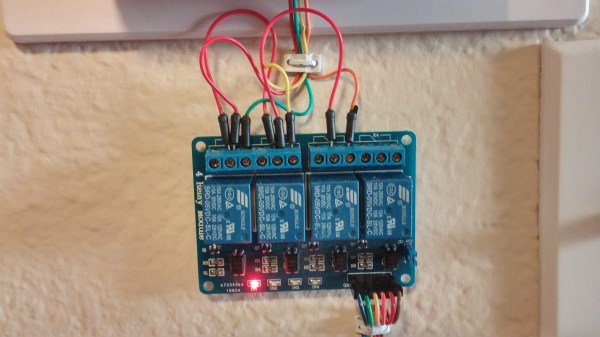
The build uses a Freeduino paired with an external GSM modem for communication and an LCD to display current status and menus, which users access via three buttons on the side of the picture frame. [kohleick] connected two temperature sensors: one directly to the Freeduino’s shield and a second outside the house. After the temperature sensors detect deviance from the set point, or upon SMS instruction, the Freeduino will crank up the heat through a 5V relay attached to the home’s boiler. Head over to the Instructables page linked above for a bill of materials, schematics, and the code. The Siemens GSM modem in this build is nothing to worry about, but be careful if you try to reproduce this project with an Arduino GSM shield, or your house might really heat up.

Monitoring A Sick Bird Using The Raspberry Pi

sick-bird-monitoring-with-rpi

[Jorge Rancé] was nursing a sick bird back to health. He found it on the street with a broken leg, which required a mini plaster cast for it to heal correctly. But felt bad when leaving the house for long periods. He grabbed some simple hardware and put his mind at easy by building an Internet connected bird monitoring system. It’s really just an excuse to play around with his Raspberry Pi, but who can blame him?

A webcam adds video monitoring using the Linux software called “motion” to stream the video. This is the same package we use with our cats when we travel; it provides a continuous live stream but can also save recordings whenever motion is detected. He added a USB temperature sensor and attached a water level sensor to the GPIO header. These are automatically harvested — along with a still image from the webcam — and tweeted once per hour using a bash script. He just needs to work out automatic food and water dispensing and he never needs to return home! Bird seed shouldn’t be any harder to dish out than fish food, right?

Hacking BodyBugg Fitness Sensors To Get Around Subscription Fee

This arm cuff is a sensor package which logs data whenever you’re wearing it. It records accelerometer data, skin temperature, and galvanic skin response. That data can then be analyzed to arrive at figures like calories burned. But… The company behind the device seems to have included a way to keep the cash flowing. Once you buy it you can read the data off of the device using a Java program they supply. But you can’t erase the data from the device unless you subscribe to their online service. Once it fills up, it’s useless. [Doug] wasn’t happy with this gotcha, so he reverse engineered the technique used to clear the BodyBugg’s memory.

There had been a few previous attempts at reverse engineering the device but that groundwork didn’t really help [Doug] on his quest. He ended up disassembling the Java classes from the original program. This helped him figure out how to initialize communications. Once there he was happy to find that the device will tell you how to use it. If you issue an invalid command it will respond with a list of all valid commands. Everything you need to get up and running can be found in his github repo.

Adding Heat Sinks To A Raspberry Pi

[Michael Dornisch] was surprised to find that the main processor of the Raspberry Pi reaches about 56 degrees Celsius (about 133 degrees F) while streaming video over the network. He thought it might help the longevity of the device if he was able to cool things off a bit. But why stop with just the processor? He added heat sinks to the SoC, Ethernet/USB chip, and voltage regulator.

From his parts bin he grabbed a small heat sink that was probably used on a graphics card. After measuring the three chips with his digital calipers he cut out the footprint he needed, resulting in three smaller heat sinks. We didn’t realize that thermal compound has enough gripping power to hold the sinks in place without any mechanical fastener, but apparently it does. [Michael] mentions that it’s possible to use other adhesives, like JB Weld. What’s important is that you use something (ie: thermal compound or a liquid adhesive) to prevent any air gap from coming between the chip surface and the aluminum.

He measured the result as a 17.3 degree C (31 degree F) drop in temperature. We looked around and it seems there’s no internal temperature sensor on the Broadcom chip so these surface readings will have to suffice. Do you think this will prolong the life of the board if it is used regularly to play back high quality video? We already know that these temperatures are within the specifications for the hardware.

[Thanks Simon]

Checking Out The Temperature Of A Raspberry Pi

[Remy] has access to a very nice Fluke thermal camera, so when his Raspberry pi came in he pointed the thermal camera at the Raspi (Spanish, Google translation) to see how far this neat computer could be pushed before it overheated.

There are three main sources of heat on the Raspberry Pi: the voltage regulator, the USB/Ethernet controller and the Broadcom SoC. At idle, these parts read 49.9° C, 48.7° C and 53° C, respectively; a little hot to the touch, but still well within the temperature ranges given in the datasheets for these components.

The real test came via a stress test where the ARM CPU was at 100% utilization. The Broadcom SoC reached almost 65° C while the Ethernet controller and regulator managed to reach the mid-50s. Keeping in mind this test was performed at room temperature, we’d probably throw a heat sink on a Raspberry Pi if it’s going to be installed in an extreme environment such as a greenhouse or serving as a Floridian or Texan carputer.

Thanks [Alberto] for sending this in.