[Amon] built an induction heater to break stuck bolts loose. If you work on cars, machines, or anything big and metal, sooner or later you’re going to run into stuck nuts and bolts. Getting them unstuck usually involves penetrating oil, heat from a torch, and cheater bars. Heat usually works well, as heating the bolt makes the metal expand, helping it to break free. Torches aren’t exactly precision instruments though, and things can get interesting using one in tight spaces.
Fire isn’t the only way to heat a bolt through. Electricity can do the job as well. But why use a heating coil when you can grab an induction heater. Mechanics have had induction heaters in their toolboxes now for a few years, under names such as Bolt Buster or Mini Ductor. These devices cost several hundred dollars. However, you can purchase a 1000 watt induction heater from the usual sources for around $30. These are open frame Zero Voltage Switching (ZVS) power supplies, with uninsulated copper coils.
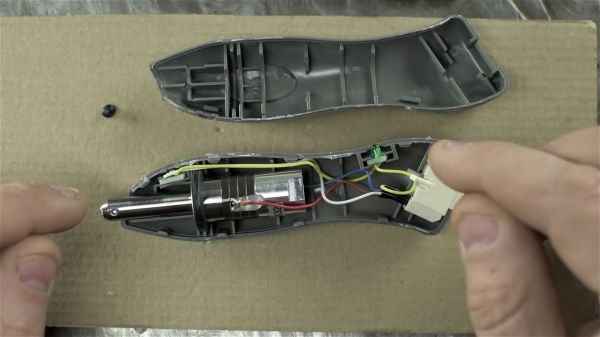
[Amon] bought one of these induction heaters, along with a beefy 24V, 40 amp switch mode supply to power it. He built the two into a plastic enclosure. A relay energizes the induction heater, so it isn’t always running. The key to this build is the handle. Rather than mount the induction coil directly on the supply, [Amon] ran two extension wires to a 3d printed gun style handle. This keeps the bulky part of the heater away from the work. The copper tube coil was re-shaped to better work with the gun. Some fiberglass sleeve keeps everything insulated, even at extreme temperatures.
The result is a very useful heater, ready to bust loose some bolts. We’ve seen homebuilt ZVS supplies powering induction coils before. It will be interesting to see how well these commercial units hold up.
Continue reading “Set Your Nuts (and Bolts) Free With This Induction Heater”