Make Your Own MIDI Controller With An Arduino

Engineers create something out of nothing, and no where is this more apparent than in the creation of customized computer hardware. To make a simple MIDI controller, you need knowledge of firmware design and computer architecture, you need knowledge of mechanical design, and you need to know electronic design. And then you need the actual working knowledge and experience to wield a tool, be it a hammer, laser cutter, or an IDE. [Mega Das] brought together all of these skill to build a MIDI controller. Sure, it’s for bleeps and bloops coming out of a speaker, but take a step back and realize just how awesome it is that any one person could imagine, then implement such a device.

The electronics for this build include a printed circuit board that serves to break out the connections on an Arduino nano to a dozen arcade push buttons, four slide pots, two rotary pots, and a handful of screw terminals to connect everything together. Mechanically, this is a laser-cut box engraved with some fancy graphics and sized perfectly to put everything inside.

Yes, we’ve seen a lot of MIDI controllers built around the Arduino over the years, but this one is in a class by itself. This is taking off-the-shelf parts and customizing them to exactly what you want, and a prodigious example of what is possible with DIY hardware creation. You can check out the build video below.

Continue reading “Make Your Own MIDI Controller With An Arduino”

Gliding Back Home From 60,000ft

If you want to play around with high altitudes, weather balloons are the way to go. With a bit of latex and some helium, it’s possible to scrape up against the edge of space without having to start your own rocketry program. [Blake] was interested in doing just this, and decided to build a near space glider which could capture the journey.

There are certain challenges involved with this flight regime, which [Blake] worked to overcome. There was significant investment in the right antennas and radio hardware to enable communication and control of the aircraft at vast distances. Batteries were chosen for their ability to work at low temperatures in the high altitude environment, and excess heat from the transmitters was use to keep them warm.

The glider was also fitted with an Ardupilot Mega which would control the gliders’s flight after separation from the lift balloon. [Blake] had some success flying the aircraft at 60,000 feet, but found that due to communications issues, the autopilot was doing a better job. The initial flight was largely a success, with the glider landing just 9 miles off target due to headwinds.

We’ve seen glider builds on other autopilot platforms, too. Video after the break.

Continue reading “Gliding Back Home From 60,000ft”

Hexagons – The Crazy New Breadboard

A breadboard is a great prototyping tool for verifying the sanity of a circuit design before taking the painstaking effort of soldering it all together permanently. After all, a mistake in this stage can cost a lot of time and possibly material, so it’s important to get it right. [daverowntree] wasn’t fully satisfied with the standard breadboard layout though, with fixed rows and columns. While this might work for most applications, he tried out a new type of prototyping board based on hexagons instead.

The design philosophy here revolves around tessellations, a tiling method for connecting the various components on this unique breadboard rather than using simple rows. The hexagons are tessellated across the board, allowing for some unique combinations that might make it slightly more complicated, but can have some benefits for other types of circuits such as anything involving the use of a three-wire device like a transistor.

The post is definitely worth a read, as [daverowntree] goes through several examples of this method of prototyping where the advantages are shown, like a voltage follower circuit and some other circuits involving transistor biasing. If you’re OK with the general design of breadboards, though, and just wished you didn’t have to do anything after the prototyping stage, we’ve got some help for you there as well.

Hacking 16GB Into An Old PC That Doesn’t Want That Much

From the title, you might think this post is going to be some lame story about someone plugging in some RAM and maybe updating a BIOS. That’s where you’d be wrong. [Downtown Doug Brown] has a much more interesting and instructive story.

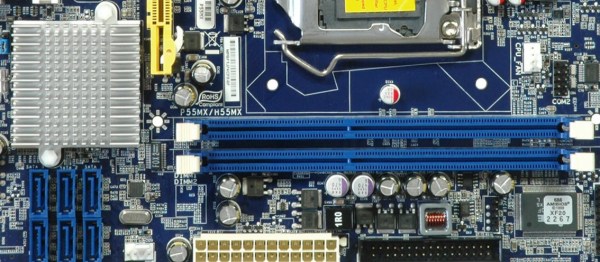
[Doug] found his motherboard was rated for 8 GB maximum and decided he’d make 16 GB of RAM work despite the limitation. He updated the BIOS and it worked — in Linux. He was able to see all the memory and it tested good. If that was it, you wouldn’t be reading about it here. The story gets interesting when he tried to boot Windows 10 and it refused, showing its kinder and gentler blue screen of death. For many people, that would be the end of the story, especially since Windows 10 doesn’t give you much information about why it crashed.

Like so many problems, this one had to be peeled back like an onion. The first thing to do was to change the Windows registry to allow the blue screen to output some technical information that was present in older versions of Windows. The error code indicated that the issue had to do with the BIOS reporting overlapping memory regions.

With some investigating in Linux, whose log files get a lot more BIOS information, [Doug] realized the E820 interface was returning a memory region that conflicted with ACPI’s information. It seems as though the motherboard was reserving space at the top of the 8 GB range for PCI operations which was punching a hole in the system’s (now larger) memory. Turning off a setting in the BIOS fixed the problem, but only because it makes Linux and Windows both see only 4GB of memory. That also wouldn’t be a very interesting story. [Doug] theorized that if he could move the mapping area to the top of the 16 GB range, things would work.

What follows is a great exposition of the Linux tools for reading and changing system information. Did he get it to work? Read the post and find out. But we will tell you that he did manage to have grub patch his system information.

Most of the motherboard hacks we’ve seen relate to hardware, not software. Of course, you could just buy a new motherboard. If you need ideas for what to do with the old one, here you go.

A Vintage Sony Portable TV, Brought Up To Date

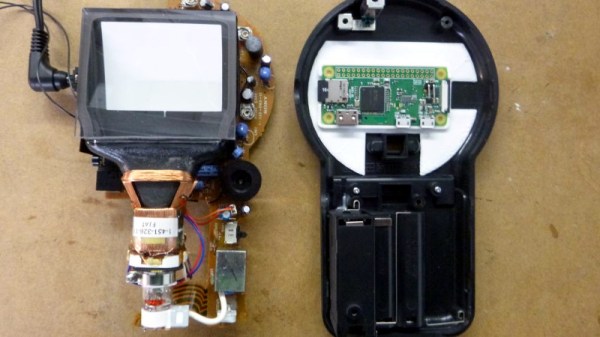
In the time before smartphones for on-the-go visual entertainment, there were portable TVs. You might think of a portable TV as a luggable device, but the really cool ones were pocket-sized. Perhaps if you are familiar with pocket TVs you’ll be thinking of a Citizen or a Casio with a matchbox-sized LCD, but before those devices reached the market there was an earlier generation that featured tiny CRTs. These were simply the coolest electronics that an ’80s kid could lust after, and [Nick Reynolds] is lucky enough to have one. It’s a Sony Watchman from some time in the first half of that decade, and because it’s useless in the age of digital broadcasts he’s upgraded it by installing a Raspberry Pi in its case.

The unlikely inspiration for the project came from the 1970s British sci-fi TV series Space 1999, in which portable CRT-based communicators were a prop. They were typical of the sci-fi vision of the future in shows of the period, one that got so much right but didn’t quite see the smartphone coming.

The Watchman features Sony’s angled CRT, and fitting a Pi Zero W into the limited space behind it called for some careful insulation of its parts with Kapton tape. He’s even included a Pi camera module with a contorted run of flexible cable, placing it beneath the screen where a tuning indicator once sat. He has no sound as yet, but is able to demonstrate a working videophone using Ekiga as a client. He has a few more Watchmen, and has plans for a suite of retro videophones, and a Pi 3 based model.

Surprisingly this isn’t the only Sony Watchman that’s had this kind of treatment, previously we’ve brought you one that hosted a Pong game.

This Week: Cyphercon 4.0

Dust off your rainbow tables and grab a  burner laptop, this Thursday, April 11,  Cyphercon 4.0 roars into Milwaukee, Wisconsin. It’s a security conference with all that entails, but there is a bit of emphasis on crypto. A founding principle of Cyphercon is to support a  “free and open discussion on strong cryptography”.

You’ll find 10 community submitted puzzles to get warmed up for solving clever challenges. There’s a wireless capture-the-flag challenge to boost your wireless sniffing/spoofing skills using simple tools like Raspberry Pi and the YARD stick One (which we just saw doing keyless entry attacks). As you’d expect, a wide range of talks from well know security professionals has been planned.

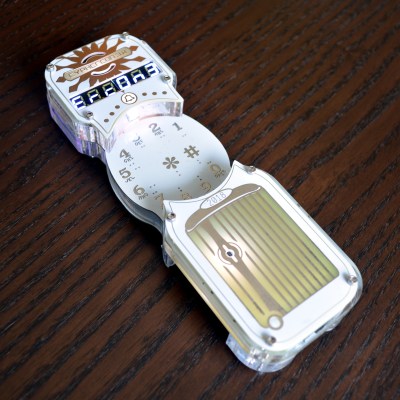
Cyphercon 3.0 Badge

There’s a few talks I’m particularly interested in seeing. Vi Grey’s talk on NES ROM polyglots is a can’t miss for me even though I’ve I’ve read about his work at length. Oh, and you know all those 23andMe DNA tests? Michelle Meas has a talk about what happens when genome databases from companies like that get breached. Eric Escobar isn’t just running the wireless CTF, but giving a talk along with Matt Orme on hardware for remote wireless pen testing. And I’m a sucker for talks from legal experts so Amit Elazari Bar On’s presentation on legal issue with bug bounty programs is very high on my list.

But these are just the things that are formally planned at the conference. I missed out on last year’s Cyphercon and heard the badge hacking challenges were on-point. I’m looking forward to seeing what they can come up with this time around! I’ll report back on what I encounter… I’m hoping to run into you there!

Tomography Through An Infinite Grid Of Resistors

One of the vast untapped potentials of medicine is the access to imaging equipment. A billion people have difficulty getting access to an x-ray, and that says nothing about access to MRIs or CAT scans. Over the past few years, [Jean Rintoul] has been working on a low-cost way to image the inside of a human body using nothing more than a few electrodes. It can be done cheaply and easily, and it’s one of the most innovative ways of bringing medical imaging to the masses. Now, this is a crowdfunding project, aiming to provide safe, accessible medical imaging to everyone.

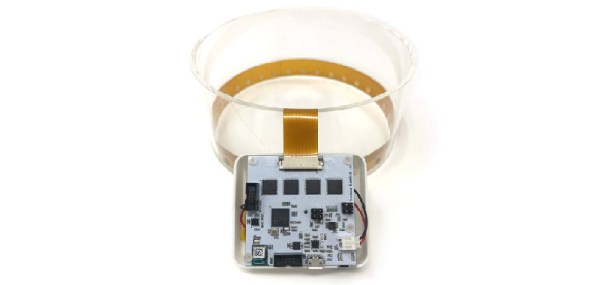
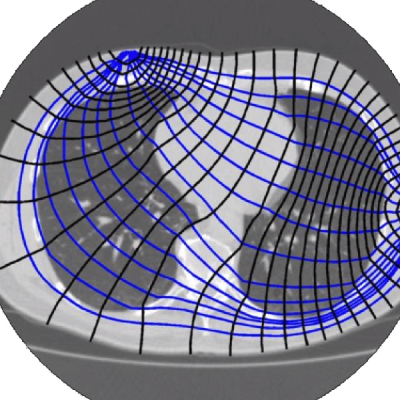
It’s called Spectra, and uses electrical impedance tomography to image the inside of a chest cavity, the dielectric spectrum of a bone, or the interior of a strawberry. Spectra does this by wrapping an electrode around a part of the body and sending out small AC currents. These small currents are reconstructed using tomographic techniques, imaging a cross-section of a body.

[Jean] gave a talk about Spectra at last year’s Hackaday Superconference, and if you want to look at the forefront of affordable medical technology, you needn’t look any further. Simply by sending an AC wave of around 10kHz through a body, software can reconstruct the internals. Everything from lung volume to muscle and fat mass to cancers can be detected with this equipment. You still need a tech or MD to interpret the data, but this is a great way to bring medical imaging technology to the people who need it.

Right now, the Spectra is up on Crowd Supply, with a board that can be configured to use 32 electrodes. Measurements are taken at 160,000 samples/sec, and these samples have 16-bit resolution. This is just the acquisition hardware, though, but the software to do tomographic reconstruction is open source and also readily available.

In terms of bringing medical imaging to the masses, this is a very impressive piece of work, and is probably the project from last year’s Hackaday Prize that has the best chance of changing the world.