Illustrated Kristina with an IBM Model M keyboard floating between her hands.

Keebin’ With Kristina: The One With The Tile-Based Macropad

Prolific Hackaday.io member [Michael Gardi] has hit upon the biggest problem with making reprogrammable macro pads — the legend situation. What do you do when the whole point is that the keys can so easily be changed?

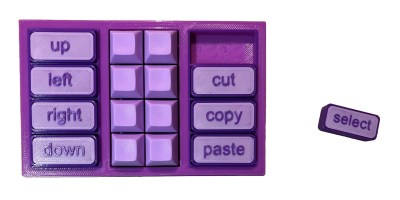
There are a couple of options: blank keycaps and memorization, re-legendable keycaps, and little screens instead of keycaps. Surely there has to be another way, and [Michael] has discovered one: a tile-based system of descriptors.

As you can see, the labels are removable 3D-printed tiles that swap out with ease thanks to tiny magnets. But these aren’t just tidy labels. Inserting a new label automatically changes the macro! Each tile holds a “simple numeric value” which maps it to a macro when inserted and detected by a Hall effect sensor. I can’t wait to hear these tiles click in action during a demo video, which I can only hope is forthcoming.

Continue reading “Keebin’ With Kristina: The One With The Tile-Based Macropad”

Input Device Gets New Input Device

One of the nicest things about a trackpoint is that you don’t have to take your hands off the keyboard. One of the worst things about a trackpoint is its usual placement, which can force a weird hand position that can cause repetitive stress injury.

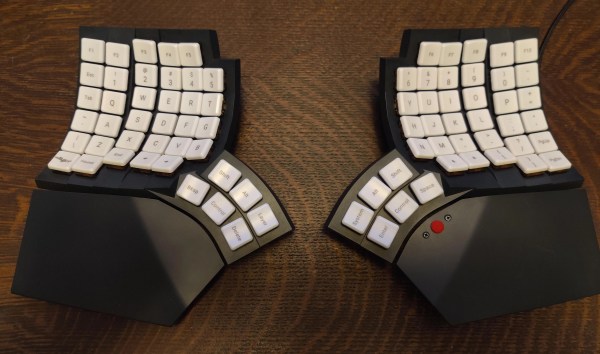
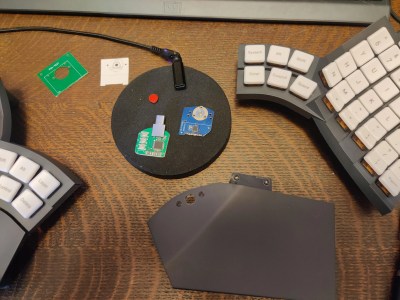
[notshitashi] has done an incredible job of adding a trackpoint to the Glove80 wireless split keyboard. It must have been really scary to drill holes in the palm rests of such a nice and not-cheap keyboard, but [notshitashi] soldiered on nonetheless, and the end result looks great.

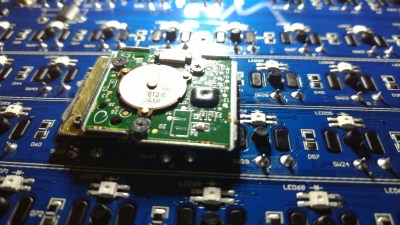
Starting with a trackpoint module from Ali, [notshitashi] found that it didn’t fit the palm rest without being trimmed down, so they desoldered the business part from the main PCB and reattached it with wires. They had to go through a few of them to get it just right, but that’s the way it goes sometimes.

[notshitashi] calls this “a bit of a cheat and dirty hack” because the trackpoint module is wired and, therefore, a separate USB HID. Yes, the Glove80 has GPIO connectors in both halves, but the problem is that stock ZMK has yet to support pointing devices. We don’t care; this is quite the elegant hack anyway.

Want to jazz up your mechanical keyboard with a trackpoint? Here’s a handy guide. Or, you can perform a transplant.

Getting To The TrackPoint Quicker

Love it or hate it, TrackPoint can be a powerful tool. Love it or hate it, the idea of moving the mouse without removing your hands from the keys has an appeal. [Alon Swartz] incorporated one into his custom wired split mechanical keyboard and wrote a helpful guide on how to do it yourself.

The first step was to determine the pinout of the Trackpoint, which he provides a handy repository of various devices with annotations and pictures. The next step is swapping the little rubber nub at the top for something a bit longer. As the PCB sits below the keys, a labret cheek piercing happens to be a perfect candidate. Strong, thin, easily obtainable in different lengths, and threaded on one end. With jewelry in hand, [Alon] created a reset circuit with just a few resistors and a capacitor so the teensy can trigger a reset of the Trackpoint. The keyboard’s TMK firmware also needed a few tweaks to support reading the Trackpoint.

It’s a great guide, and we love the use of the jewelry as a piece of the keyboard. A knitting needle was used in a previous attempt to add a Trackpoint to a mechanical keyboard, and we’re excited to see what other household items end up in keyboards.

Atreus Gets A TrackPoint And Layer LEDs

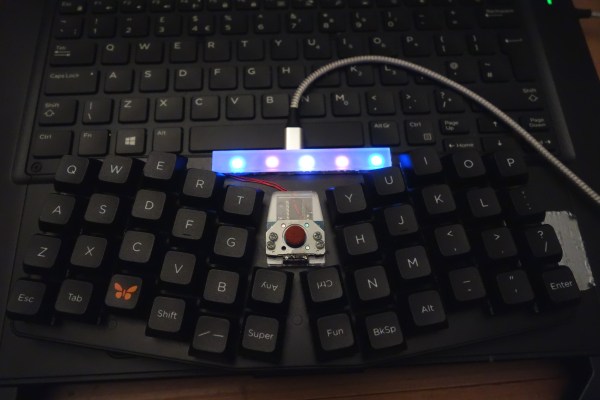
Fancy, split keyboards are cool and all, and they can really help with repetitive strain injury issues depending on a lot of different factors. But the big, glaring problem is that they often lack nice features that regular keyboards have — things like a number pad, media buttons, or in [discordia]’s case, a ThinkPad-style pointing stick. Fortunately, there’s a perfect spot for one between the two halves of the Keyboardio Atreus.

[discordia] is happy with the Atreus, but the whole layers thing can take some getting used to. Since Atreus only has 44 keys, it utilizes a layering system to change their function to cover all the keys you’d find on a full keyboard. After getting stuck in one rarely-used layer for a while, they decided to remedy the situation with some RGB LEDs to indicate the active layer. If you’ve got an Atreus that could use a few upgrades, check out [discordia]’s step-by-step instructions for adding a trackpoint and one-wire RGB LEDs.

If you have an old enough ThinkPad on your hands, then you may want to liberate the clicky keyboard, too.

Breathing New Life Into Old School ThinkPad Keyboards

The ThinkPad is generally considered the unofficial laptop of hackerdom, so it’s no surprise that we see plenty of projects focused on repairing and modifying these reliable workhorses. But while we usually see folks working on relatively modern incarnations of this iconic line of computers, this project by [Frank Adams] and [Brian Chan] shows that the hacker’s love affair with the ThinkPad stretches back farther than many might realize.

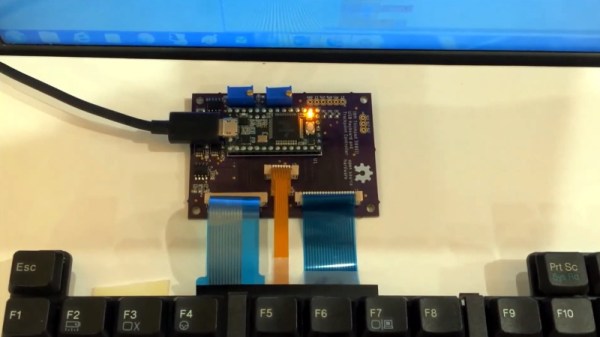
As explained on the project’s Hackaday.io page, the duo have produced an open hardware board that will allow you to take the keyboard and trackpoint from a late ’90s ThinkPad 380ED and use it as a standard USB input device on a modern computer. According to [Frank], the keyboards on these machines are notable for having full-size keys rather than the “chicklet” boards that are so common today.

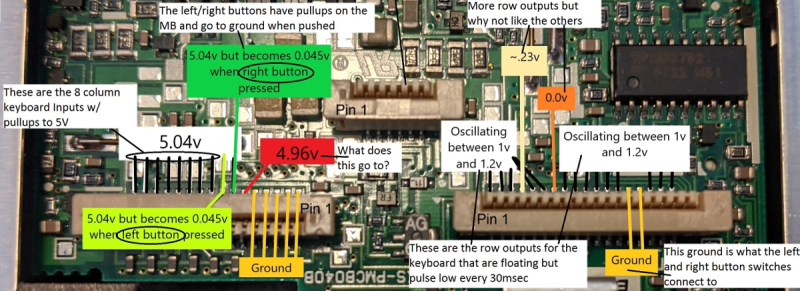
Now you may be wondering why this is significant. After all, we’ve seen plenty of projects that hook up an old keyboard to a USB-equipped microcontroller to get them speaking the lingua franca. Well, the trick here is that the trackpoint on these older ThinkPads actually required additional circuitry on the motherboard to function. The keyboard features three separate FPC connections for the matrix, the trackpoint buttons, and the analog strain gauges in the trackpoint itself.

After a considerable amount of reverse engineering, [Frank] and [Brian] have developed a board that uses the Teensy 3.2 to turn this plethora of pins into something useful. In the video after the break, you can see the new composite USB device working perfectly on a modern Windows computer.

It will probably come as little surprise to find that [Frank] is no stranger to hacking ThinkPad keyboards. In 2018 we covered a similar adapter he built for the far more modern T61, which was an absolute cakewalk by comparison.

Continue reading “Breathing New Life Into Old School ThinkPad Keyboards”

Add A Trackpoint To A Mechanical Keyboard

People love their tech, and feel like something’s missing when it’s not there. This is the story of one person’s desire to have the venerable trackpoint in their new keyboard.

[Klapse] loves a Lenovo old-style non-chicklet keyboard, so, despite the cost, five were ordered. They very quickly ended up with keys that didn’t work, although the trackpoints still did. After buying a sixth which ended up the same, [Klapse] decided that maybe giving up on the Lenovo keyboards was the best idea. A quick stop at a local store scored a fill-in mechanical keyboard, but in the back of [klapse]’s mind the need for a trackpoint remained. Maybe one could be frankensteined in to the keyboard that was just purchased?

Underside of the trackpoint, fitted to the keyboard PCB

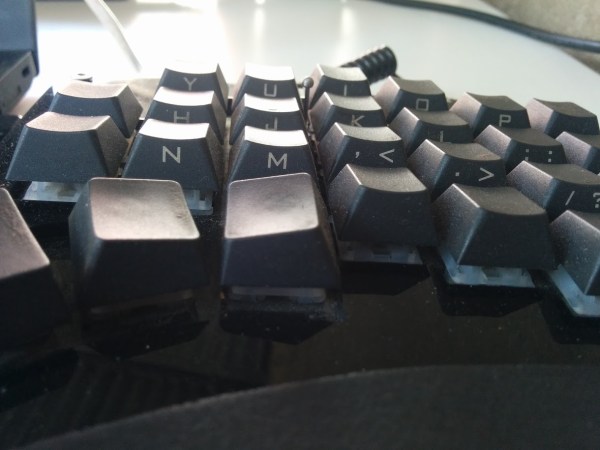
The keyboard’s circuit board had traces everywhere, with nowhere to drill through between the correct keys, typically between the G, H and Y keys. But there was a hole used for mounting the PCB nearby. between the H, J, U and Y keys. The trackpoint needed to be extended to reach all the way through the key caps, so [klapse] searched the house looking for something that might do. Turns out that a knitting needle fits perfectly.

At this point a side-hack emerged. [Klapse] found a drill bit small enough to make the necessary hole in the trackpoint shaft to fit the needle. But the bit was too small for the drill chuck. In true hacking style, the bit was wrapped with duct tape and held in the drill. Sure, it wobbled a lot and it was really difficult to get it to drill in the center of the shaft, but it worked, eventually. The needle was cut off and glued into the hole, the key caps were modified a bit to allow the trackpoint through and the rubber tip put back on.

They say, “desire to cram old tech into new is the mother of invention.” Or something similar, anyway. Check out how a Teensy liberated a Lenovo laptop keyboard trackpoint and all. Also, check out this custom keyboard with integrated trackpoint, of course.

Thinkpad 701c: Reverse Engineering A Retro Processor Upgrade

[Noq2] has given his butterfly new wings with a CPU upgrade. Few laptops are as iconic as the IBM Thinkpad 701 series and its “butterfly” TrackWrite keyboard. So iconic in fact, that a 701c is part of the permanent collection of the Museum of Modern Art in New York.

Being a 1995 vintage laptop, [Noq2’s] 701c understandably was no speed demon by today’s standards. The fastest factory configuration was an Intel 486-DX4 running at 75 MHz. However, there have long been rumors and online auctions referring to a custom model modified to run an AMD AM-5×86 at 133 MHz. The mods were performed by shops like Hantz + Partner in Germany. With this in mind, [Noq2] set about reverse engineering the modification, and equipping his 701c with a new processor.

thinkpad-brainsurgeryThe first step was determining which AMD processor variant to use. It turns out that only a few models of AMD’s chips were pin compatible with the 208 pin Small Quad Flat Pack (SQFP) footprint on the 701c’s motherboard. [Noq2] was able to get one from an old Evergreen 486 upgrade module on everyone’s favorite auction site. He carefully de-soldered the AM-5×86 from the module, and the Intel DX4 from the 701c. A bit of soldering later, and the brain transplant was complete.

Some detailed datasheet research helped [noq2] find the how to increase the bus clock on his 5×86 chip, and enable the write-back cache. All he had to do was move a couple of passive components and short a couple pins on the processor.

The final result is a tricked out IBM 701c Thinkpad running an AMD 5×86 at 133 MHz. Still way too slow for today’s software – but absolutely the coolest retro mod we’ve seen in a long time.