Pulse Width Modulation With Microcontrollers

Those following the ProtoStack tutorials will be happy to hear that there is a new installment which explains Pulse Width Modulation. If you’ve never heard of PWM before, it’s a method of generating a signal that is logic 1 for a portion of the time and logic 0 for the remainder of the time. It is the most commonly used method for dimming an LED, and that’s [Daniel’s] example in this tutorial. But you’ll also find it used in many other applications such as servo motor control and piezo speaker control.

[Daniel] starts off with a brief explanation of duty cycle, then moves on to some examples of hardware and software PWM. Many of the AVR microcontrollers have a hardware PWM feature that allows you to configure a pin that toggles based on a target timer value. This is demonstrated using an ATmega168, but a method of using interrupts and your own code is also covered in case you don’t have a hardware PWM pin available.

A Beginner’s Guide To LED Matrices

led_tutorial

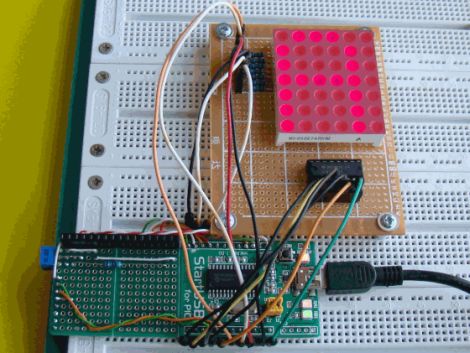
[Rajendra Bhatt] wrote in to share a tutorial he put together demonstrating the basics of using LED dot matrix displays. While this subject might be old hat to many out there, his helpful walkthroughs are geared more towards beginners who are exploring various electronics concepts for the first time.

He explains the theory behind LED displays using a PIC-driven 5×7 matrix as an example. He discusses persistence of vision and how tricking the human eye can save you quite a bit of time and a whole lot of pins. Multiplexing is broken down into its most basic steps, which [Rajendra] illustrates by showing how a letter would be drawn on the LED display one column at a time. The use of a ULN2803A Darlington Array is also discussed, and he details why it is used when pulling the five columns of LEDs to ground.

The only portion of the tutorial we thought could be expanded upon was the programming section. While he does show how each letter of the alphabet can be displayed via a series of five hex values, he does not cover the “why” part of the process. Obviously while anyone familiar with binary and hex can figure it out in pretty short order, we think that it would be a great place to pause and expand the readers’ knowledge even more.

Overall it’s a useful tutorial, and most beginners would likely find it quite helpful.

Make Presents: The Multimeter

This video falls under the category of things we want to send people when they ask “how do I get started with electronics”, and we get asked that a lot. For those of you who have been working with electronics for years at all, you can skip this entire video. That is, unless you really want to watch an instructional video on multimeters. In the video, which we’ve included after the break, they talk about the differences between different meters, the common uses and how to actually use the meter to get the results you need. Stuffed full of useful information, this video will get those of you who are still reading up to snuff pretty quickly. Now go use your multimeter to do some hacking!

Continue reading “Make Presents: The Multimeter”

Learn To Code At Lifehacker

[Adam] over at lifehacker is putting together a series on the principles of programming called “Learn to code”. They are using Javascript as a basis to teach the fundamentals that would allow you to get stuff done in any similar language, like actionscript. After you’ve got these basics down, even moving to an object oriented language shouldn’t be too difficult. We absolutely love educational resources and hope they continue this series pretty far. They’ve already released part one and part two. We have supplied the video from each after the break, but there’s more info at the links.

Continue reading “Learn To Code At Lifehacker”

Power Supplies And Transformers; A Learning Experience

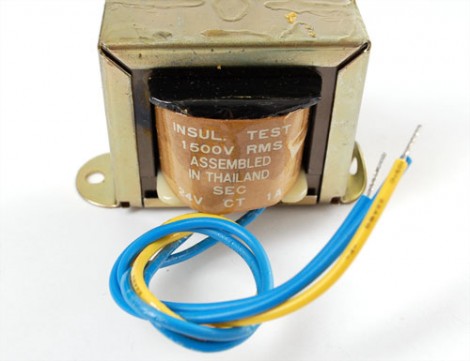
[Ladyada] is working on a tutorial series covering power supplies. If you’ve ever built an electronic project you’ve used some type of power supply but we think that most people have no idea how you get from mains power to the DC voltages that most small projects use. So if you want to learn, get started with the first installment which covers AC/DC converters based on a transformer like the one seen above.

These transformers are inside the heavy and hot wall-wart plugs that come with many electronics. We used one along with a breadboard power supply when building the pumpkin LED matrix. They use a pair of coils to step down the voltage to a much smaller level. From there it’s a matter of rectifying the AC into DC power, which she talks about in an easy to follow discussion.

We understand this type of converter quite well but we’re a bit foggy on switch-mode AC/DC converters that don’t use a transformer. They’re much better because you don’t have to build a regulator into the target project like you do with wall-warts. Can’t wait until she gets to that part of the series!

C Sharp Development 101 – Part 1: Hello World

In this tutorial we are going to get up close with the Visual Studio 2010 environment. We will learn how to make a console application as well as a form to display our hello world applications.  This will give us an opportunity to view 2 types of solutions of the many available in Visual Studio.  We will start making the console application first then progress to the forms application.

First we must  understand the development environment we are going to use.  On the far left side is the toolbox panel.  This panel gives us access to a lot of controls  that can be used by the Windows Forms.  Next is the Solution Explorer that will allow us to navigate the projects and files we are going to create in this Solution.  The Properties panel is directly under my Solution Explorer and will allow us to change properties of controls and of the form we will create later on.  If any of these are not being displayed they can be retrieved from the View menu at the top under Other Windows.  For more information on the Visual Studio IDE visit MSDN and search for the specific questions you are having.

Continue reading “C Sharp Development 101 – Part 1: Hello World”

Solder Paste How-to Tutorial

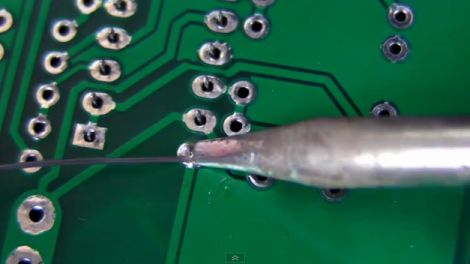
The application of Solder Paste is an essential part of short run manufacturing and prototyping. After getting back bare boards from a PCB shop, its time to get down to business and populate those boards. This new tutorial set assumes you have access to things such as stencils for your boards, but does mention a couple of resources on commercially available ways to purchase stencils. Of course, if you have a laser cutter, we can help you out. After getting your solder paste chops down, make sure you check out our guide to toaster oven reflowing.

[Thanks to P. Torrone]