Using Industrial CT To Examine A $129 USB Cable

What in the world could possibly justify charging $129 for a USB cable? And is such a cable any better than a $10 Amazon Basics cable?

To answer that question, [Jon Bruner] fired up an industrial CT scanner to look inside various cables (Nitter), with interesting results. It perhaps comes as little surprise that the premium cable is an Apple Thunderbolt 4 Pro USB-C cable, which sports 40 Gb/s transfer rates and can deliver 100 Watts of power to a device. And it turns out there’s a lot going on with this cable from an engineering and industrial design perspective. The connector shell has a very compact and extremely complex PCB assembly inside it, with a ton of SMD components and at least one BGA chip. The PCB itself is a marvel, with nine layers, a maze of blind and buried vias, and wiggle traces to balance propagation delays. The cable itself contains 20 wires, ten of which are shielded coax, and everything is firmly anchored to a stainless steel shell inside the plastic connector body.

By way of comparison, [Jon] also looked under the hood at more affordable alternatives. None were close to the same level of engineering as the Apple cable, ranging as they did from a tenth to a mere 1/32nd of the price. While none of the cables contained such a complex PCB, the Amazon Basics cable seemed the best of the bunch, with twelve wires, decent shielding, and a sturdy crimped strain relief. The other cables — well, when you’re buying a $3 cable, you get what you pay for. But does that make the Apple cable worth the expense? That’s for the buyer to decide, but at least now we know there’s something in there aside from Apple’s marketing hype.

We’ve seen these industrial CT scanners used by none other than [Ken Shirriff] and [Curious Marc] to reverse engineer Apollo-era artifacts. If you want a closer look at the instrument itself, check out the video below

Continue reading “Using Industrial CT To Examine A $129 USB Cable”

USB-C Power For Ham Radio

Even though manufacturers of handheld ham radios have been busy adding all sorts of bells and whistles into their portable offerings, for some reason, many of them lack a modern USB-C port. In the same vein, while some have USB for programming or otherwise communicating between the radio and a computer, very few can use USB for power. Instead , they rely on barrel jacks or antiquated charging cradles. If you’d like to modernize your handheld radio’s power source, take a look at what [jephthai] did to his Yaesu.

In the past, USB ports could be simply soldered onto a wire and used to power basically anything that took 5 VDC. But the radio in question needs 12 volts, so the key was to find a USB-C cable with the built-in electronics to negotiate the right amount of power from USB-PD devices. For this one, [jephthai] cut the barrel connector off his radio’s power supply and spliced in some Anderson power pole connectors so he could use either the standard radio charger or one spliced onto this special cable.

With this fairly simple modification out of the way, it’s possible to power the handheld radio for long outings with the proper USB battery bank on hand. For plenty of situations this is much preferable to toting around a 12 V battery, which was the method of choice for powering things like QRP rigs when operating off-grid.

An Effects Pedal For Keyboards (and Mice)

Effects pedals for musical instruments like electric guitars can really expand a musician’s range with the instrument. Adding things like distortion, echo, and reverb at the push of a button can really transform the sound of a guitar and add depth to a performance. But [Guy] wondered why these effects should be limited to analog signals such as those from musical instruments, and set about to apply a number of effects to the use of computer keyboards and mice with this HID effects pedal.

The mouse is perhaps the closer of the two to an analog device, so the translations from the effects pedal are somewhat intuitive. Reverb causes movements in the mouse to take a little bit of extra time before coming to a stop, which gives it the effect of “coasting”. Distortion can add randomness to the overall mouse movements, but it can also be turned down and even reversed, acting instead as a noise filter and smoothing out mouse movements. There’s also a looper, which can replay mouse movements indefinitely and a crossover, which allows the mouse to act as a keyboard.

For the keyboard, included effects are a tremolo, which modulates between upper- and lower-case at certain intervals; echo, which repeats keypresses; and a pitch-shift which outputs a “higher” character in the alphabet above whichever one has been pressed. Like the mouse, there’s also a crossover mode which allows the keyboard to be used as a mouse.

The device looks and feels like an effects pedal for a guitar would, with a RP2040 inside to intercept HID information, do the signal processing, and then output the result to the computer. And, while [Guy] admits this was a fun project with not many practical uses, there are a couple handy ones including potentially the distortion effect to smooth out mouse inputs for those with neuromuscular disorders or the mouse looper to act as a mouse jiggler for those with micromanaging employers. It’s also reprogrammable, and as we’ve seen since time immemorial having a programmable foot keyboard can be extremely handy for certain workflows.

Continue reading “An Effects Pedal For Keyboards (and Mice)”

Smart Doorbell Focuses On Privacy

As handy as having a smart doorbell is, with its ability to remotely see who’s at the front door from anywhere with an Internet connection, the off-the-shelf units are not typically known for keeping user privacy as a top priority. Even if their cloud storage systems were perfectly secure (which is not a wise assumption to make) they have been known to give governmental agencies and police free reign to view the videos whenever they like. Unfortunately if you take privacy seriously, you might need to implement your own smart doorbell yourself.

The project uses an ESP32-CAM board as the doorbell’s core, paired with a momentary push button and all housed inside a 3D-printed enclosure. [Tristam] provides a step-by-step guide, including printing the enclosure, configuring the ESP32-CAM to work with the popular open-source home automation system ESPHome, handling doorbell notifications automatically, and wiring the components. There are plenty of other optional components that can be added to this system as well, including things like LED lighting for better nighttime imaging.

[Tristam] isn’t much of a fan of having his home automation connected to the Internet, so the device eschews wireless connections and batteries in favor of a ten-meter USB cable connected to it from a remote machine. As far as privacy goes, this is probably the best of all worlds as long as your home network isn’t doing anything crazy like exposing ports to the broader Internet. It also doesn’t need to be set up to continuously stream video either; this implementation only takes a snapshot when the doorbell button is actually pressed. Of course, with a few upgrades to the ESP circuitry it is certainly possible to use these chips to capture video if you prefer.

Thanks to [JohnU] for the tip!

USB-C Cable Tester Is Compact And Affordable

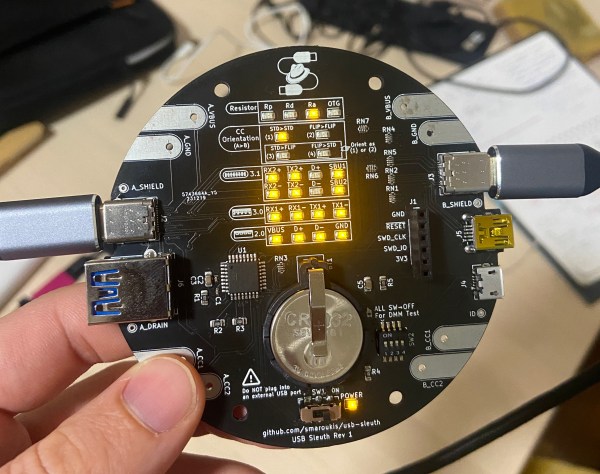
We’ve all been bitten before by USB cables which were flaky, built for only charging, or just plain broken. With the increased conductor count and complexity of USB Type C, there are many more ways your cable can disappoint you. Over in Austria, [Peter Traunmüller] aka [petl] has designed the C2C caberQU USB C cable tester. This small PCB tester checks every wire on the cable, including the shield, and both connector orientations. He also makes a version for testing USB A to C cables (see video below the break).

Automatic cable testers are often associated with factory production, where you want to test a large quantity of cables quickly and automatically, and are priced accordingly. But this project makes it affordable and easy for anyone to test single cables in a home lab or small office.

The tester only checks for basic continuity, but that should solve a majority of USB-C cable problems. All the documentation for this tester is available on the project’s GitHub repository, including Gerbers, schematics, and mechanical details. Or if you’d rather buy one pre-made, [petl] has put them up for sale on Tindie. Continue reading “USB-C Cable Tester Is Compact And Affordable”

The Right Equipment Makes A Difference For Digital Oscilloscope Music

We all love our cheap digital oscilloscopes, and with good reason. But if there’s one place where analog scopes still shine, it’s anywhere you need X-Y mode. Digitally sampling the inputs and mapping them on the screen as discrete points just isn’t the same as steering an electron beam around a CRT, making X-Y mode work on digital scopes — at least the affordable ones — somewhat lacking.

Thankfully, nobody told [Mark Hughes] that his digital scope would make a lousy X-Y display, so he just plunged ahead and figured out how to make it work anyway. The results are actually pretty good, but it took some doing. His setup begins with OsciStudio, an application built to take 3D shapes and animations and turn them into oscilloscope music. The output from that is piped to a USB sound card; [Mark] used a PreSonus Studio 26c, an adapter with DC-coupled inputs, which he found to be critical to getting good images. Also important was a USB isolator and good-quality cables, which greatly reduced jitter and made the image much more stable.

Displaying the image was as easy as connecting the left and right outputs from the sound card to the two scope inputs — [Mark] used a Keysight EDUX1052G — and setting it to X-Y mode. It took a fair amount of fiddling to get as far as he did, but we think the results speak for themselves. As for the sounds made by these images, he says it’s a bit like a hung sound card when a computer blue-screens. So, yeah — not exactly musical, but still an interesting way to have some fun with your digital scope.

Brute Forcing A Mobile’s PIN Over USB With A $3 Board

Mobile PINs are a lot like passwords in that there are a number of very common ones, and [Mobile Hacker] has a clever proof of concept that uses a tiny microcontroller development board to emulate a keyboard to test the 20 most common unlock PINs on an Android device.

Trying the twenty most common PINs doesn’t take long.

The project is based on research analyzing the security of 4- and 6-digit smartphone PINs which found some striking similarities between user-chosen unlock codes. While the research is a few years old, user behavior in terms of PIN choice has probably not changed much.

The hardware is not much more than a Digispark board, a small ATtiny85-based board with built-in USB connector, and an adapter. In fact, it has a lot in common with the DIY Rubber Ducky except for being focused on doing a single job.

Once connected to a mobile device, it performs a form of keystroke injection attack, automatically sending keyboard events to input the most common PINs with a delay between each attempt. Assuming the device accepts, trying all twenty codes takes about six minutes.

Disabling OTG connections for a device is one way to prevent this kind of attack, and not configuring a common PIN like ‘1111’ or ‘1234’ is even better. You can see the brute forcing in action in the video, embedded below.

Continue reading “Brute Forcing A Mobile’s PIN Over USB With A $3 Board”