The RPC: A Stand-alone MIDI Workstation

raspiMidiRPC

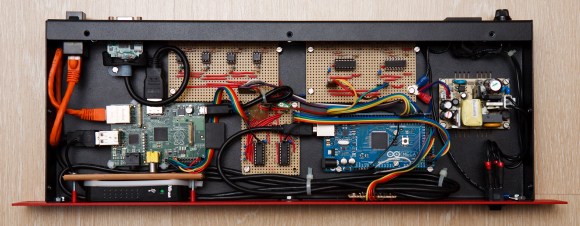
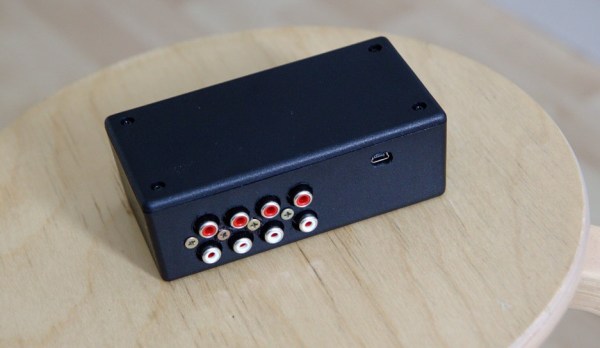
Not just another pretty enclosure, this shiny little red box is [Lauri’s] stand-alone MIDI workstation. The build uses an Arduino Mega 2560 to handle the MIDI inputs and outputs. It communicates via serial with a Raspberry Pi that acts as a sequencer and oversees all user interactions. The Pi’s SD card offers convenient storage for your work, though we wish it was easily ejectable from the front of the box and not trapped under the hood. [Lauri’s] RPC also squeezes in the necessary USB hub for the RasPi and an HDMI-to-VGA converter. As an all-in-one solution, this is a sleek little box that–once paired with some software for arpeggiators, chord harmonies, and scales–will be a handy MIDI sequencer with robust control ready to be conveniently mounted on your rack.

Now all you’ll need is something to plug in. Why not check out the custom MIDI recorder we featured last week, or the organ-to-MIDI keyboard conversion for inspiration.

[Thanks Teemu]

USB Adapter For An Old VT100 Keyboard

VT100

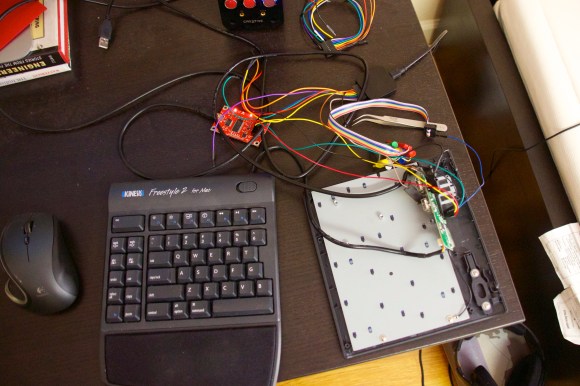
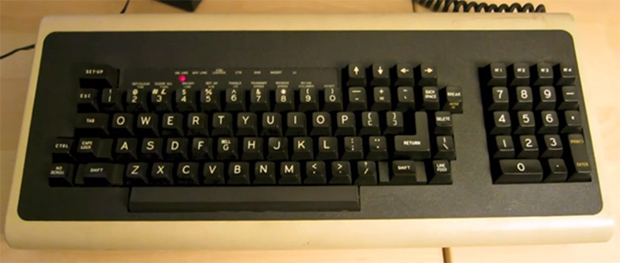
Ah, the VT100, the first dumb terminal that was controlled with a microprocessor. This ancient beast from the late 70s is quite unlike the terminals you’d find from even five years after its vintage – the keyboard connects via a TRS quarter-inch jack – the electronic and code design of this terminal is a bit weird. [Seth] was up to the challenge of making this mechanical keyboard work as a standard USB device, so he created his own USB adapter.

On the little quarter-inch to USB adapter, [Seth] included an HD 6402 UART to talk to the keyboard, along with a Teensy dev board and a few bits of circuits stolen from DEC engineers. The protocol between the keyboard and terminal is a little weird – first the terminal sets a bit in a status word, then the keyboard scans all the key rows and columns in sequence before telling the terminal it’s done. Yes, this gives the VT100 full n-key rollover, but it’s just weird compared to even an IBM Model M keyboard that’s just a few years younger.

[Seth] finally completed his circuit and wired it up on a perfboard. Everything works just as it should, although a little key remapping was done to keep this keyboard adapter useful for Mac and Windows computers. It’s a wonderful bit of kit, and any insight we can get into the old DEC engineers is a wonderful read in any event.

Vidias below.

Continue reading “USB Adapter For An Old VT100 Keyboard”

Supercharging Your Digital Calipers

supercapCalipers01

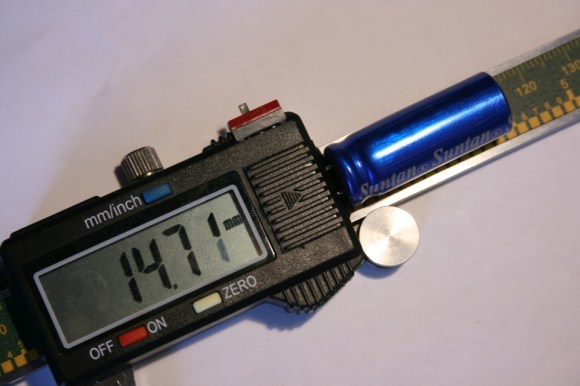
A dead battery in your digital calipers usually means a trip to the store for a new button cell. Not for [Trevor]. His hack substitutes a super capacitor, guaranteeing you’ll never need to rummage around for one of those pesky watch batteries again.

These calipers require only 20 seconds to reach a full charge that can last for a few days. Better still, [Trevor] designed a simple circuit with a voltage regulator at the end of the cord to allow charging via USB: just remember to flip the switch from “discharging” to “charging” mode. Although this is a fairly straightforward hack, its design is impressively tidy. The super capacitor fits perfectly at the end of the display and slides along with it, keeping it away from any important printed numbers. If these are the same calipers everyone seems to have these days, it looks like it may still fit in the provided case, too.

If you’re looking for more ways to beef up your calipers, try upgrading them with a Bluetooth module.

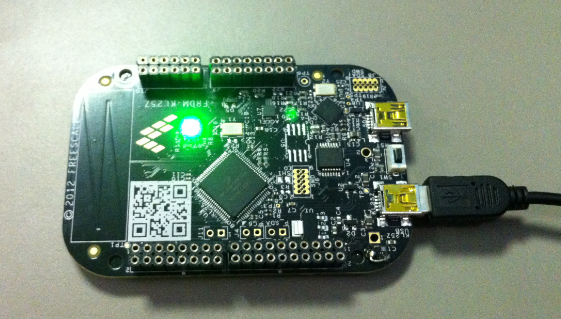
How To Use The Kenetis KL25Z Freedom Board As An HID Mouse

[Eric] is interested in turning this Freedom development board into an air mouse by using the onboard accelerometer. But he had to work through the particulars of the USB HID mouse class before he could get that done.

This Freescale FRDM-KL25Z is one of the awesome ARM boards we looked at a year ago. Can you believe you can get this thing for like thirteen bucks? We suppose the gotcha is that the CodeWarrior IDE meant for use with them is not entirely free. But there is a free trial, and [Eric] shows how much easier it is to tailor the USB stack for your needs with it.

Don’t worry though. If you’re like us and use Open Source For The Win he’s got you covered as well. When you’re done reading his HID mouse writeup head on over to his six-part tutorial for building a free toolchain for the Kenetis boards.

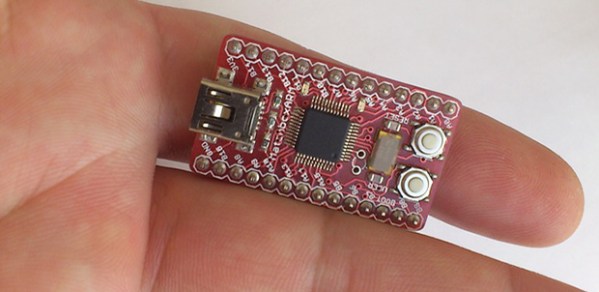
ARM Dev Board With USB Uploading

[George and Bogdan] wrote in to tell us about a cool Kickstarter they’ve been working on. It’s called the MatchboxARM, and like other tiny-yet-powerful ARM dev boards floating around, this one features a very fast and capable processor and more than enough pins for just about any project. One interesting feature of this board, however, makes it stand out from the pack: it has a USB mass storage-based bootloader, meaning uploading new code is as easy as a drag and drop.

This isn’t the first dev board we’ve seen to sport this feature: the Stellaris Launchpad has had this for a while and even the lowly ATtiny85, in the form of a Digispark has a mass storage-based bootloader. The MatchboxARM, though, brings this together with a very powerful ARM microcontroller with enough I/Os, ADCs, PWM pins, and I2C and SPI ports for the most complicated projects.

Hacklet Adds Linux Control For The Modlet Smart Outlet

modlet-for-linux-hacklet

Linux users now have a simple option for controlling the Modlet smart outlet. Hacklet is a Ruby script that can switch and read status information from Modlet.

This is the first we remember hearing about Modlet. It’s another take on controlling your appliances remotely. Unlike WeMo, which puts control of one outlet on WiFi, the Modlet uses a USB dongle to control two outlets wirelessly. It has the additional benefit of reading how much current is being used by each plug. This does mean that you need a running computer with the USB dongle to control it. But cheap embedded systems like the Raspberry Pi make this less of an issue both in up-front cost, and the price to keep it running all the time.

[Matt Colyer’s] demo video includes an unboxing of the $60 starter kit. The screen seen above shows his script pairing with the outlet. It goes on to demonstrate commands to switch it, and to pull the data from the device. He even provides an example of how to use IFTTT with the script.

Continue reading “Hacklet Adds Linux Control For The Modlet Smart Outlet”

LED Module Used To Display Load, Traffic, And Status Data For Your PC

cpu-monitoring-block

You’re going to like [Ivan’s] write-up for this LED computer status monitor. Of course he didn’t just show-and-tell the final product — if he had you’d be reading this in a Links post. But he also didn’t just detail how he put the thing together. Nope, he shared pictures and details of every iteration that got him here.

It started off with a tachometer. Yeah, that analog display you put on the dashboard of your car which reads out RPM. He wanted to make it into a USB device which would read out his CPU load. But that’s an awful lot of work when it can only display one thing at a time. So he decided to add an 8×8 LED module which would display the load for each individual core of his CPU. It looks great next to the illuminated tachometer. From there he added resolution by transitioning to an RGB module, which ended up sucking him into a coding project to extend the data pushed to his embedded hardware. In the end his ReCoMonB (Real Computer Monitoring Block) displays CPU load, RAM usage, several aspects of HDD activity, as well as the network up and down traffic.

We think he’s probably squeezed all that he can from this little display. Time to upgrade to a TFT LCD.

Continue reading “LED Module Used To Display Load, Traffic, And Status Data For Your PC”