Recreating The Amiga 1200 PCB From Pictures

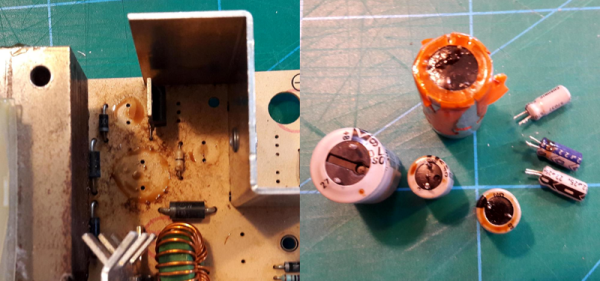
In the past we’ve talked about one of the major downsides of working with vintage computer hardware, which of course is the fact you’re working with vintage computer hardware. The reality is that these machines were never designed to be up and running 20, 30, or even 40-odd years after they were manufactured. Components degrade and fail, and eventually you’re going to need to either find some way to keep your favorite classic computer up and running or relegate it to becoming a display piece on the shelf.

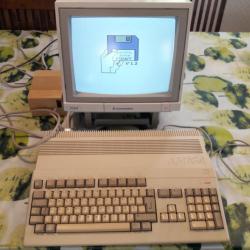
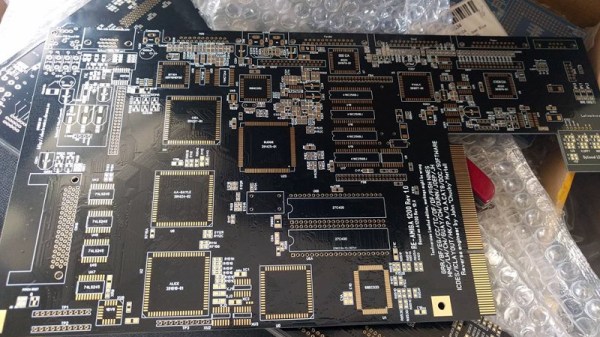
If you’re like [John Hertell], you take the former option. Knowing that many an Amiga 1200 has gone to that great retrocomputing museum in the sky due to corroded PCBs, he decided to recreate the design from scans of an unpopulated board. While he was at it, he tacked on a few modern fixes and enhancements, earning his new project the moniker: “Re-Amiga 1200”.

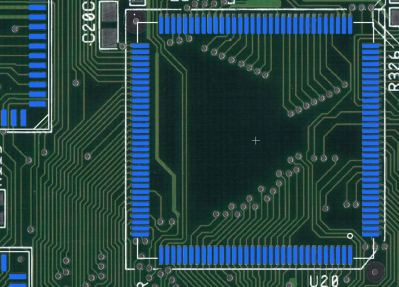
To create this updated PCB, [John] took high quality scans of an original board and loaded them up into Sprint Layout, which allows you to freely draw your PCB design over the top of an existing image. While he admits the software isn’t ideal for new designs, the fact that he could literally trace the scan of the original board made it the ideal choice for this particular task.

After the base board was recreated in digital form, the next step was to improve on it. Parts which are now EOL and hard to come by got deleted in place of modern alternatives, power traces were made thicker, extra fan connectors were added, and of course he couldn’t miss the opportunity to add some additional status blinkenlights. [John] has released his Gerber files as well as a complete BOM if you want to make your own Re-Amiga, and says he’ll also be selling PCBs if you don’t want to go through the trouble of getting them fabricated.

It seems as if Amiga fans never say never, as this isn’t the first time we’ve seen one brought back from the brink of extinction by way of a modernized motherboard. Whatever it takes to keep the vintage computing dream alive.

[Thanks to Anders for the tip.]

Continue reading “Recreating The Amiga 1200 PCB From Pictures”

An Incredible ATX Amiga 4000 Motherboard

No matter how far modern computer hardware advances, there’s still a fairly large group of people who yearn for the early days of desktop computing. There’s something undeniably appealing about these early systems, and while even the most hardcore vintage computer aficionado probably wouldn’t be using one as their daily computer anymore, it’s nice to be able to revisit them occasionally. Of course the downside of working with computers that may well be older than their operators is that they are often fragile, and replacement parts are not necessarily easy to come by.

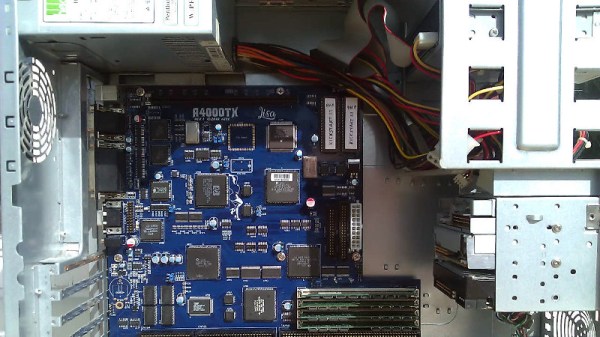
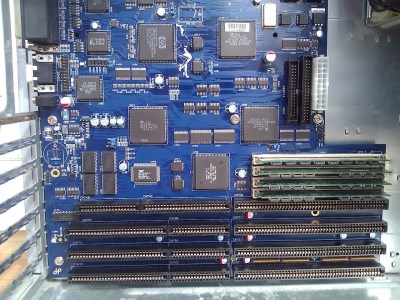
But thanks to projects like this impressive ATX Amiga 4000 motherboard shown off by [hese] on the Amibay forums, getting first hand experience with classic computing doesn’t necessarily mean relying on vintage hardware. By making an Amiga that’s compatible with standard ATX computer cases and power supplies, it becomes a bit more practical to relive the Commodore glory days. Right now it’s mainly a personal project, but if there’s sufficient interest it sounds as if that might change.

This board could be considered a modern reincarnation of the Amiga 4000T, which was an official tower version of the standard Amiga 4000 released by Commodore in 1994. It features a 68030 CPU, with 16 MB Fast RAM and 2 MB Chip RAM. For expansion there are four full-length Zorro III slots and three ISA slots, as well as IDE ports for a floppy and hard drive.

The board really looks the part of a professionally manufactured computer motherboard from the late 1990s, which speaks not only to the attention to detail [hese] put into its design, but the manufacturing capabilities that are now available to the individual. With passionate people like this involved, it’s hardly surprising that the vintage computer scene is so vibrant.

Of course, this isn’t the first newly built “vintage” computer we’ve seen here at Hackaday. From bare-minimum 8085 computers to the comparative luxury of the 6502-powered Cactus, it seems like what’s old is new again.

[Thanks to Laurens for the tip.]

Getting Started With Blinking Lights On Old Iron

If you ever go to a computer history museum, you’ll be struck by how bland most modern computers look. Prior to 1980 computers had lights and switches, and sometimes dials and meters. Some had switchboard-like wiring panels and some even had oscilloscope-like displays. There’s something about a machine with all those switches and lights and displays that gets your hacker juices flowing. Have you ever wanted to get started in retrocomputing? Is it difficult? Do you need a lot of money? That depends on what your goals are.

There are at least three ways you can go about participating in retrocomputing: You can pony up the money to buy actual antique computers, you can build or buy old computers recreated with anywhere from zero to one hundred percent of period-authentic components, or you can experiment with emulators that run on a modern computer. As a hybrid of the second and third option there are also emulations in FPGAs.

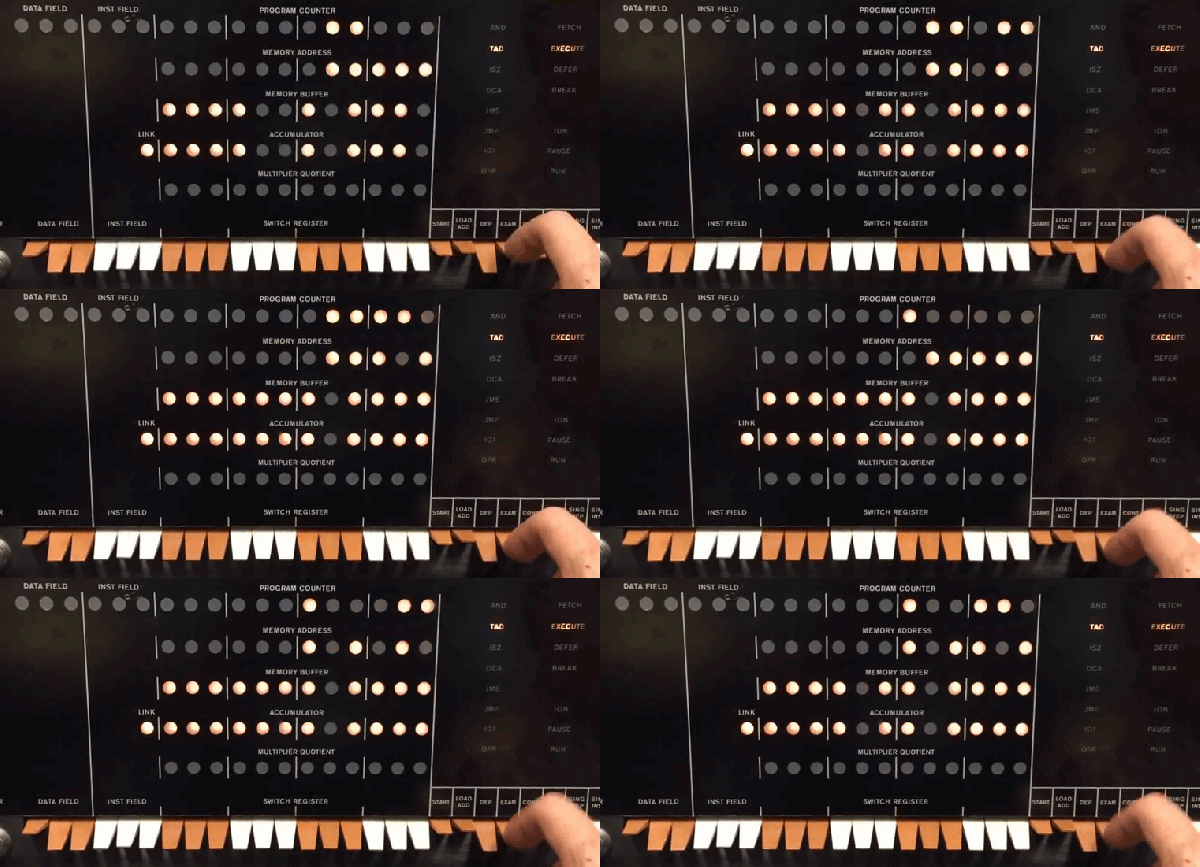
You can see that the first option can be very expensive and you will probably have to develop a lot of repair and restoration skills. Watching [Mattis Lind] twiddle the bits on an actual PDP-8 in the clip above is great, but you’ll need to work up to it. The two techniques which get you going without the original hardware don’t have to break the bank or even cost anything presuming you already have a PC.

Although some sneer at emulation, for some machines it is almost the only way to go. You couldn’t buy the original EDSAC, for example. It is also a good way to get started without a lot of expense or risk. But regardless of how you do it, there’s one thing in common: you have to know how to operate the thing.

Continue reading “Getting Started With Blinking Lights On Old Iron”

MARCH Attends HOPE X In July

hopex_web_topbar_b

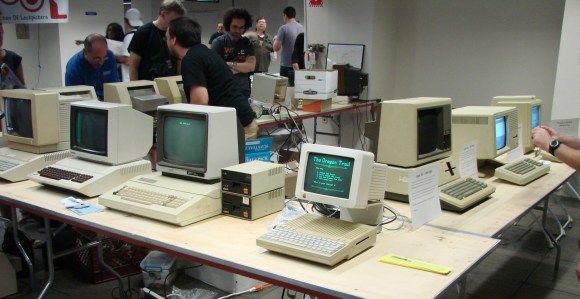
The Mid-Atlantic Retro Computing Hobbyist (MARCH) group is at HOPE X displaying a chronology of Apple computers, everything from an accurate Apple 1 reproduction all the way way up to an Apple Macintosh, and of course including all the II’s in between. Although they are only displaying Apples at this event, don’t confuse them for an Apple group. They love all types of vintage computers from the 1940’s to the 80’s.

[Evan], president of the group, elegantly explained why they are here; “to let people know that vintage computing is a thing and there are people in the area that do that thing”. He would like to encourage everyone who is mildly interested in retro computing to contact their local retro computer group and get involved in the community.

The group also puts on a yearly Vintage Computer Festival in New Jersey. This year’s event has already passed but you can still see what happened as Hackaday was there documenting all the cool stuff.

Mid Atlantic Retro Computing Group

Overhaul An Old Mechanical Keyboard

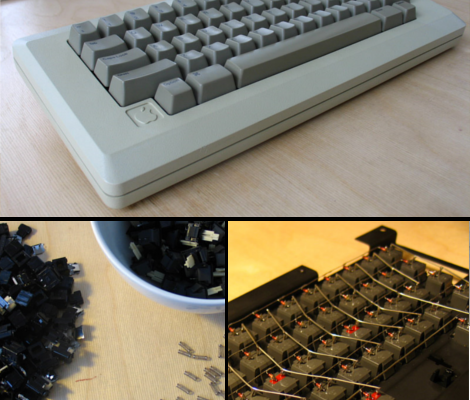
Deskthority forum user [lowpoly] recently posted a writeup on his complete overhaul of an Apple M0110  mechanical keyboard.  Any one familiar with the satisfying clack of a good mechanical key under their fingers can appreciate the effort put into this project.

[lowpoly] removed the keyboard’s PCB, rewired the key matrix adding diodes, built in a teensy USB board, broke apart the mechanical switches and fit replacement springs and finally applied a generous portion of retr0bright to all of the aging plastic. Since the teensy has no mounting holes [lowpoly] had to create a mounting assembly out of some spare plastic. A usb mini cable is even fitted into the original RJ-11 connector.  To compensate for the lack of PCB the key assembly was fitting with some rubber washers. To top off the whole thing some nice new rubber feet were taped to the underside of the M0110.

[lowpoly] reports that with the foam, new springs, and lack of PCB the keyboard is much quieter and easy to use.  The end result is a slick retro looking modern keyboard. If you’ll excuse us we have to go rooting through some old storage bins to find our own ancient keyboards.

We have seen our share of vintage keyboard hacks which can be useful, impressive and sometimes just odd. This build keeps it down to a nice simple, functional, useful retrofit. Nice work!

“Zero Overhead” Z80 Computer Focuses On Performance

z80_wirewrap_computer_zero_overhead

There’s something quite satisfying about building your own computer. Nowadays, constructing your own desktop PC is relatively easy, so if you really want to get your hands dirty, you have to take a step back in time and give some vintage hardware a spin.

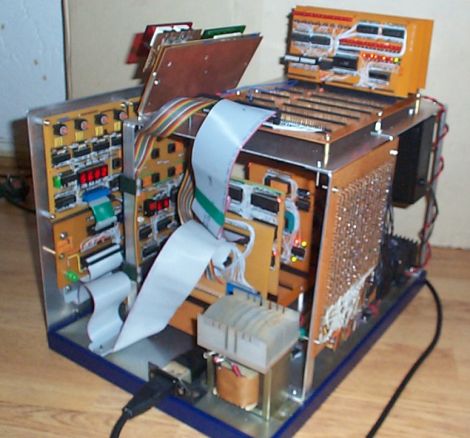
[YT2095] has spent a good portion of the last two months building a computer based on the classic Z80 CPU. His machine, called “Z Eighty Development” or “ZED” for short is an amazing build, and most definitely a labor of love. He has put an estimated 700+ hours into this machine and it’s a beaut! When closed, the machine is pretty unassuming, but once he folds down the keypad, you can see that all of his time has been put to good use.

Most of the board’s components are connected together via wire wrap, including the large 48k memory card he built, as you can see from the link above. The wide array of add on cards all work together to accomplish his goal of “zero overhead” – freeing up the Z80 from having to do any unnecessary processing, such as I/O, etc.

It’s quite an impressive build, and ranks up there with some of the best Z80 based computers we have seen through the years.

DENCON

dencon

Defcon, the world’s largest hacker convention, is this coming weekend in Las Vegas. While the convention generally focuses on breaking new technology, digital archivist [Jason Scott] has an interesting surprise for attendees this year. With some help from VintageTech, he’ll be assembling a massive den of retro computing machinery. They’ll have fully functional systems like the PDP-11/70 for people to play with. It sure to be one of the more unique things to see at the con.