Supercon 2023: Exploring The Elegance Of The Voja4

When you design an electronic badge, the goal is to make a device that’s interesting and has enough depth to keep your attendees engaged for the duration of the con but not so complicated that they can’t become proficient with it before they have to head home. It’s a difficult balance to nail down, and truth be told, not every Supercon badge has stuck the landing in this regard.

But if you’ve really done things right, you’ll create a piece of hardware that manages to outlive the event it was designed for. A badge that attendees continue to explore for months, and potentially even years, afterward. If the talk “Inside the Voja4” by Nathan Jones is any indication, we think it’s safe to say that goal was achieved with the Supercon 2022 badge.

During this forty-minute presentation, Nathan discusses what makes the 4-bit badge so fascinating from a technical standpoint and how it could theoretically be expanded to accomplish far more complex tasks than one might assume at first glance.

Continue reading “Supercon 2023: Exploring The Elegance Of The Voja4”

Why Learn Ancient Tech?

The inner orbits of the Hackaday solar system have been vibrating with the announcement of the 2022 Hackaday Supercon badge. The short version of the story is that it’s a “retrocomputer”. But I think that’s somehow selling it short a little bit. The badge really is an introduction to machine language or maybe a programming puzzle, a ton of sweet blinky lights and clicky buttons, and what I think of as a full-stack hacking invitation.

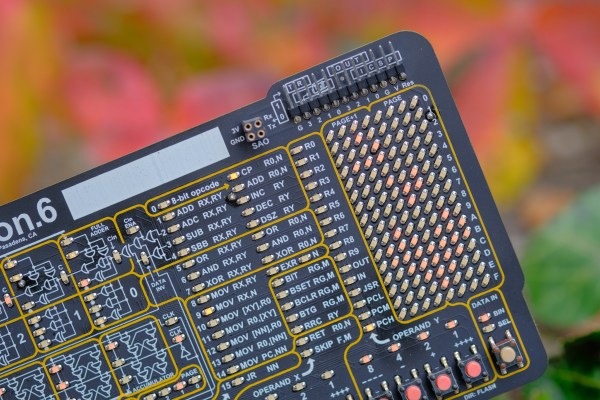
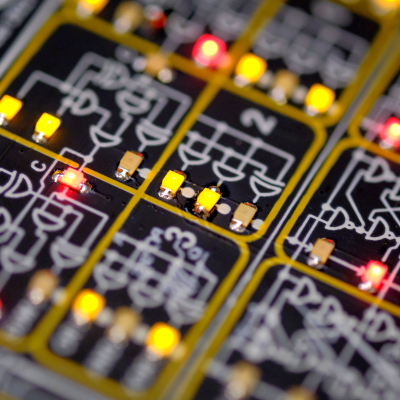
Voja Antonic designed the virtual 4-bit machine that lives inside. What separates this machine from actual old computers is that everything that you might want to learn about its state is broken out to an LED on the front face, from the outputs of the low-level logic elements that compose the ALU to the RAM, to the decoder LEDs that do double-duty as a disassembler. You can see it all, and this makes it an unparalleled learning aid. Or at least it gives you a fighting chance.

So why would you want to learn a made-up machine language from a non-existent CPU? Tom Nardi and I were talking about our experiences on the podcast, and we both agreed that there’s something inexplicably magical about flipping bits, calling the simplest of computer operations into action, and nonetheless making it do your bidding. Or rather, it’s anti-magical, because what’s happening is the stripping away of metaphors and abstractions. Peering not just behind, but right through the curtain. You’re seeing what’s actually happening for once, from the bottom to the top.

As Voja wrote on the silkscreen on the back of the badge itself: “A programmer who has never coded 1s and 0s in machine language is like a child who has never run barefoot on the grass.” It’s not necessary, or maybe even relevant, but learning a complex machine in its entirety is simultaneously grounding and mind-expanding. It is simply an experience that you should have.

Remoticon 2021 // Voja Antonic Makes You A Digital Designer

[Voja Antonic] has been building digital computers since before many of us were born. He designed with the Z80 when it was new, and has decades of freelance embedded experience, so when he takes the time to present a talk for us, it’s worth paying attention.

For his Remoticon 2022 presentation, he will attempt to teach us how to become a hardware expert in under forty minutes. Well, mostly the digital stuff, but that’s enough for one session if you ask us. [Voja] takes us from the very basics of logic gates, through combinatorial circuits, sequential circuits, finally culminating in the description of a general-purpose microprocessor.

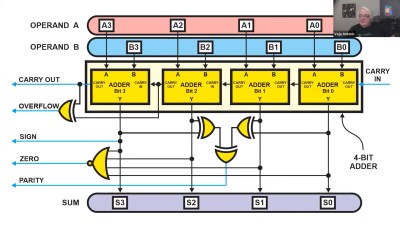
A 4-bit ripple-carry adder with additional CPU flag outputs

As he demonstrates, complex digital electronics systems really are just built up in a series of steps of increasing complexity. starting with individual active elements (transistors operating as switches) forming logic elements capable of performing simple operations.

From there, higher level functions such as adders can be formed, and from those an ALU and so on. Conceptually, memory elements can be formed from logic gates, but it’s not the most efficient way to do it, and those tend to be made with a smaller and faster circuit. But anyway, that model is fine for descriptive purposes.

Once you have combinatorial logic circuits and memory elements, you have all you need to make the necessary decoders, sequencers and memory circuits to build processors and other kinds of higher complexity circuits.

Obviously forty minutes isn’t anywhere nearly enough time time to learn all of the intricacies of building a real microprocessor like the pesky details of interfacing with it and programming it, but for getting up the learning curve from just a knowledge of binary numbers to an understanding of how a CPU is built, it’s a pretty good starting point.

Now, If you can only tear your eyes away from his slick game-of-life wall mounted LED display, you might pick up a thing or two.

Continue reading “Remoticon 2021 // Voja Antonic Makes You A Digital Designer”

Voja Antonic: Designing The Cube

Voja Antonic designed this fantastic retrocomputing badge for Hackaday Belgrade in 2018, and it was so much fun that we wanted to bring it stateside to the Supercon essentially unaltered. And that meant that Voja had some free time to devote to a new hardware giveaway: the Cube. So while his talk at Supercon in November was ostensibly about the badge, he just couldn’t help but tell us about his newer love, and some of the extremely clever features hidden within.

It’s funny how the hardware we design can sometimes reflect so much on the creator. Voja designed then-Yugoslavia’s first widely used home computer (and published the DIY plans in a magazine!). Thousands were built from their kits. The Galaksija was a Z80-based design with a custom BASIC that was just barely squeezed into the available 4K of ROM. So you shouldn’t be shocked that the retro-badge has a working keyboard and a nice BASIC on board.

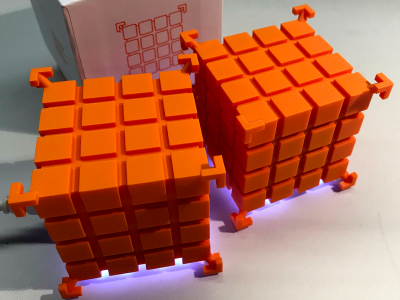
But let’s jump ahead to the Cube, because that’s even more of a passion project. On the outside, they’re very simple devices, with only a USB port and a sweet diffused LED ring visible. Aesthetic? Minimalistic? Beautiful, honestly.
Continue reading “Voja Antonic: Designing The Cube”

What Makes The Perfect Hardware Badge

There are only a handful of people who can say they’ve built several successful electronic badges for conferences. Voja Antonic is not just on that list, he’s among the leaders in the field. There are a lot of pressures in this type of design challenge: aesthetics, functionality, and of course manufacturability. If you want to know how to make an exposed-PCB product that will be loved by the user, you need to study Voja’s work on the 2016 Hackaday SuperConference Badge. The badge is completely open, with all the design files, firmware, and a manual on the badge project page.

Between travelling from Belgrade to Pasadena and guiding production of 300 badges across the finish line before the conference deadline Voja took ill. He made it to the conference but without a voice he asked me to give his badge design talk for him. You can check that talk out below but let’s touch briefly on why Voja’s design is so spectacular.

Continue reading “What Makes The Perfect Hardware Badge”

Solving Hackaday’s Crypto Challenge

Although I’ve been to several DEF CONs over the past few years, I’ve never found time to devote to solving the badge. The legendary status of all the puzzles within are somewhat daunting to me. Likewise, I haven’t yet given DefCon DarkNet a try either — a real shame as the solder-your-own-badge nature of that challenge is right up my alley.

But at the Hackaday SuperCon I finally got my feet wet with the crypto challenge created by [Marko Antonic]. The challenge was built into a secondary firmware which anyone could easily flash to their conference badge (it enumerates as a USB thumb drive so just copy it over). This turned it into a five-puzzle challenge meant to take two days to solve, and it worked perfectly.

If you were at the con and didn’t try it out, now’s the time (you won’t be the only one late to the game). But even if you weren’t there’s still fun to be had.

Thar’ be spoilers below. I won’t explicitly spill the answers, but I will be discussing how each puzzle is presented and the different methods people were using to finish the quest. Choose now if you want to continue or wait until you’ve solved the challenge on your own.

Continue reading “Solving Hackaday’s Crypto Challenge”

Design And Hacking Drilldown: SuperCon Badge

One can imagine a political or business conference without an interactive badge — but not a hacker conference. Does this make the case for hackers being a special breed of people, always having something creative to show for their work? Yes, I think it does.

Following the Hackaday Belgrade conference in April of this year, we met at the Supplyframe offices to discuss the badge for the Hackaday SuperConference that will happen in Pasadena on 5+6th of November. The Belgrade conference badge (which was fully documented if you’re curious) was surprisingly popular, and I was asked to design the new one as well.

I was prepared to come up with something completely new, but [Mike Szczys] suggested keeping with the same basic concept for the project: “No reason to change anything, we have a badge that works”. To which I responded: “Well, the next one will also work”. But then I realized that “works” does not stand for “being functional”. The key is that it was embraced by visitors who played with it, coded on it, and solved a crypto challenge with it.

The World Doesn’t Have Enough LEDs

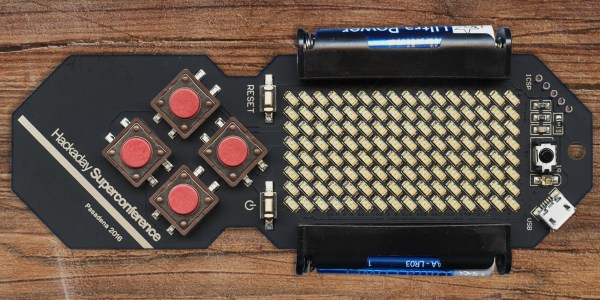
led-modules-versus-smdFast forward six months — here are the modifications made to the basic concept. First, the existing LED matrix, which was composed of two compact 8×8 blocks, was replaced by 128 discrete SMD LEDs. It was a much needed change to help scale down the dimensions and clunkiness, but also to avoid another painful experience of trying to purchase and have the matrix displays shipped, which seriously threatened the production of the previous badge.

It’s a long story which I discussed in my Belgrade talk — it turned out we did not manage to get enough common anode (CA) displays from all distributors in the whole world. We had a plan B, which also fizzled, leaving us with the plan C which actually included two “C”s: Common Cathode. We cleaned up all the supplies at five distributors, and managed to get 122 CA red, 340 CC red and 78 CA green displays (enough for only 270 badges) — the entire world supply. After that, you couldn’t get any 38 mm Kingbright’s display for months! The only problem was that there were two different versions of PCBs, one for CA and the other for CC displays, but luckily only one version of software, as it could autodetect the display type.
accelerometer-on-the-boardMotion and Expansion

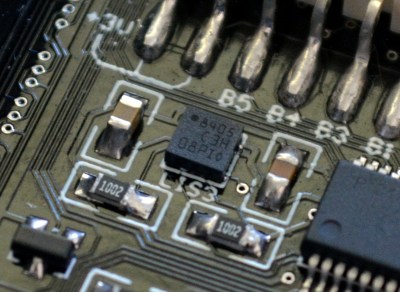
So, what else was new in the concept? In the Belgrade version, the badge supported an accelerometer module and included an unpopulated footprint in case you decided to install it, but now the badge has the MEMS chip LIS3 as an integral part. There are nine pads (with five I/O ports, driven directly from the MCU) to which you can add a 9-pin expansion connector. There will be a number of these connectors at the Design Lab, so that anyone can expand their badge for their convenience, on the spot.

The Visual Design

The biggest change was in the visual design. What we came up with ended up being a fair bit smaller, lighter, with a more convenient shape, and less than half the thickness of the previous one. After we had scrapped quite a few ideas during the development process (including stylized skull, frog, etc), we were left with a couple of options which you can see on the image below. The wireframe drawing on the left hand side is the Belgrade badge, shown here for a size comparison. At this point the locale and date of the conference weren’t yet definitive, which is why you see San Francisco written on the images.
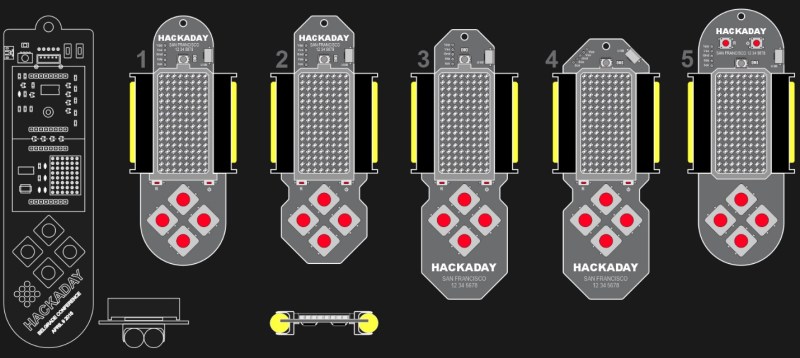
design-options-2016-supercon-badge

Design number 4 prevailed, so the PCB layout could begin. I don’t like autorouted PCBs, so I was in for quite a rough time trying to solve the routing manually having only 2 layers on the board at my disposal.

Routing a Compact LED Matrix

The LED matrix is so dense that there was virtually no room on the LED layer, so most of the tracks on the component layer had to be routed as if it was a single layer PCB. To make matters worse, the LED layer is routed as a matrix, with a bunch of horizontal and vertical tracks, otherwise a good reason to use a 4-layer PCB. To stay inside the budget, everything had to be placed on 2 layers, and that’s why the final result seems so confusing at the populated area between batteries:

Continue reading “Design And Hacking Drilldown: SuperCon Badge”