Generally, the projects featured on Hackaday actually do something. We won’t go as far as to say they are practical creations, but they usually have some kind of function other than to sit there and blink. But what if just sitting still and blinking away randomly is precisely what you want a piece of hardware to do?
That was exactly the goal when [createscifi] set out to dress a Lite Brite up as a futuristic prop. On a technical level, this project is pretty much as simple as it gets. But we appreciated seeing some of the techniques brought to bear on this project, and perhaps more importantly, really like the channel’s overall goal of creating affordable sci-fi props using common components. We don’t plan on filming our own space epic anytime soon…but we like to know the option is there.
As you might expect, the release of last year’s Ghostbusters: Afterlife has not only lead to renewed interest in the old 1980s toys and tie-in merchandise, but has spawned a whole new generation of blinking plastic gadgets to delight children of all ages. Of course, for folks like us, that means more hardware to hack on.
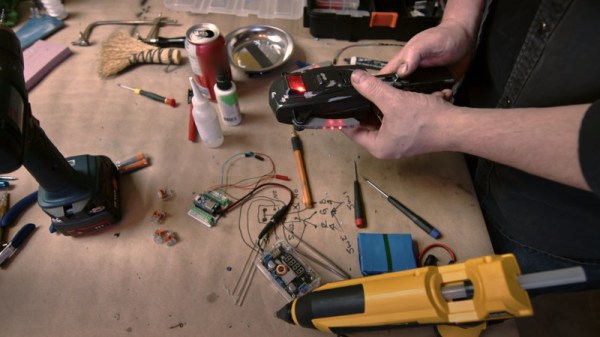
In a recent post to the official Ghostbusters YouTube channel, professional prop maker [Ben Eadie] shows off some of the tricks of the trade when he takes a $15 USD “PKE Meter” toy from Hasbro and turns it into a screen-quality prop. Even if you’re not looking to get an early start on your Halloween costume, the techniques demonstrated in this video could be easily adapted to other projects. For those whose next ideal home improvement is a fireman’s pole and an ectoplasmic laser-confinement grid, you might want to grab a couple of these toys while they’re still cheap for eventual conversion.
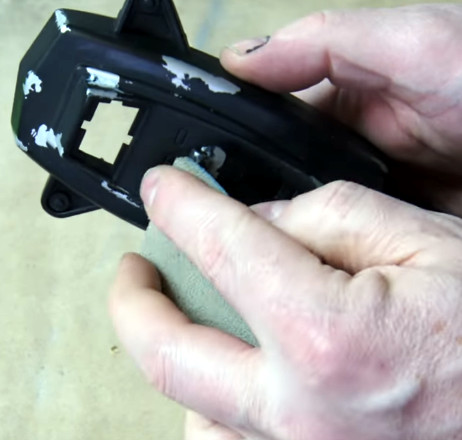
Uncovering the silver makes the piece look worn down.
The biggest takeaway from the video is probably the finishing techniques, as they could be used on any sort of realistic prop build. [Ben] starts by using a cabinet scraper to smooth out the lines on the plastic toy, and any holes are filled with the familiar baking soda and cyanoacrylate glue trick. Once the surfaces have been prepped, all the principle parts are sprayed with an adhesion promoter, followed by a coat of silver, and then the final black color.
This allows him to create a convincing “chipped paint” effect by strategically sanding or scraping through the top coat. Dabbing some toothpaste where you want the device to look worn down before spraying the final coat makes the process even faster, as it will prevent the top coat from sticking to the silver in the first place.
Unfortunately [Ben] doesn’t spend a whole lot of time explaining the electronics side of things, but it doesn’t look like there’s anything too complex going on. All the original gear is stripped, and it gets replaced with a microcontroller which we believe is an Adafruit ItsyBitsy nRF52840 Express. This is connected to two strings of tiny APA102 addressable LEDs which are run down the “wings” (we especially like the 3D printed lenses used to replace the original solid pips), and one that’s used to provide the iconic sine-wave display.
While the full steampunk aesthetic might be a bit much for most people, those antique gauges do have a certain charm about them. Unfortunately, implementing them on a modern project can be somewhat tricky. Even if you’ve got a stock of old gauges laying around, you’ve still got to modify the scale markings and figure out how to drive them with digital electronics. While we’ve seen plenty of people do it over the years, there’s no debating it’s a lot harder than just wiring up an I2C display.
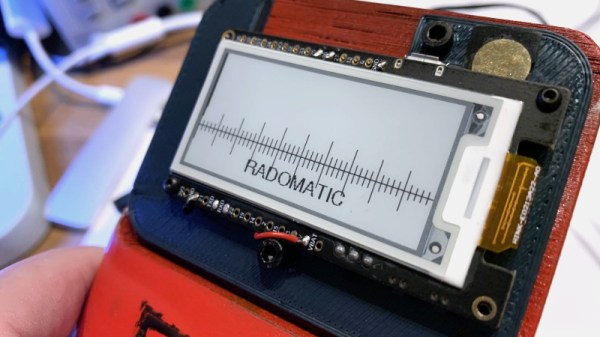
But maybe it doesn’t have to be. With his Rad-O-Matic, [Hans Jørgen Grimstad] created a pretty convincing “analog” gauge using a small e-ink panel. Of course it won’t fool anyone who gives it a close look, but at a glance, you could certainly be forgiven for thinking it was some kind of vintage indicator. Especially with the cracked and stained Fresnel lens he put in front of it.
For this project [Hans] used a LilyGo T5, which combines an ESP32 with a 2.13 inch electronic paper display. These are presumably meant to be development boards for digital signage applications, but they occasionally show up in hacker projects since they’re so easy to work with. The board pulls data from a RD200M radon sensor over a simple UART connection, and the current reading is indicated by a “needle” that moves across a horizontal scale on the display.
On its own, it wouldn’t look very vintage. In fact, quite the opposite. But [Hans] really helped sell the look on this project by designing and 3D printing a chunky enclosure and then weathering it to make it look like it’s been kicking around since the Cold War.
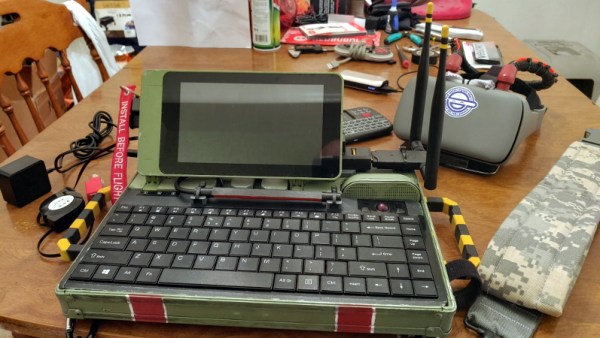
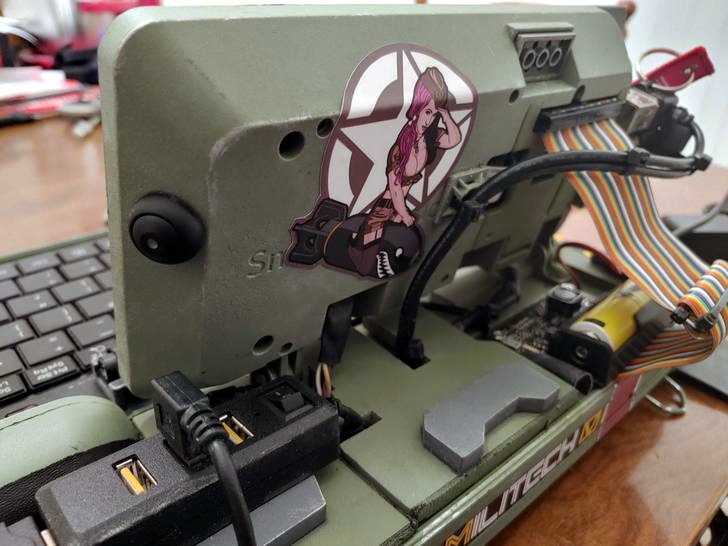
The recent crop of cyberdeck builds are inspired, at least tangentially, by William Gibson’s novel Neuromancer and its subsequent sequels. In the novels, the decks are used as mobile terminals to access the virtual reality of cyberspace. In our world, they’re usually just quasi-retro boxes with Raspberry Pis in them. Artistic license and all that. But the “XMT-19 Cutlass”, a deck built by [CaptNumbNutz], attempts to hew more closely to the source material than most builds we’ve seen.
Of course it won’t be transporting you into the matrix, and ultimately it’s still just a casemod for the Raspberry Pi. But at least it does a fantastic job of fitting the Neuromancer motif. The design is supposed to look like the XMT-19 was a piece of high-tech military hardware that was later co-opted by a cyberspace cowboy operating in the urban megatropolis that Gibson called the Sprawl, with exposed wiring and a visual mish-mash of components.
If you can believe it, the build started out as a locking clipboard of all things. From there, [CaptNumbNutz] started layering on the hand-cut foam greebles and spraying on the WWII inspired color scheme. We especially like the yellow tips on the antennas that invoke the propellers of vintage airplanes, and the serial number stenciled onto the bottom. In a departure from basically every other cyberdeck we’ve seen to date, there appear to be no 3D printed elements on the XMT-19; all the parts are hand made with nothing more than an a sharp knife and a heap of patience.
In terms of the electronics, the whole build has been greatly simplified by the use of a SmartiPi Touch case, which integrates the Pi and touch screen into a single hinged unit that just needed to get bolted to the top of the deck. Plus it gave him an excuse to put a big rainbow ribbon cable on the back of it to reach the Pi’s GPIO ports, which as you know, instantly makes everything look more retro-futuristic.