Enter The Space Tunnel

What’s better than 1 string of LED lights? 96. That’s how many. Each string of the 96 has 60 ws2812b LEDs, for a total of 5760 individually addressable RGB LEDs.  That’s not the cool part of [jaymeekae]’s Space Tunnel installation, the cool part is that they’re interactive.

Starting out with some PVC piping, dark cloth was used as a backdrop and the LED strips were attached to it. Several power supplies are used to supply the voltage necessary and each strip controlled by FadeCandy chips which connect to, in this case, a Windows PC via USB. Initially, computer power supplies were used, but they couldn’t supply the current necessary. [jaymeekae] used them for the first installation, but switched to better power supplies for further installations.

Once the lights were up and powered, [jaymeekae] started work on the interface to control them. Starting with a used bureau, [jaymeekae] cut out a section for the touchscreen, and installed the controlling computer in the bottom half. Processing is used to interface with the FadeCandy controllers and HTML is used for a user interface. Each mode runs a different Processing program for different effects, including audio visualization, a space tunnel mode (hence the name) and a cool drawing app where the user draws on the touchscreen and sees the results in the lights overhead.

Over several iterations, the Space Tunnel has evolved, with better power supplies and a better interface. It’s a great art installation and [jaymeekae] takes it to festivals, including one in Spain and one in the UK. There are some other LED string projects at Hack-a-Day, including this one with ping-pong balls, and this one that involves drinking a lot of beer first.

[via Reddit]

Continue reading “Enter The Space Tunnel”

Beautiful Linear RGB Clock

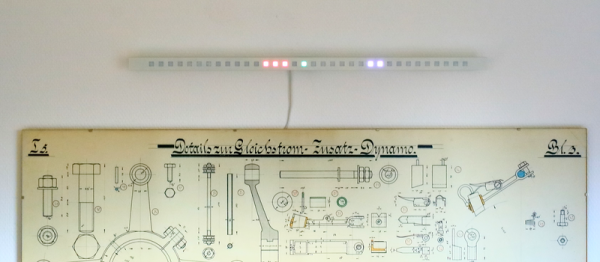
Yup, another clock project. But here, [Jan] builds something that would be more at home in a modern art museum than in the dark recesses of a hacker cave. It’s not hard to read the time at all, it’s accurate, and it’s beautiful. It’s a linear RGB LED wall clock.

7512951486134540347You won’t have to learn the resistor color codes or bizarre binary encodings to tell what time it is. There are no glitzy graphics here, or modified classic timepieces. This project is minimal, clean, and elegant. Twelve LEDs display the hours, six and nine LEDs take care of the minutes in add-em-up-coded decimal. (It’s 3:12 in the banner image.)

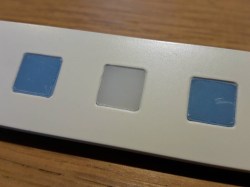
The technical details are straightforward: WS2812 LEDs, an Arduino, three buttons, and a RTC. You could figure that out by yourself. But go look through the log about building the nice diffusing plexi and a very clean wall-mounting solution. It’s the details that separate this build from what’s hanging on our office wall. Nice job, [Jan].

Cheap LCD TV Gets Cheaper Fix

Most hacks need some fair bit of skill and knowledge if you want to come out successful at the other end. Others, you just plunge in blindly with a “heck, it’s already broken so I can’t make it any worse” attitude. Throwing caution to the wind, you dive in, rip things up, and see if you can manage to catch the bull by the horns.

[Jim]’s cheap LCD TV, barely a few years old, died. It was purchased from the store whose blue polo-shirted cashiers can drive you nuts with their incessant questions. [Jim] just rolled up his sleeves and rather haphazardly managed to fix his TV while adding an extra feature along the way.

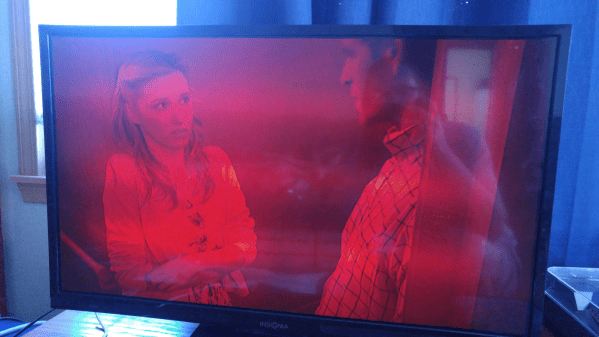
His initial check confirmed that the LCD panel worked. Using a flashlight, he could see that the panel was displaying video which meant it was the backlight that wasn’t working. Opening up the TV, he located the LED driver board whose output turned out to be zero volts. [Jim] happened to have a lot of WS2812B strips lying around, along with their power supplies and RGB color controllers. The obvious solution was to ditch the existing LEDs and power supply and use the WS2812B strips.

Surprisingly, the original backlight consisted of just 21 LEDs arranged in three rows. He ripped those out, put in the WS2812B strips, and taped the jumble of wires out of sight. After putting it back together, [Jim] was happy to see it worked, although the new strips were not as bright as the old ones, causing some uneven light bands. He solved this by adding a few more strips of LEDs. It took him a couple of hours to fix his TV, but by the end of it, he had a TV whose backlight could be adjusted to any color using the external color controllers — although we’re not too sure what good that would be.

Huge Interactive Crossword

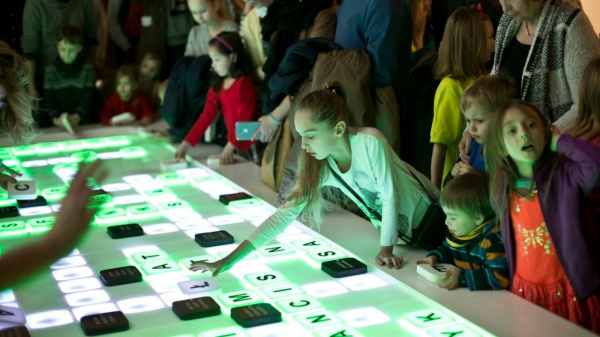
Give kids some responsible and challenging tasks, and you’d be surprised at the results. The “Anything Goes” exhibit at the National Museum in Warsaw was aimed as a museological and educational experiment. A group of 69 children aged 6–14 was divided into teams responsible for preparing the main temporary exhibition at the museum. Over six months, they worked on preparing the exhibition during weekly four-hour meetings. They prepared scripts, provided ideas for multimedia presentations, and curated almost 300 works for display. One of those was [Robert Mordzon]’s Giant Interactive Crossword.

The build is in two parts. The letter tiles, which have embedded RFID tags, obviously look like the easiest part of the build. The table, looking at the video (after the break), probably needed a lot more effort and labour. It is built in two halves to make construction easier. There are a 130 boxes that need to be filled in with the right letters to complete the crossword. Each box contains a bunch of electronics consisting of an Arduino Nano, a RFID Reader and a bunch of sixteen WS2812B LEDs, all assembled on a custom PCB. Do the math, and you’ll figure out that there’s 2080 LEDs, each capable of sipping 60 mA at full brightness. That’s a total current requirement of almost 125 amps at 5 V. Add in all the Arduino’s, and [Robert] needed a beefy 750 W of power, supplied via four switch mode power supplies.

Each Arduino Nano is a slave on the I²C bus. The I²C master is an Arduino Mega 2560, which in turn communicates with a computer over serial. When a box is empty, the LEDs are dim, when a wrong letter is placed, they turn Red, and when the right letter is placed, they turn Green. If a word gets completed, a special word animation is played. This information is also passed on to the computer, which then projects an animation related to the word on a giant wall screen. Upon the crossword getting completed, the table erupts in to a sound (via the computer) and light “disco” show and also reveals the main motto of this section of the exhibit – “Playing the Hero”.

Continue reading “Huge Interactive Crossword”

WS2812B LED Clones: Work Better Than Originals!

Commodity electronics manufacturing is a tough game. If you come out with a world-beating product, like WorldSemi did with the WS2812B addressable RGB LED “pixel”, you can be pretty sure that you’re going to be cloned in fairly short order. And we’re all used to horror stories of being sold clones instead of what was ordered. But what if the clones were actually an improvement?

[Gonazar] bought some strips of “WS2812” LEDs and prototyped a project. When stepping up to larger production, he thought he’d go directly to WorldSemi. Long story short, the cheaper LED modules that he’d previously bought weren’t from WorldSemi, but were actually SK6812 clones labelled as WS2812Bs. When he switched to the real thing, he discovered that they had some temperature and pressure sensitivities that the clones didn’t. The clones were better!

They weren’t even straight clones. It turns out that they have a much higher PWM frequency, resulting in less flicker at low brightnesses. The distributor came clean, saying that they swapped them out without note because they spoke the same protocol, but were a strict improvement.

Continue reading “WS2812B LED Clones: Work Better Than Originals!”

LED Strip Display Gives You Two Ways To See The Music

What to call this LED strip music visualizer is a puzzler. It lights up and pulsates in time with music similar to the light organs of 1970s psychedelia fame, but it’s more than that. Is it more like the Larson Scanner that graced the front of [David Hasselhoff]’s ride on Knight Rider? A little, but not quite.

description-croppedWhatever you decide to call this thing, it looks pretty cool, and [Scott Lawson] provides not one but two ways to build it. The business end is a simple strip of WS2812b addressable LEDs. It looks like the first incarnation of the project had an ESP8266 driving the LEDs in response to commands sent to it from a PC running the visualization code, written in Python. That setup keeps the computationally intensive visualization code separate from the display, but limits the display to 256 pixels and probably has to deal with network latency. The Raspberry Pi version both crunches the numbers and drives the display, but the Pi doesn’t have the oomph to run both the LEDs and the GUI, which is pretty interesting to look at by itself. The video below shows the different visualization modes available — we’re partial to the “energy effect” at the end.

Take your pick of hardware and throw a couple of these things together for your next rave. And if you need a little more background on the aforementioned Larson Scanner, we’ve got you covered.

Continue reading “LED Strip Display Gives You Two Ways To See The Music”

Jenkins Lights The Christmas Tree

Jenkins is open-source automation software that tries to automate parts of the software development process. When you submit code, for example, Jenkins will grab it, build the project with it and run any tests on it. If you have a large number of people submitting new code or data, Jenkins will wait and grab a bunch of the submissions to build. Depending on the size of the project, this can take a while, and if there’s a problem, you need to know quickly so that people aren’t waiting on a broken build. Email’s fine for this, but [dkt01] saw one of the desktop LED Christmas tree projects on Hackaday, and integrated it into his Jenkins system.

Like the other projects, WS2812b LED rings are used as the tree, and an Arduino Pro Mini runs the show, with an Ethernet LAN Module to communicate with the Python script that monitors the Jenkins build job. The Python script sends commands to the Arduino, which in turn lights up the LEDs. They light up green on a successful build and red if something fails, but during the build process, the LEDs show the current state of the build, tracking Jenkins’ progress as it builds.

Our previous Jenkins post used a big, red LED light that would light up if the build failed. [dkt01]’s build lets you know if the build is successful or has failed, but the build progress is a great addition.

Continue reading “Jenkins Lights The Christmas Tree”