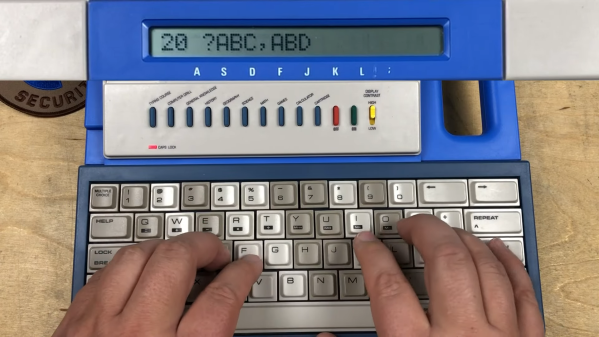
The VTech PreComputer 1000 is a rather ancient toy computer that was available in the distant misty past of 1988. It featured a keyboard and a variety of simple learning games, but does it also feature Microsoft BASIC? [Robin] of 8-Bit Show and Tell dove in to find out.
Officially, the PreComputer was programmable in a form of BASIC, referred to by VTech as PRE-BASIC V1.0. Given that the system has a Z80 CPU and there’s little information in the manual about this programming language, [Robin] was suspicious as to whether it was based on Microsoft BASIC-80. Thus, an examination was in order to figure out just how this BASIC implementation worked, and whether it shared anything with Microsoft’s own effort.
We won’t spoil the conclusions, but there are some strong commonalities between VTech’s BASIC and Microsoft’s version from this era. The variable names in particular are a strong hint as to what’s going on under the hood. The video is worth a watch for anyone that’s a fan of early microcomputer history, BASIC, or just the weird computer-like devices of yesteryear. We also love the idea that the PreComputer 1000 was actually quite a capable machine hiding behind a single-line LCD display.
The more accomplished 8-bit microcomputers of the late 1970s and early 1980s had a dedicated display chip, a CRT controller. This took care of all the jobs associated with driving a CRT display, generating the required timing and sequencing all the dots to make a raster. With a CRT controller on hand the CPU had plenty of time to do other work, but on some cheaper machines there was no CRT controller and the processor had to do all the work of assembling the display itself.
[Dr. Matt Regan] had a Sinclair ZX81 which relied on this technique, and he’s put up the first of what will become a series of videos offering a deep dive into this method of creating video. The key to its operation lies in very careful use of timing, with operations executed to keep a consistent number of clock cycles per dot on the display. He’s making a very low resolution version of the display in the first video, which he manages to do with only an EPROM and a couple of 74 logic chips alongside the Z80. We’re particularly impressed with the means of creating the sync pulses, using opcodes carefully chosen to do nothing of substance except setting a particular bit.
This method of assembling a display on such a relatively slow microprocessor has the drawback of no means of creating a grayscale, and of course it’s only available in glorious black and white. But it’s the system which gave a first experience of computing to millions, and for that we find the video fascinating. Take a look, below the break.
And now this video, which shows a wannabe Ninja going ham on a Cruise taxi stopped somewhere on the streets of San Francisco. It has to be said that the vandal doesn’t appear to be doing much damage with what looks like a mason’s hammer; except for the windshield and side glass and the driver-side mirror — superfluous for a self-driving car, one would think — the rest of the roof-mounted lidars and cameras seem to get off lightly. Either Cruise’s mechanical engineering is better than their software engineering, or the neo-Luddite lacks the upper body strength to do any serious damage. Or maybe both.
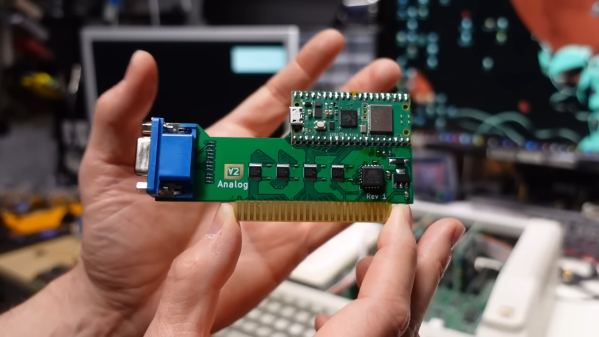
The Apple II was at the forefront of the home computer revolution when it came out in 1977. In its era, nobody really cared about hooking up the Apple II to a VGA monitor, but these days, it’s far easier than sourcing an original monitor. The V2 Analog is a useful tool that will let you do just that, plus some other neat tricks, besides.
As demonstrated on Youtube by [Adrian’s Digital Basement], The V2 Analog is basically a slot-in video card for the Apple II, II+, and IIe. It’s based upon the AppleII-VGA, which uses a Raspberry Pi Pico to snoop the 6502 CPU bus and copy the video memory. It then outputs a high-quality VGA signal that is far nicer than the usual composite output options.
As a bonus, the V2 Analog can be reconfigured to run as an emulated AppliCard Z80 expansion card instead. This card was originally intended to allow Apple II users to run CP/M applications. The V2 Analog does a great job in this role, though it bears noting it can’t handle VGA output and Z80 emulation at the same time.
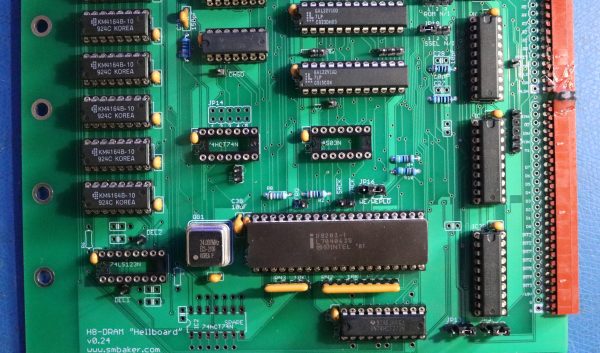
Ask anyone to name a first-generation home computer from the 1970s, and they’ll probably mention the likes of the Altair 8800 and IMSAI 8080. But those iconic machines weren’t the only options available to hobbyists back in the day: Heathkit, famous for its extensive range of electronic devices sold in kit form, jumped on the microcomputer bandwagon with their H8. Though it always remained a bit of an obscure machine, several dedicated enthusiasts kept making H8-compatible hardware and software long after the computer itself went out of production. That tradition continues in 2023, with [Scott M. Baker] producing a brand-new DRAM board that’s compatible with any version of the H8.
Although the Heathkit H8 was designed around the Intel 8080 processor, it could also be equipped with a Z80. [Scott] had built an 8085 based CPU board as well, meaning that any other hardware he developed for the H8 had to support these three processors. For something as timing-critical as a memory board, this turned out to be way harder than he’d expected.
First off, he had already made things difficult for himself by choosing DRAM rather than the simpler SRAM. Whereas SRAM chips can be more or less directly hooked up to the CPU’s address and data buses, a DRAM setup needs refresh circuitry to ensure the data doesn’t leak out of the chips’ internal capacitors. [Scott] decided to use the classic D8203 DRAM controller to do that for him — a solution that was pretty common back in the day.
Getting the timing right for all signals between the CPU and the DRAM controller was not at all trivial, however. The main problem was with two signals, called /SACK and /XACK, which were used to pause memory access during refresh cycles. Depending on which CPU was on the other side, these signals apparently had to be combined with other signals, stored in a flip-flop or delayed by a cycle or two in order to align with the processor’s internal logic. None of this seemed to work reliably, so [Scott] looked elsewhere for inspiration.
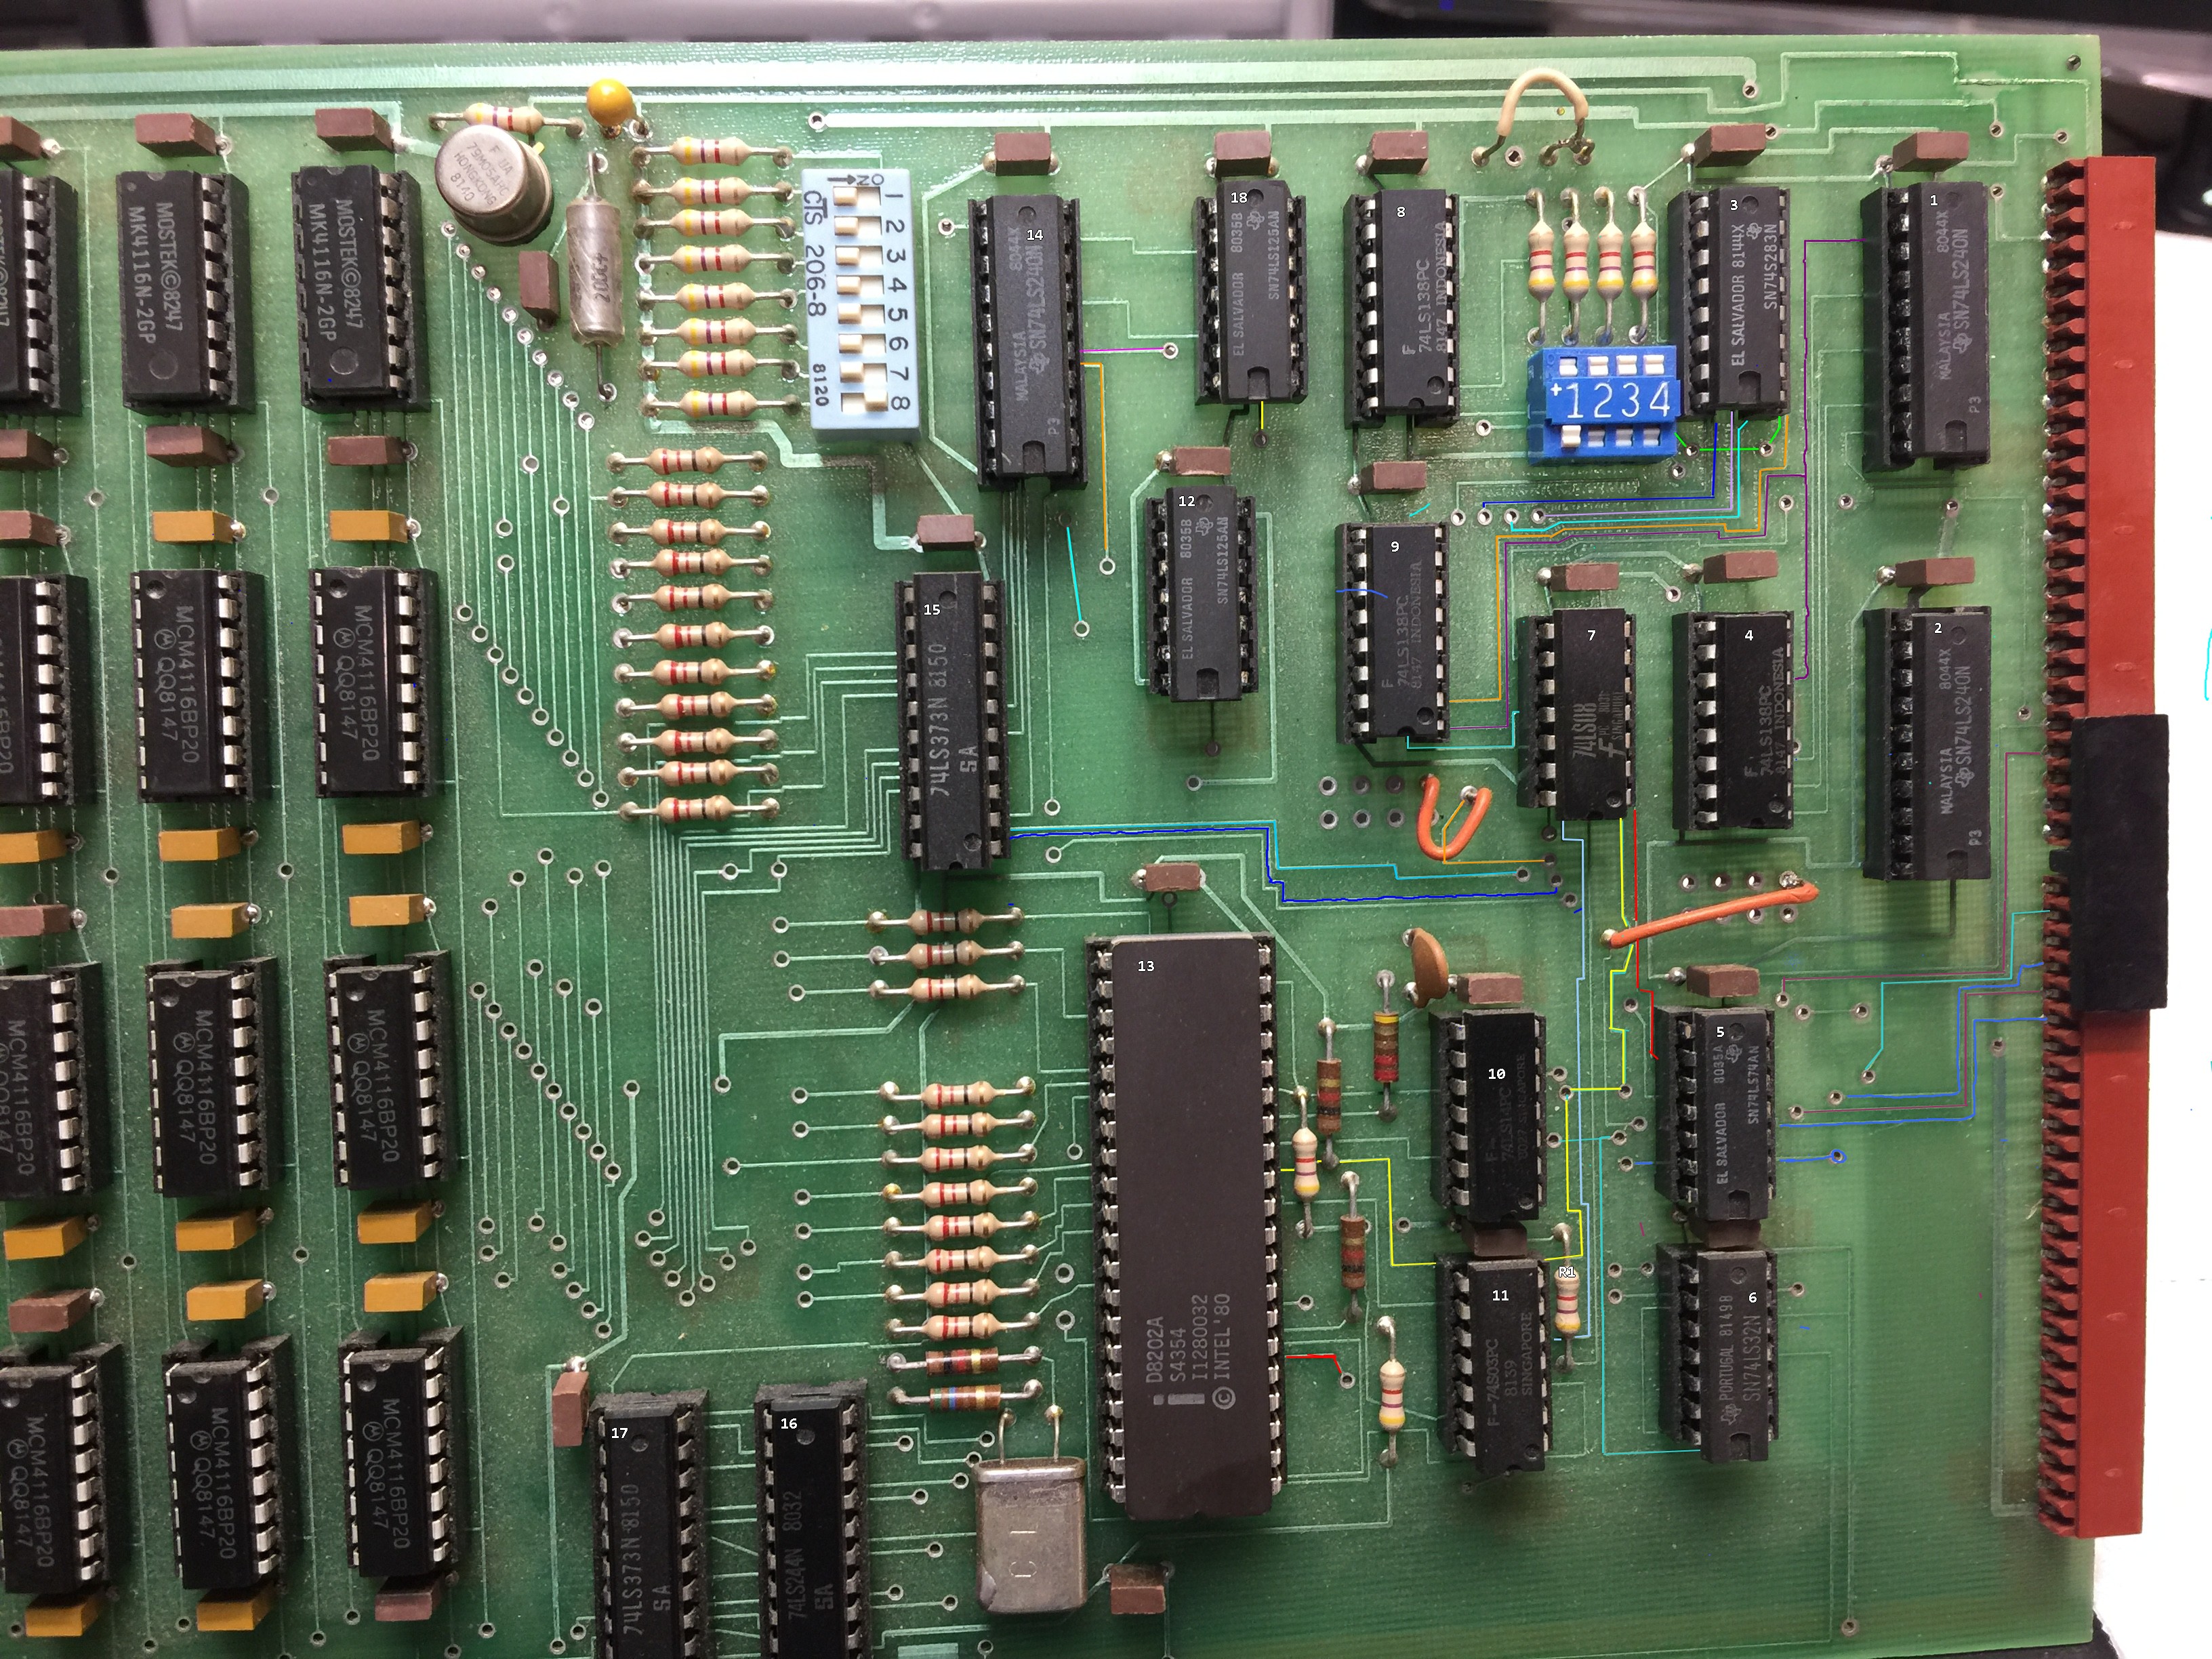
Luckily, traces are easy to follow on a two-layer board.
He found this on eBay, where a few vintage H8-compatible DRAM boards were for sale. Although [Scott] didn’t manage to win the auction, the eventual buyer was kind enough to snap some high-resolution pictures of the board which enabled him to reverse-engineer the circuit. The board used the similar D8202 DRAM controller and came with logic that generated the proper signals to interface with the 8080 and 8085 CPUs. For the Z80, [Scott] dived into the documentation for Heathkit’s Z80 option and found a schematic with a few logic gates that would satisfy the Zilog chip as well.
[Scott] combined both of these solutions on a beautiful 1980s-style printed circuit board, with a bunch of 7400 series logic gates and even two GAL22V10 programmable logic devices. With full documentation and Gerber files available on the project’s GitHub page, Heathkit H8 owners can now get their own brand-new memory board — in kit form, as a Heathkit should be.
If you buy WS2812s under the Adafruit NeoPixel brand, you’ll receive the advice that “An 8 MHz processor” is required to drive them. “Challenge Accepted!“, says [ShielaDixon], and proceeded to first drive a set from the 7.3 MHz Z80 in an RC2014 retrocomputer, and then repeat the feat from a 3.5 MHz Sinclair ZX Spectrum.
The demos in the videos below the break are all programmed in BASIC, but she quickly reveals that they call a Z80 assembler library which does all the heavy lifting. There’s no microcontroller behind the scenes, save for some glue logic for address decoding, the Z80 is doing all the work. They’re all implemented on a pair of RC2014 extension cards, a bus that has become something of a standard for this type of retrocomputer project.
So the ubiquitous LEDs can be addressed from some surprisingly low-powered silicon, showing that while it might be long in the tooth the Z80 can still do things alongside the new kids. For those of us who had the Sinclair machines back in the day it’s particularly pleasing to see boundaries still being pushed at, as for example in when a Z80 was (almost) persuaded to have a protected mode.
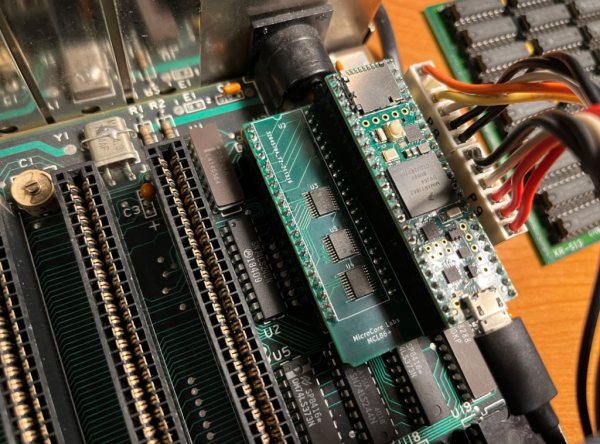
[Ted Fried] wrote in with not one but two (2!) new drop-in replacements for widespread old-school CPUs: the Zilog Z80 and the Intel 8088. Both of the “chips” run in cycle-accurate mode as well as in a super turbo mode, which can run so fast that you’ll need to use the Teensy’s internal RAM just to keep up.
Both of these designs have a hardware and software component. The PCBs basically adapt the pinout of the Teensy to the target CPU, with a bunch of 74VLC latches on board to do the voltage level conversion. The rest is a matter of emulating all of the instructions on the Teensy, which is more than fast enough to keep up. If this sounds familiar to you, it’s basically the same approach that [Ted] used last year to bring us his replacement for the 6502 found in the Apple ][ and Commodore 64.
Why would you want an emulated CPU when the originals are still available? [Ted] inherited a busted Osborne I, an ancient Z80 luggable. By replacing the original Z80 with his emulation, he could diagnose the entire system, which led him to discover some bad DRAM chips and get the old beast running again. Or maybe you just want to play IBM XT games at insane speeds?
If any of this tickles your fancy, head over to [Ted]’s blog, microcore labs, and follow along. Although now that he’s covered most of the famous retrocomputers, we have to ask ourselves what processor is going to be next?