Reverse Engineer Your Robot Lawnmower

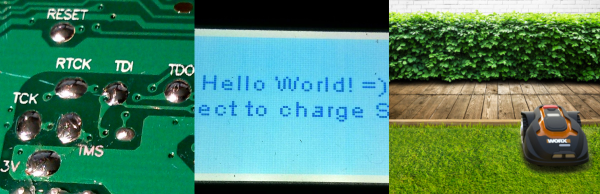
Your home is your castle, and you are king or queen of all you survey. You’ve built your own home-automation system from scratch. Why would you possibly settle for the stock firmware in your robotic lawnmower? [Daniel Wiegert] wouldn’t either, so in Project Landlord he has started to reverse-engineer it.

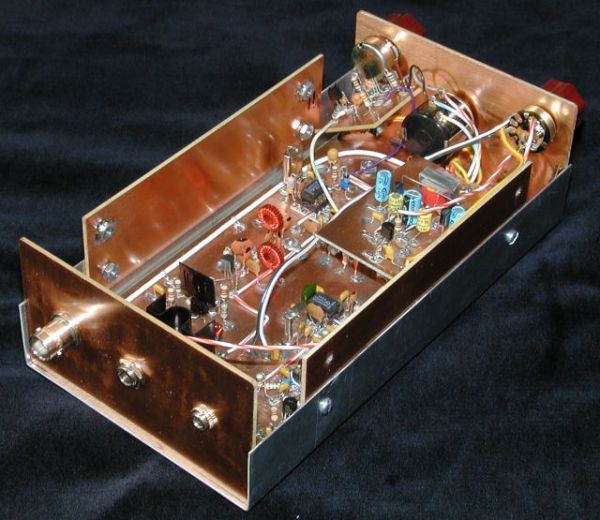
You can hardly blame him. The Worx Landroid‘s controller board uses an NXP LPC1768 ARM Cortex-M3, and the debug pins are labelled on the backside. The manufacturer didn’t protect the flash memory. It’s just begging to have its firmware dumped. So far, [Daniel] has managed to both brick and unbrick the device, and has completely mapped the controller’s pinout, so he’s on his way to complete control.

Right now, he’s got a working proof-of-concept firmware on his GitHub that’s able to drive the machine around a little bit and set the brakes. It’s running FreeRTOS, and [Daniel] is looking for other people to get in on the project. He’s done the hard initial work, so get in there and reap the rewards! Just don’t neglect to remove the blade before custom firmware.

Will custom firmware in a robotic lawnmower change the world? Probably not. But it is awesome, and will certainly make a difference in the lives of people whose robot mowers continually get stuck behind the hydrangeas.

The HackadayPrize2016 is Sponsored by:

Infrared Detector Selects Over A Wide Range

You can classify infrared light into three broad ranges: short wave, medium wave, and long wave. Traditionally, sensors concentrate on one or two bands, and each band has its own purpose. Short wave IR, for example, produces images similar to visible light images. Long wave is good for thermal imaging.

Researchers have announced a new detector that, by adjusting a bias, can detect all three bands using a simple approach that stacks different absorption layers over a semiconductor substrate. The device only requires two terminals and is very efficient, although the efficiency varies based on the band.

We’ve covered infrared sensing before. We’ve even seen DSLRs hacked into IR sensors. This new research might be a bit much to duplicate in your garage. After all, it requires tellurium doped gallium antimonide substrates and sophisticated processing equipment. However, this research will probably lead to practical devices that will find their way into projects before too long.

What’s The Weather Like For The Next Six Hours?

The magic glowing orb that tells the future has been a popular thing to make ever since we realized we had the technology to bring it out of the fortune teller’s tent. We really like [jarek319]’s interpretation of the concept.

Sitting mystically above his umbrella stand, with a single black cord providing the needed pixies for fortune telling, a white cube plays an animation simulating the weather outside for the next six hours. If he sees falling drops, he knows to grab an umbrella before leaving the house. If he sees a thunderstorm, he knows to get the umbrella with the fiberglass core in order to prevent an intimate repeat of Mr. Franklin’s early work.
Continue reading “What’s The Weather Like For The Next Six Hours?”

Your Quadcopter Has Three Propellers Too Many

While studying failure modes for quadcopters, and how to get them safely to the ground with less than a full quad of propellers, a group of researchers at the Institute for Dynamic Systems and Control at ETH Zurich came up with a great idea: a mode of flight that’s like the controlled spinning descent of a maple seed.

The Monospinner runs on the absolute minimum number of moving parts. Namely, one. Even a normal helicopter has a swash plate for adjustable blade pitch, and a tail rotor to keep it from spinning. Give up the idea that you want to keep it from spinning, and you can achieve controlled flight with a lot less. Well, one motor and a whole lot of math and simulation.

The Monospinner is carefully weighted so that it’s as stable as possible while spinning, but so far it’s unable to spin itself up from a standstill. In initial tests, they attached it to a pivot to help. The best part of the video (below) is when the researcher throws it, spinning, into the air and it eventually stabilizes. Very cool.

Continue reading “Your Quadcopter Has Three Propellers Too Many”

JIT Learning Using Expert Systems

Chris Gammell is a guy that should need no introduction around these parts. He’s a co-host on The Amp Hour, and the guy behind Contextual Electronics, a fabulous introduction to electronics and one of the best ways to learn KiCad. If you want to talk about the pedagogy of electronics, this is the guy you want.

Chris’ talk at the Hackaday | Belgrade conference was on just that – the pedagogy of electronics. Generally, there are two ways to learn how to blink an LED. The first, the bottom-up model taught in every university, is to first learn Ohm’s law, resistance, current, voltage, solve hundreds of resistor network problems, and eventually get around to the ‘electrons and holes’ description of a semiconductor. The simplest semiconductor is a diode, and sometime in the sophomore or junior year, the student will successfully blink a LED.

The second, top-down method is much simpler. Just wire up a battery, resistor, switch, and LED to a breadboard. This is the top-down model of electronics design; you don’t need to know everything to get it to work. You don’t need to do it with a 555, and you certainly don’t have to derive Maxwell’s equations to make something glow. Chris is a big proponent of the top-down model of learning, and his Belgrade talk is all about the virtues of not knowing everything.

Continue reading “JIT Learning Using Expert Systems”

Getting Ugly, Dead Bugs, And Going To Manhattan

Back in the 1980s I was a budding electronics geek working in a TV repair shop. I spent most of my time lugging TVs to and from customers, but I did get a little bench time in. By then new TVs were entirely solid-state and built on single PC boards, but every once in a while we’d get an old-timer in with a classic hand-wired tube chassis. I recall turning them over, seeing all the caps and resistors soldered between terminal strips bolted to the aluminum chassis and wondering how it could all possibly work. It all looked so chaotic and unkempt compared to the sleek traces and neat machine-inserted components on a spanking new 19″ Zenith with the System 3 chassis. In a word, the old chassis was just – ugly.

Looking back, I probably shouldn’t have been so judgmental. Despite the decades of progress in PCB design and the democratization of board production thanks to KiCad, OSH Park, and the like, it turns out there’s a lot to be said for ugly methods of circuit construction.

Continue reading “Getting Ugly, Dead Bugs, And Going To Manhattan”

Creating Full Color Images On Thermoformed Parts

In a race to produce the cheapest and most efficient full-color 3D object, we think Disney’s Research facility (ETH Zurich and the Interactive Geometry Lab) may have found the key. Combining hydrographic printing techniques with plastic thermoforming.

You might remember our article last year on creating photorealistic images on 3D objects using a technique called hydrographic printing, where essentially you print a flattened 3D image using a regular printer on special paper to transfer it to a 3D object in a bath of water. This is basically the same, but instead of using the hydrographic printing technique, they’ve combined the flattened image transfer with thermoforming — which seems like an obvious solution!

Continue reading “Creating Full Color Images On Thermoformed Parts”