ATtiny85 Snake Game Is A Circuit Sandwich

If there’s any looming, unwritten rule of learning a programming language, it states that one must break in the syntax by printing Hello, World! in some form or another. If any such rule exists for game programming on a new microcontroller, then it is certainly that thou shalt implement Snake.
This is [__cultsauce__]’s first foray away from Arduinoville, and although they did use one to program the ATtiny85, they learned a lot along the way.

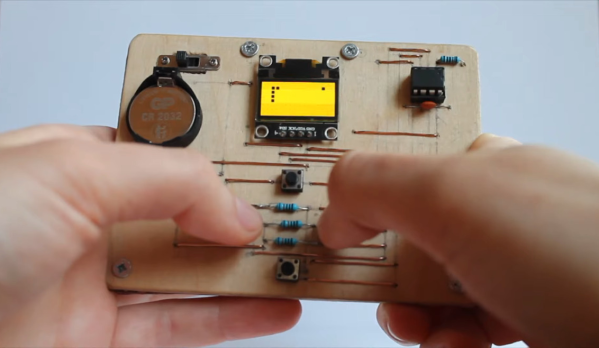
It doesn’t take much to conjure Snake with an ’85 — mostly you need a screen to play it on (an OLED in this case), some buttons to direct the snake toward the food dot, a handful of passives, and a power source.

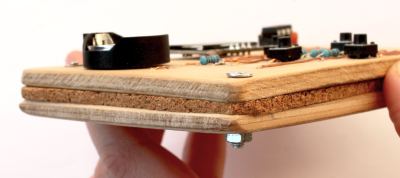
[__cultsauce__] started by programming the microcontroller and then tested everything on a breadboard, both of which are admirable actions. Then it was time to make this plywood and cork sandwich, which gives the point-to-point solder joints some breathing room and keeps them from getting crushed. Be sure to check it out in action after the break, and grab the files from GitHub if you want to charm your own ‘tiny Snake.

There’s a ton you can do with this miniature microcontroller, and that includes machine learning.

Continue reading “ATtiny85 Snake Game Is A Circuit Sandwich”

Coin Cell Eliminator Does More Than Save Batteries

Coin cells are useful things that allow us to run small electronic devices off a tiny power source. However, they don’t have a lot of capacity, and they can run out pretty quickly if you’re hitting them hard when developing a project. Thankfully, [bobricius] has just the tool to help.

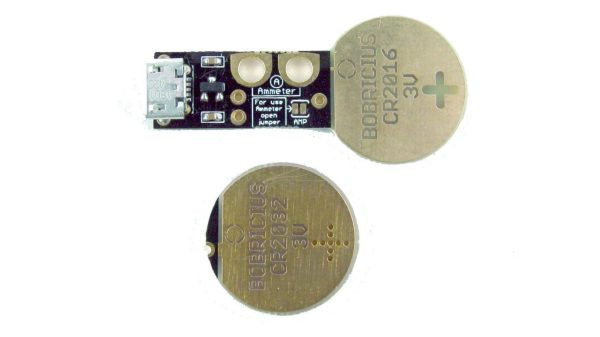
The device is simple – it’s a PCB sized just so to fit into a slot for a CR2016 or CR2032 coin cell. The standard board fits a CR2016 slot thanks to the thickness of the PCB, and a shim PCB can be used to allow the device to be used in a CR2032-sized slot instead.

It’s powered via a Micro USB connector, and has a small regulator on board to step down the 5 V supply to the requisite 3 V expected from a typical coin cell. [bobricius] also gave the device a neat additional feature – a pair of pads for easy attachment of multimeter current probes. Simply open the jumper on the board, hook up a pair of leads, and it’s easy to measure the current being drawn from the ersatz coin cell.

If you’re regularly developing low-power devices that use coin cells, this tool is one that could save a lot of mucking about in the lab. [bobricius] has them available on Tindie for those eager to get their hands on one. We’ve seen similar designs before too, albeit pursued in a different way!

Weather Station Dumps CR2032 Cells, Gains 18650

Despite the fact that we’re rapidly approaching the year 2022, there are still an incredible number of gadgets out there that you’re expected to power with disposable batteries. Sure you can buy rechargeable stand-ins that come in the various shapes and sizes of the traditional alkaline cells, but that’s a stopgap at best. For some, if a new gadget doesn’t feature an internal Li-ion battery and standardized USB charging, it’s a non-starter.

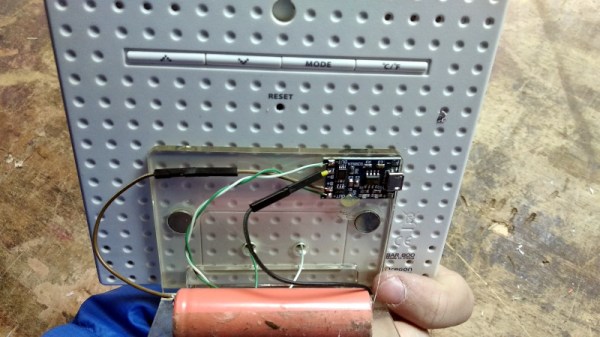
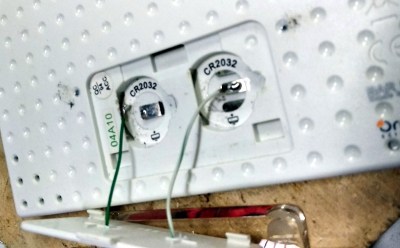
[Danilo Larizza] is one of those people. Bothered by the fact that his Oregon Scientific weather station required a pair of CR2032 coin cells, he set out to replace them with an integrated rechargeable solution. The conversion ending up being easier to implement than he initially expected, and by his calculations, his solution should keep the unit up and running for nearly 40 days before needing to be topped off with a standard USB charger.

Wiring in the new battery.

The first step was determining how much power it actually took to run the weather station. Although the two CR2032 cells were wired in series, and therefore providing a nominal 6 V, he determined through experimentation with a bench power supply that it would run on as little as 3.2 volts. This coincides nicely with the voltage range for a single 18650 cell, and meant he didn’t need to add a boost converter into the mix. He notes the weather station does flash a “Low Battery” warning most of the time now, but that seems a fair price to pay.

Confident in the knowledge that the weather station could happily run with an 18650 cell connected in place of the original CR2032s, all [Danilo] needed to do was figure out a way to charge the battery up from time to time. To that end, he reached for a common TP4056 module. This handy little board is a great match for 18650 cells, and is so cheap that there’s really no excuse not to  have a few of them kicking around your parts bin. You never know when you might need to teach an old gadget new tricks.

A CR2032 Battery Eliminator

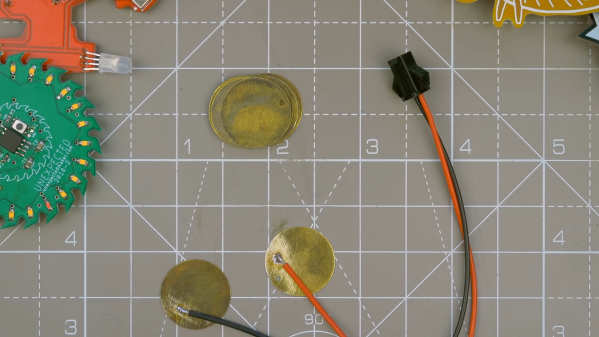
Back when batteries were expensive and low-capacity, it was common to buy a “battery eliminator” that could substitute for common battery configurations. [David Watts] must remember those, because he decided to make an eliminator for all the CR2032 battery-driven gear he has. He got some brass blanks about the size of the battery, and you can see the results on the video below.

His first attempt seemed to work fairly well, a sandwich of two brass disks, each with a Velcro spacer and wires soldered on to connect to a power supply. The fake battery looks as though it might be a little thick, but it did work once the battery holder was persuaded to accept it.

Continue reading “A CR2032 Battery Eliminator”

Tiny Two-Digit Thermometer Has Long Battery Life

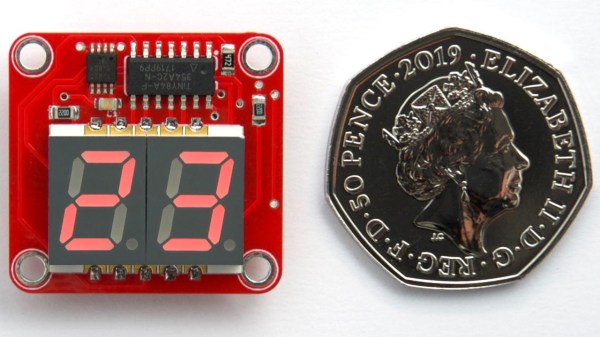
Like most of his work, this tiny two-digit thermometer shows that [David Johnson-Davies] has a knack for projects that make efficient use of hardware. No pin is left unused between the DS18B20 temperature sensor, the surface mount seven-segment LED displays, and the ATtiny84 driving it all. With the temperature flashing every 24 seconds and the unit spending the rest of the time in a deep sleep, a good CR2032 coin cell should power the device for nearly a year. The board itself measures only about an inch square.

You may think that a display that flashes only once every 24 seconds might be difficult to actually read in practice, and you’d be right. [David] found that it was indeed impractical to watch the display, waiting an unknown amount of time to read some briefly-flashed surprise numbers. To solve this problem, the decimal points flash shortly before the temperature appears. This countdown alerts the viewer to an incoming display, at the cost of a virtually negligible increase to the current consumption.
[David]’s project write-up explains how everything functions. He also steps through the different parts of the source code to explain how everything works, including the low power mode. The GitHub repository holds all the source files, and the board can also be ordered direct from OSH Park via their handy shared projects feature.

Low power consumption adds complexity to projects, but the payoffs can easily be worth the time spent implementing them. We covered a detailed look into low power WiFi microcontrollers that is still relevant, and projects like this weather station demonstrate practical low power design work.

Jumbo LEDs Make For A Handy ATtiny Beacon

Inspiration can come from anywhere. Sometimes it’s just a matter of seeing an interesting part that you want to fiddle around with badly enough that you end up developing a whole idea, and potentially product, around it. That’s how [Bobricius] found himself creating this very slick little warning beacon, and looking at the end result, we think he made the right decision.

The Kingbright DLC-6SRD “jumbo” LED is actually six individual emitters built into a plastic diffuser. Interfacing with the device is simple enough; each LED has its normal anode and cathode leg, all you need to do is power them up. What [Bobricius] has created is a simple PCB design that the DLC-6SRD can plug right into, complete with a 2032 coin cell holder on the opposite side.

Of course, just lighting up all six elements at the same time wouldn’t be very interesting. [Bobricius] is controlling them individually right off of the digital pins of an ATtiny10 with the help of some Charlieplexing. This makes all kinds of interesting patterns possible, and as demonstrated in the video after the break, the current iteration of the project uses some very simple code to “rotate” the LED as if it was the flasher on an emergency vehicle.

The addition of a few blinking LEDs can make a world of difference in terms of nighttime visibility, so a cheap stick-on module that adds such a distinctive light pattern could be a very important safety device. It could also be useful for UAVs, following the FAA’s new rules which would mandate anti-collision lights for night flying.

Continue reading “Jumbo LEDs Make For A Handy ATtiny Beacon”

Be Ready To Roll With Universal Electronic Dice

There are applications you can download for your smartphone that can “roll” an arbitrary number of dice with whatever number of sides you could possibly want. It’s faster and easier than throwing physical dice around, and you don’t have to worry about any of them rolling under the couch. No matter how you look at it, it’s really a task better performed by software than hardware. All that being said, there’s something undeniably appealing about the physical aspect of die rolling when playing a game.

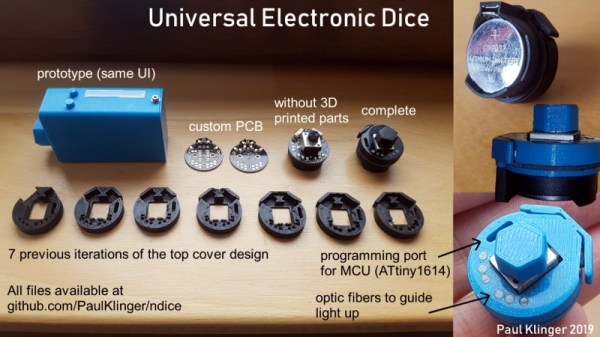
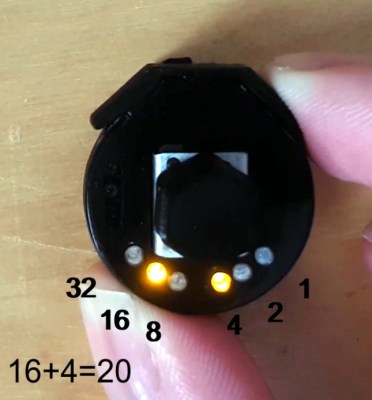
Luckily, [Paul Klinger] thinks he has the solution to the problem. His design combines the flexibility of software number generation with the small form factor of a physical die. The end result is a tiny gadget that can emulate anything from a 2 to 64 sided die with just 6 LEDs while remaining as easy to operate as possible. No need to tap on your smartphone screen with Cheetos-stained hands when you’ve got to make an intelligence check, just squeeze the Universal Electronic Die and off you go. Granted you’ll need to do some binary math in your head, but if you’re the kind of person playing D&D with DIY electronic dice, we think you’ll probably be able to manage.

The 3D printed case that [Paul] came up with for his digital die is very clever, though it did take him awhile to nail it down. As shown in the video after the break, it took seven iterations before he got the various features such as the integrated button “flaps” right. There’s also a printed knob to go on the central potentiometer, to make it easier to select how many sides your virtual die will have.

In terms of the electronics, the design is actually quite simple. All that lives on the custom PCB is a ATtiny1614 microcontroller, the aforementioned LEDs, and a couple of passive components. A CR2032 coin cell powers the whole operation, and it should provide enough juice for plenty of games as it’s only turned on when the user is actively “rolling”.

We’ve seen a number of very impressive electronic dice projects over the years, and it doesn’t look like the trend is slowing down anytime soon. Of course, if you absolutely must hear those physical dice rolling, we can help you with that too.