Reverse-Engineered GBA Board Could Come In Handy

Retro gear is beloved, both for what it can do, and what it reminds us of. Nostalgia is a powerful thing, after all. But then, so is corrosion — and the latter has a habit of killing hardware and driving up prices for remaining units. Thankfully, hard workers like [NatalieTheNerd] are out there, creating reproduction PCBs to keep old hardware alive. Her Game Boy Advance (GBA) reproduction PCB is a great tool for the restoration and modding communities.

The board was reverse engineered, with [Natalie] sharing various scans and schematics of the GBA’s motherboard on the Modded Game Boy Club website. The project recreates the AGB-CPU-03 version of the GBA, and is designed to be produced on a 1 mm board with an ENIG process. You can combine the PCB with some salvaged parts and a new shell and build yourself a remarkably fresh GBA, if you so desire.

Beyond it’s intended use, [Natalie] points out the board outlines could be used as a basis for RetroPie or ESP32 projects that fit into a standard Game Boy Advance form factor. We love that idea. We’ve seen [Natalie’s] work before too, in the form of this neat little macropad. Nifty as always!

A Game Boy Advance – Downgraded!

We feature a large number of game console mods here, because enhancing the experience of using a classic machine often involves some really clever work. But here’s one that’s a bit different, instead of upgrading his Game Boy Advance, [Wenting Zhang] has downgraded it from a colour screen to a monochrome LCD. Take a look at the video below the break.

One might ask why this would be necessary, given that there are plenty of backlit colour LCD upgrades already for the GBA, but perhaps people who played the original might understand that it’s about improving the viewability over the rather poor-quality colour LCD original.

Interesting too is the choice of display controller. Where it might be expected to find an FPGA, instead there’s an PR2040. He goes into detail about its programming, and we hope it might inspire any others looking at screen transplants. Meanwhile if the name [Wenting Zhang] means anything to you, it should be for his other work with mono LCDs.

Continue reading “A Game Boy Advance – Downgraded!”

A Primer For The Homebrew Game Boy Advance Scene

As video game systems pass into antiquity, some of them turn out to make excellent platforms for homebrew gaming. Not only does modern technology make it easier to interact with systems that are now comparatively underpowered and simpler, but the documentation available for older systems is often readily available as well, giving the community lots of options for exploration and creativity. The Game Boy Advance is becoming a popular platform for these sorts of independent game development, and this video shows exactly how you can get started too.

This tutorial starts with some explanation of how the GBA works. It offered developers several modes for the display, so this is the first choice a programmer must make when designing the game. From there it has a brief explanation of how to compile programs for the GBA and execute them, then it dives into actually writing the games themselves. There are a few examples that [3DSage] demonstrates here including examples for checking the operation of the code and hardware, some simple games, and also a detailed explanation the framebuffers and other hardware and software available when developing games for this console.

While the video is only 10 minutes long, we recommend watching it at three-quarters or half speed. It’s incredibly information-dense and anyone following along will likely need to pause several times. That being said, it’s an excellent primer for developing games for this platform and in general, especially since emulators are readily available so the original hardware isn’t needed. If you’d like to build something from an even more bygone era than the early 2000s, though, take a look at this tutorial for developing games on arcade cabinets.

Continue reading “A Primer For The Homebrew Game Boy Advance Scene”

Six GameBoy Pokemon games

Bridging Game Worlds With The ‘Impossible’ Pokémon Trade

Transferring hard-earned Pokémon out of the second generation GameBoy game worlds into the ‘Advance Era’ cartridges (and vice versa) has never been officially supported by Nintendo, however [Goppier] has made these illicit trades slightly easier for budding Pokémon trainers by way of a custom PCB and a healthy dose of reverse engineering.

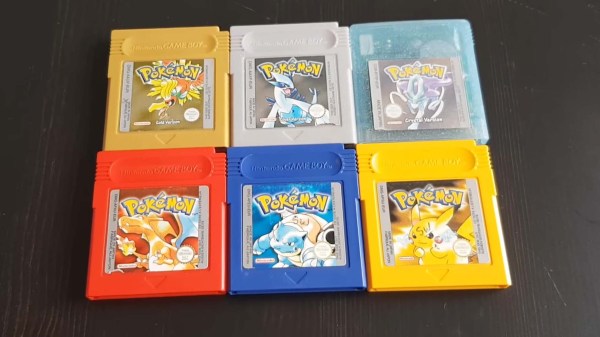
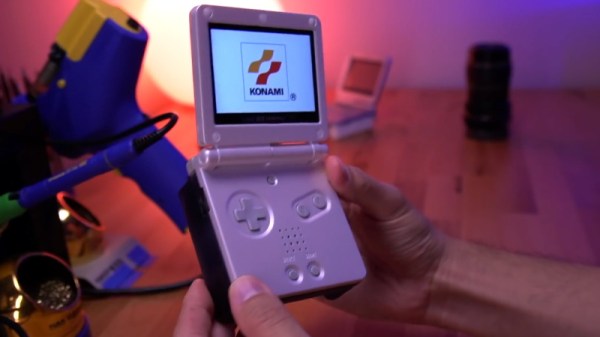
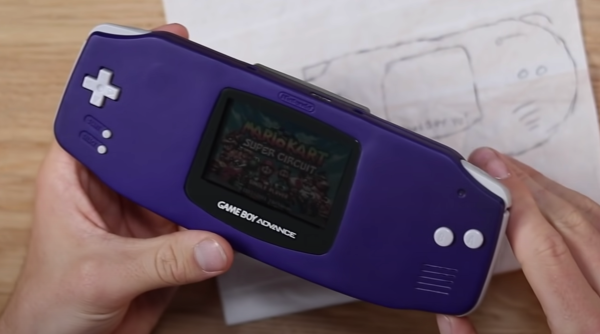
Changes to the data structure between Generation II on the original GameBoy (Pokémon Gold, Silver and Crystal) and Generation III on the GameBoy Advance (Pokémon Ruby, Sapphire, FireRed, LeafGreen and Emerald) meant that trades between these cartridges was never a possibility – at least not through any legitimate means. In contrast, Pokémon trades are possible between the first and second generation games, as well as from Generation III and beyond, leaving the leap from Gen II to Gen III as an obvious missing link.

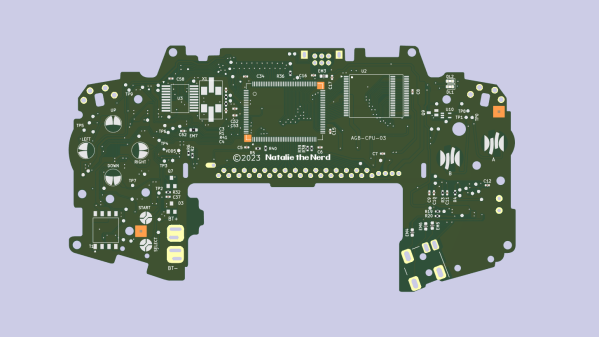
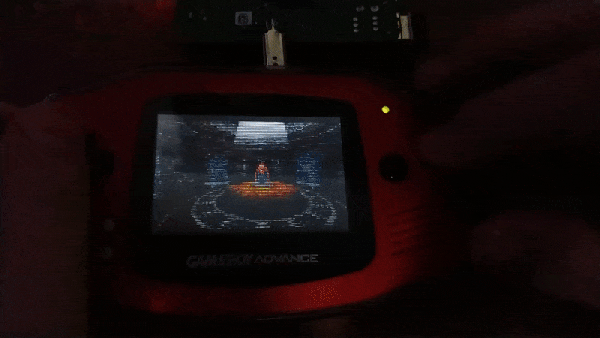
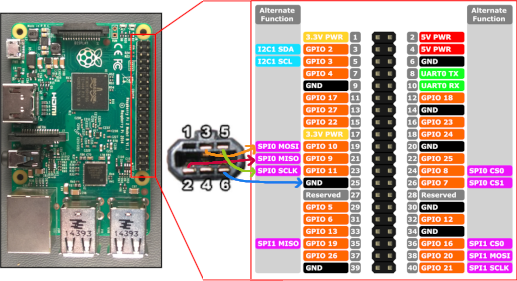
Modern players have already overcome this limitation by dumping the cartridge save files onto a PC, at which point any Pokémon could be added or subtracted from the save. Thus, this method relies on self-control as well as the right hardware. [Goppier]’s solution is arguably far more elegant, and requires very little extra hardware. A simple PCB with ports for older and newer GameBoy Game Link Cables is the physical bridge between the generations. An ARM Cortex microcontroller sits between these connections and translates the game data between the old and the new.

The microcontroller is required to translate the data structure between the generations, and seems fit for purpose. Not only does the Pokémon data require conversion, but a few other hacks are needed before the two generations will talk nicely to each other. Pokémon on the GameBoy Advance brought in new features such as representing player movement in the trading rooms (i.e. you can see the other player moving on your screen), which also had to be addressed.

The concern over the legitimacy of trades within the Pokémon community is a curious, yet understandable, byproduct of the multiplayer experience. As an example, modern players have to be wary of ‘hacked’ Pokémon, which can often introduce glitches into their game world following a trade. Apart from these issues, some Pokémon players simply desire genuine Pokémon as part of fostering a fair and enjoyable gaming experience.

This literal bridge between Gen II and Gen III game worlds brings the community tantalizingly close to a ‘legitimate’ means of transferring their Pokémon out of ancient cartridges and into modern games. Could Nintendo one day officially sanction Gen II to Gen III trades with a similar device? Crazier things have happened.

We love our GameBoy hacks here on Hackaday, so why not check out this project that replaces the battery-backed SRAM in your GameBoy games with FRAM?

Continue reading “Bridging Game Worlds With The ‘Impossible’ Pokémon Trade”

THICC GBA SP Mod Gets Easy Install Ahead Of Release

Back in August we covered a unique modification for the Nintendo Game Boy Advance SP which replaced the handheld’s rear panel with an expanded version that had enough internal volume for an upgraded battery, a Bluetooth audio transmitter, and support for both Qi wireless and USB-C charging. The downside was that getting the 10 mm 3D printed “backpack” installed wasn’t exactly the most user-friendly operation.

But today we’re happy to report that the dream team behind the so-called THICC BOI SP have not only made some huge improvements to the mod, but that they intend to release it as a commercial kit in the next few months. The trick to making this considerable upgrade a bit more forgiving is the use of a bespoke flat flex cable that easily allows the user to solder up all the necessary test points and connections, as well as a custom PCB that pulls together all the hardware required.

In the video below, [Tito] of Macho Nacho Productions goes over the latest version of the mod he’s been working on with [Kyle] and [Helder], and provides a complete step-by-step installation tutorial to give viewers an idea of what they’ll be in for once the kit goes on sale. While it’s still a fairly involved modification, the new design is surprisingly approachable. As we’ve seen with previous console modifications, the use of flat flex technology means the installation shouldn’t pose much of a challenge for anyone with soldering experience.

The flat flex cable allows for an exceptionally clean install.

Some may be put off by the fact that the replacement rear panel is even thicker this time around, but hopefully the unprecedented runtime made possible by the monstrous 4,500 mAh LiPo battery pack hiding inside the retrofit unit will help ease any discomfort (physical or otherwise) you may have from carrying around the chunkier case. Even with power-hungry accouterments like an aftermarket IPS display and a flash cart, the new battery can keep your SP running for nearly 20 hours. If you still haven’t beaten Metroid: Zero Mission by then, it’s time to take a break and reflect on your life anyway.

According to [Tito], the logistical challenges and considerable upfront costs involved in getting the new rear panels injection molded in ABS is the major roadblock holding the release of the kit back right now. The current prototypes, which appear to have been 3D printed in resin, simply don’t match the look and feel of the GBA SP’s original case well enough to be a viable option. A crowd funding campaign should get them over that initial hump, and we’ll be keeping an eye out for more updates as things move along towards production.

The previous version of this mod was impressive enough as a one-off project, but we’re excited to see the team taking the next steps towards making this compelling evolution of the GBA more widely available. It’s a fantastic example of what’s possible for small teams, or even individuals, when you leverage all the tools in the modern hardware hacking arsenal.

Continue reading “THICC GBA SP Mod Gets Easy Install Ahead Of Release”

two hands holding a wider version of a purple gameboy advance

The Stretch Limo Of Game Boys

Here at Hackaday, we see all sorts of projects, some born out of a deep necessity or itch that couldn’t be scratched. Others are born out of a world of “why not” and it is perhaps these projects that put the biggest smile on our faces. The WideBoy Advance by [Elliot] of Retro Future is one such project.

Starting with a working Game Boy Advance and a donor one with a busted motherboard, the frankenstein-ification could start. A Dremel split one case in half and removed the sides on another, while trusty old car body filler helps fill and smooth the gaps. A particularly clever trick is to use the Dremel to create channels for the filler to adhere easier. Several areas had to be built up with filler and glued in bits of plastic as a base. As you can see in the video below, the countless hours of sanding, priming, sanding, and more priming led to a beautifully smooth finish. The choice of purple paint really sells the impression of a factory-fresh Game Boy Advance.

The working circuit board was desoldered and the donor board was cut into pieces to fit in the extended sides. Using some magnet wire, connections were bridged over to the original motherboard via the test points on the PCB. [Elliot] didn’t opt to swap the screen to an IPS display or add a backlight. These quality of life improvements are nice, but a dead giveaway that Nintendo didn’t make it. The goal is to get the user to wonder, even if just for a second, what if Nintendo just happened to make this wide one-off handheld console.

[Elliot] made it simply because he found it interesting and enjoyed the form of the thing he made. Is it a hack? Is it art? Probably a little bit of both. This isn’t his first modified Nintendo handheld either. He previously made a long Nintendo Gameboy DMG-01. We love seeing all the wild hacks and tweaks made to Game Boy line, such as this Game Boy Color inside the DMG-01.

Continue reading “The Stretch Limo Of Game Boys”

PlayStation Games On The GBA, With A Few Extra Steps

It might seem impossible, but what you’re looking at is a Sony PlayStation game being played on a Nintendo Game Boy Advance. The resolution is miserable and the GBA doesn’t have nearly enough buttons to do most 3D games justice, but it’s working. There’s even audio support, although turning it on will slow things down considerably.

How does it work? The trick is that creator [Rodrigo Alfonso] is actually emulating the PlayStation on a Raspberry Pi and simply using Nintendo’s handheld as an external display and controller. We say “simply”, but of course, it’s anything but. The GitHub page for the project goes into impressive detail on how the whole thing works, but the short version is that the video data is sent from the Linux framebuffer to a small program running on the GBA over the handheld’s serial port using SPI. In testing he was able to push 2.56 Mbps through the link, which is a decent amount of bandwidth when you’ve only got to keep a 240 × 160 screen filled.

Perhaps the best part is that you don’t even need a flash cart to try it at home. [Rodrigo] is using a trick we’ve seen in other GBA projects, where the program is actually transferred to the handheld over the link cable at boot time.

Nintendo introduced this “multiboot” feature so multiplayer games could be played between systems even if they didn’t all have a physical cartridge, but now that hackers have cracked the code, it means you can run arbitrary code on a completely unmodified console; though it does get wiped as soon as you power it off.

[Rodrigo] provides all the information and software you need to try it at home, you just need a Raspberry Pi, a Game Boy Advance, and Link Cable you don’t mind cutting up; far less hardware than is required by the similar project to run DOOM on the NES. Since he’s tied everything into the popular RetroPie frontend, we imagine it would even work when emulating earlier 2D consoles; which would be a much better fit for the GBA’s display and limited inputs.