IKEA LED Lamp Gets Hacked For Night Light Duty

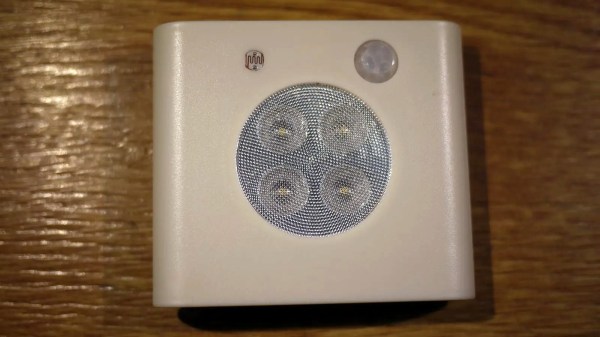
IKEA make a lot of different lamps, including useful motion-sensitive models that can click on when you walk past. [Andrew Menadue] trialed one as a night light, but it was far too bright for the task. It also would come on during the day time, wasting its precious battery life when it wasn’t needed. Thus, in order to mold the lamp to its new purpose, hacking ensued.

The first step, as it so often is, was to crack open the case and look inside. Preliminary inspections revealed a BISS0001 chip —  a simple passive infrared motion sensor. The chip has a function built in that can disable the output from triggering if it detects light. Adding a light-dependent resistor and a further 100K resistor was all that was needed to enable this feature.

Now, the lamp only kicks on if it detects motion at night. Some further tweaks also cut the current limit to the LEDs, reducing the brightness to a more suitable level for night time. [Andrew] now has a useful night light that suits his needs, and likes it so much that he once drove 150 miles to recover one that he left behind on vacation. That’s dedication!

The LackRack Enterprise Edition in Revspace, Netherlands

Rackmount Hardware Placement Issues? IKEA LACK To The Rescue!

[hackbyte] reminds us about a classic hack that, even though we’ve seen floating around for over a decade, has somehow never quite graced our pages before. Many of us keep small home labs and even, at times, collections of servers that we’d be comfortable be calling mini-datacenters. However, if you use the ever-abundant 19″ switches, servers and other hardware, keeping these mounted and out of the way can be a thorny experience. Which leads us to, undoubtedly, unintentional – but exceptionally handy – compatibility between IKEA LACK table series and 19″ rackmount hardware.

The half-humorous half-informative wiki page on Eth0Wiki talks about this idea in depth, providing a myriad of examples and linking to pages of other hackerspaces and entities who implemented this idea and improved upon it. These tables look nice and fit anywhere, stack neatly when not in use, and you can put a bottle of Club-Mate on top. Aka, they’re the exact opposite of cheap clunky cabinets actually designed for rackmount you can buy, and cost a fraction of the price. What’s not to love?

You can buy a whole lot of cheap hardware in 19″, and arguably, that’s where you can get the best hardware for your dollar. Many a hackerspace has used these tables for makeshift infrastructure, permanent in all but intent. So, in case some of us missed the memo, now you are aware of yet another, underappreciated solution for mounting all these servers we get for cheap when yet another company replaces its equipment – or undergoes a liquidation. If LackRack hasn’t been on your radar – what have you been using for housing your rackmount hardware collection?

Wondering what to do with an old server? Building a powerful workstation is definitely on the list. Alternatively, you could discard the internals and stuff it full of Raspberry Pi!

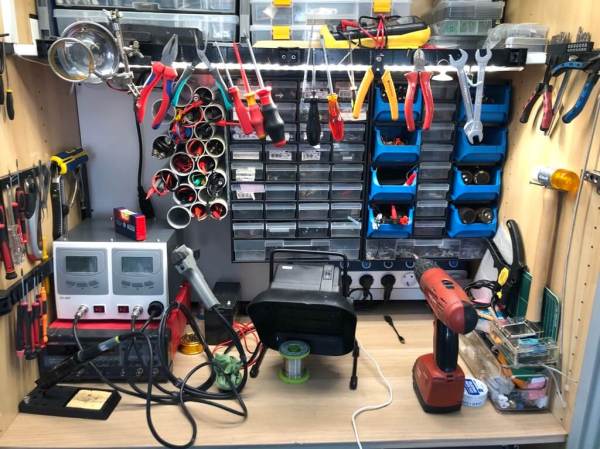
An electronics workbench with tools and drawers

IKEA Wardrobe Holds Entire Hardware Workspace

If you’re like us, you probably don’t finish a typical hardware project in one sitting. This doesn’t have to be a problem if you’re fortunate enough to have a dedicated workbench for your hacking activities; you simply leave your current project there, ready to continue when you have time again. But this is not always a workable option if you, or a housemate, needs to use the same desk for other tasks as well.

[!BATTA!] over at IKEAhackers ran into this problem, and solved it by building a complete electronics workstation inside a wardrobe. The base of this project is a storage unit called PAX, which is designed to store clothes and shoes but which also works just fine with project boxes. [!BATTA!] installed a variety of shelves and drawers to organize their collection of boxes and tools.

Not content with simple storage, [!BATTA!] decided to add a workbench, using a sturdy sliding tray that carries a working surface and a reinforced back panel to hold parts bins. Metal braces were added to prevent wobbliness, and the whole structure was bolted to a wall to prevent it from tipping over. When the workbench is not in use, the tray simply slides inside so the doors can be closed for a nice, clean look.

We really like the many clever storage solutions spread around the work area, such as a magnetic rail to hold hand tools and a “honeycomb” of PVC tubes for storing cables. Compact LED strips provide suitable lighting while a power strip with both mains and USB sockets brings juice to the tools and projects.

Modifying pieces of IKEA furniture is nothing new; we’ve seen them turned into arcade cabinets and MP3 players. We’ve also covered several well-organized workspaces, but none as compact as this one. Thanks to [IrregularShed] for the tip.

Hacked IKEA Air Quality Sensor Gets Custom PCB

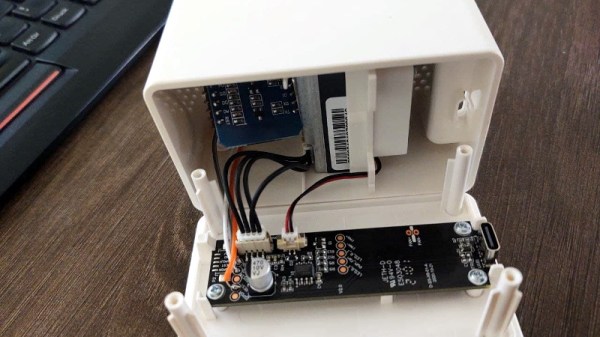
Last month we brought word of the IKEA VINDRIKTNING, a $12 USD air quality sensor that could easily be upgraded to log data over the network with the addition of an ESP8266. It only took a couple of wires soldered to the original PCB, and since there was so much free space inside the enclosure, you didn’t even have to worry about fitting the parasitic microcontroller; just tape it to the inside of the case and button it back up.

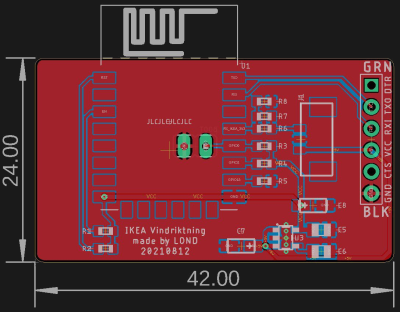
Now we’ve got nothing against the quick and dirty method around these parts, but if you’re looking for a slightly more tidy VINDRIKTNING modification, then check out this custom PCB designed by [lond]. This ESP-12F board features a AP2202 voltage regulator, Molex PicoBlade connectors, and a clever design that lets it slip right into a free area inside the sensor’s case. The project description says the finished product looks like it was installed from the factory, and we’re inclined to agree.

Nothing has changed on the software side, in fact, the ESP-12F gets flashed with the same firmware [Sören Beye] wrote for the Wemos D1 Mini used in his original modification. That said [lond] designed the circuit so the MCU can be easily reprogrammed with an FTDI cable, so just because you’re leaving the development board behind doesn’t mean you can’t continue to experiment with different firmware builds.

It’s always gratifying to see this kind of community development, whether or not it was intentionally organized. [lond] saw an interesting idea, found a way to improve its execution, and released the result out into the wild for others to benefit from. It wouldn’t be much of a stretch to say that this is exactly the kind of thing Hackaday is here to promote and facilitate, so if you ever find yourself inspired to take on a project by something you saw on these pages, be sure to drop us a line.

ESP8266 Adds WiFi Logging To IKEA’s Air Quality Sensor

Introduced back in June, the IKEA VINDRIKTNING is a $12 USD sensor that uses colored LEDs to indicate the relative air quality in your home depending on how many particles it sucks up. Looking to improve on this simplistic interface, [Sören Beye] tacked an ESP8266 to the board so it can broadcast sensor readings out over MQTT.

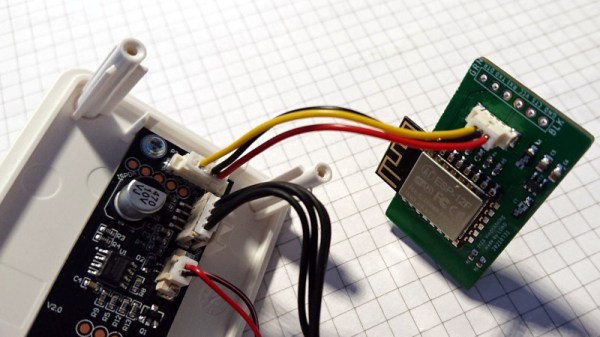
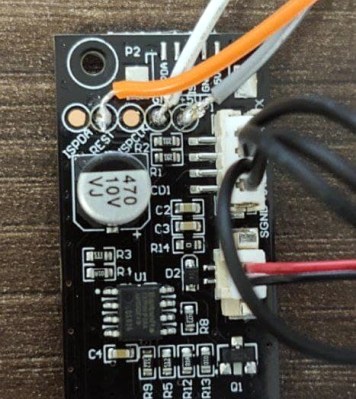
Just three wires link the ESP8266 to the PCB.

While some of us would have been tempted to gut the VINDRIKTNING and attach its particle sensor directly to the ESP8266, the approach [Sören] has used is actually quite elegant. Rather than replacing IKEA’s electronics, the microcontroller is simply listening in on the UART communications between the sensor and the original controller. This not only preserves the stock functionality of the VINDRIKTNING, but simplifies the code as the ESP doesn’t need to do nearly as much.

All you need to do if you want to perform this modification is solder a couple wires to convenient test pads on the VINDRIKTNING board, then flash the firmware (or write your own version), and you’re good to go. There’s plenty of room inside the case for the ESP8266, though you may want to tape it down so it doesn’t impact air flow.

While not required, [Sören] also recommends making a small modification to the VINDRIKTNING which makes it a bit quieter. Apparently the 5 V fan inside the sensor is occasionally revved up by the original controller, rather than kept at a continuous level that you can mentally tune out. But by attaching the sensor’s fan to the ESP8266’s 3.3 V pin, it will run continuously at a lower speed.

We’ve seen custom firmware for IKEA products before, but this approach, which keeps the device’s functionality intact regardless of what’s been flashed to the secondary microcontroller, is particularly appealing for those of us who can’t seem to keep the gremlins out of our code.

[Thanks to nexgensri for the tip.]

A Smart Light Bulb Running Doom Is A Pretty Bright Idea

A light bulb might seem like an unlikely platform for gaming, but we’re living in the future now, so anything is possible. And with enough know-how, it turns out that an RGB light bulb can indeed be modified to run Doom.

[Ed note: The project pages and video got pulled right when this went to press. Nicola received a takedown notice.  We’ll let you know more when we do. The main link has been updated to the Wayback Machine.]

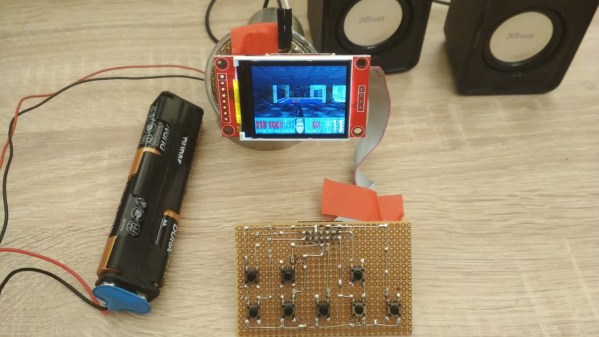
That’s not to say that the Ikea TRÅDFRI light bulb is the only thing [Nicola Wrachien] needed to accomplish the hack. But the bulb, specifically this addressable GU10 RGB LEB bulb, donated the most critical component, a Silicon Labs MGM210L wireless microcontroller, with enough processing power to run vanilla Doom. Added to the microcontroller was a TFT display, a controller made from a handful of buttons and a shift register, and a few odds and ends to stitch it all together. Some more memory was needed, though, so [Nicola] used an 8 MB QSPI flash memory and a couple of neat tricks to reduce latency and improve bandwidth. There are a lot of neat tricks with this one, but the coolest thing might just be that the whole footprint of the build isn’t that much bigger than the original bulb. Check out the surprisingly smooth gameplay in the video below.

This is a nice addition to the seemingly neverending “Will it Doom?” series. We’ve seen the classic game ported to everything from a GPS to a kitchen “bump bar” computer and even to an oscilloscope.

Continue reading “A Smart Light Bulb Running Doom Is A Pretty Bright Idea”

Using Ikea Guts To Add Sonos Compatibility To A Vintage Speaker

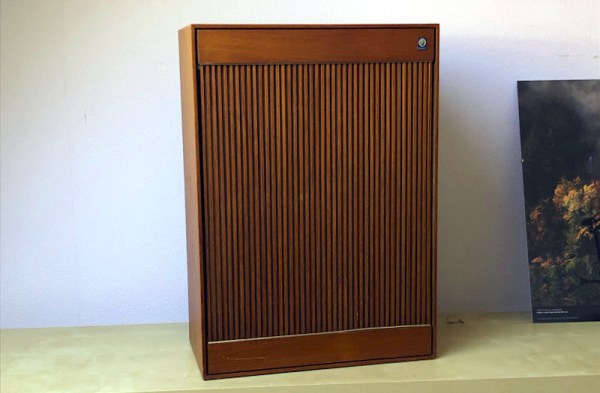
We’re in a fortunate position when it comes to audio gear, because advances in amplifier and signal processing technology have delivered us budget devices that produce a sound that’s excellent in comparison to those of a few years ago. That said, a decent quality device is good whichever decade it was manufactured in, and a speaker from the 1960s can be coaxed into life and sound excellent with a modern amplifier. It’s something [Sebastius] has explored, as he picked up an attractive-looking set of Swedish speakers from the 1960s. Wanting to bring them into the 21st century, he’s upgraded them for Sonos compatibility by hacking in the guts of an IKEA Symfonisk bookshelf speaker.

The speakers themselves looked good enough, but on closer examination they proved to bear the scars of many decades. After testing new wiring and drivers they still had a good sound to them. Their passive crossover meant that hooking them up to a single amplifier is as straightforward as it was decades ago, but a Symfonisk has an active crossover and two amplifiers. Fortunately there’s a neat hack by which those two amplifiers can be combined as one, and this is what he’s done with the resulting Symfonisk electronic package mounted on the reverse of the speaker.

The fate of the original speaker’s broken mid-range and tweeter drivers was a common enough one back in the day as speakers were ill-matched to amplifiers. Too small an amp would need turning up in volume to get a good sound resulting in distortion that would burn out the top end drivers, while too much power would result in the bass drivers being overloaded and failing. It’s unclear whether the drivers in a vintage speaker would be well-matched to an amplifier such as the Symfonisk, but we’re guessing they are safe while run at sensible volumes. Perhaps of more interest is whatever on-board DSP a Symfonisk contains, because while vintage speakers were designed for as flat a response as possible, modern compact speakers use DSP to equalise the frequency and phase responses of otherwise not-very-good-sounding enclosures. If the Symfonisk does this then those adjustments will appear as distortion in the sound of a different cabinet, but the question remains whether that distortion will be significant enough to be detectable by ear.

If the Symfonisk catches your attention, we’ve covered a teardown of it in the past.