A Cyclopic LCD Case For Your Raspberry Pi Server

If you’ve got a personal website that needs hosting or a few hundred gigabytes of files that could use a centralized storage location, the Raspberry Pi’s small size and extreme energy efficiency make it a compelling server choice compared to that curbside Pentium 4 box you’ve been trying to find a home for. All you need is something to put in.

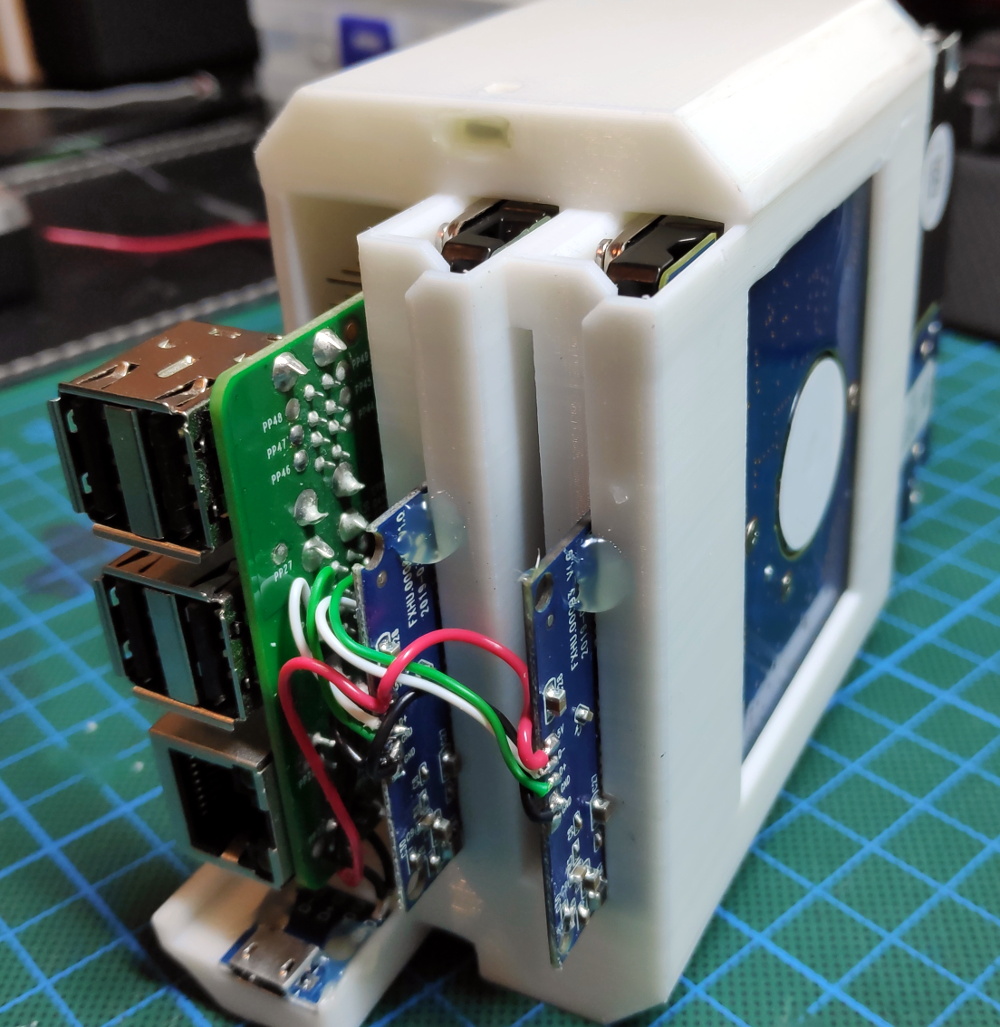
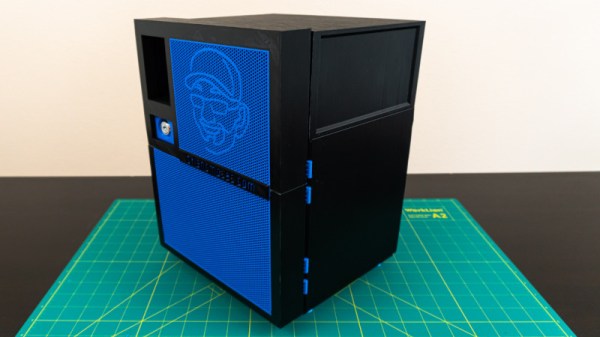
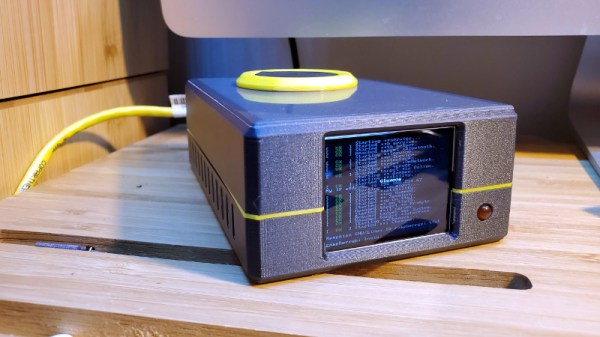
Of course there’s no shortage of Pi case designs ready to be extruded from your 3D printer, but we recently found ourselves particularly taken with this unique one designed by [Ken Segler]. It’s not only small and sleek with a dash of futuristic flair, but it includes a front-mounted two inch 240 x 320 IPS display that connects to the Pi over SPI. At the minimum that gives you a way to see all those beautiful boot messages on startup, but with a little code, it could provide you with various system statics and status messages at a glance.

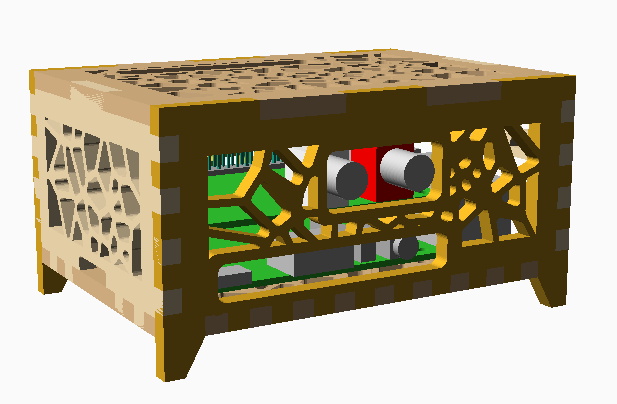
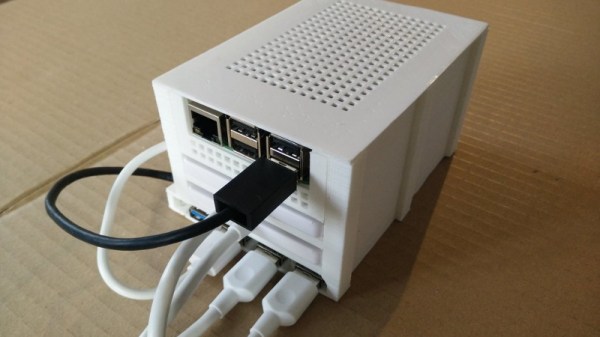
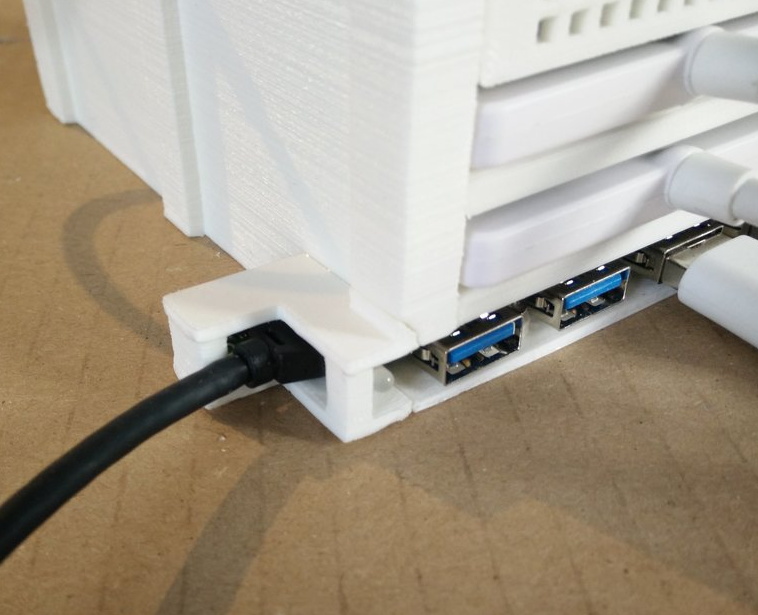
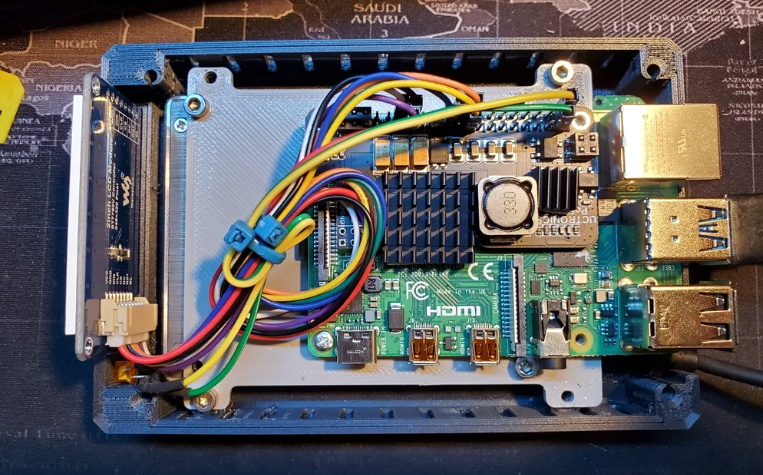
While the LCD is clearly the star of the show here, the case also has a few other nice features that make it worthy of your consideration. The magnetically attached fan filter on the the top, for one. The stacked layout that puts the Pi directly above the SSD also makes for a relatively compact final product.

One thing to note though is that [Ken] is using Power-over-Ethernet, meaning there’s no spot for a dedicated power jack on the case. It’s an easy enough feature to add into your own build, but naturally not everyone’s network is suitably equipped. In that case, beyond the normal annoyances of editing STL files, it shouldn’t be too much trouble to add one in without having to literally hack your way through the printed plastic.

Media Streamer With E-Ink Display Keeps It Classy

The Logitech SqueezeBox was a device you hooked up to your stereo so you could stream music from a Network Attached Storage (NAS) box or your desktop computer over the network. That might not sound very exciting now, but when [Aaron Ciuffo] bought it back in 2006, it was a pretty big deal. The little gadget has been chugging all these years, but the cracks are starting to form. Before it finally heads to that great electronics recycling center in the sky, he’s decided to start work on its replacement.

Thanks to the Raspberry Pi, building a little device to stream digital audio from a NAS is easy these days. But a Pi hooked up to a USB speaker isn’t necessarily a great fit for the living room. [Aaron] didn’t necessarily want his replacement player to actually look like the SqueezeBox, but he wanted it to be presentable. While most of us probably would have tried to make something that looked like a traditional piece of audio gear, he took his design is a somewhat more homey direction.

An OpenSCAD render of the enclosure.

The Raspberry Pi 4 and HiFiBerry DAC+ Pro live inside of a wooden laser cut case that [Aaron] designed with OpenSCAD. We generally associate this tool with 3D printing, but here he’s exporting each individual panel as an SVG file so they can be cut out. We especially like that he took the time to add all of the internal components to the render so he could be sure everything fit before bringing the design into the corporeal world.

While the case was definitely a step in the right direction, [Aaron] wasn’t done yet. He added a WaveShare e-Paper 5.83″ display and mounted it in a picture frame. Software he’s written for the Raspberry Pi shows the album information and cover art on the display while the music is playing, and the current time and weather forecast when it’s idle. He’s written the software to plug into Logitech’s media player back-end to retain compatibility with the not-quite-dead-yet SqueezeBox, but we imagine the code could be adapted to whatever digital media scheme you’re using.

Over the years, we’ve seen a number of SqueezeBox replacements. Many of which have been powered by the Raspberry Pi, but even the ESP8266 and ESP32 have gotten in on the action recently.

A Very Buttoned Up Raspberry Pi Media Server

Projects that turn the Raspberry Pi into a low-cost Network Attached Storage (NAS) solution are very common; all you need is the right software, the Pi itself, and some USB storage devices. But unless you particularly like the “Medusa” look, with loose cables running all over the place, you’ll probably want to put the hardware into a suitable enclosure. Unfortunately, that’s where the somewhat unusual layout of the Pi can make things tricky.

Which is why [AraymBox] came up with this unique “capsule” enclosure for the Raspberry Pi and two USB-attached hard drives. Every effort has been made to keep the outside of this design as clean and streamlined as possible. The asymmetrical loops of wires that we so often see on other projects are gone, with everything been brought inside thanks to some clever wiring. This enclosure looks like a professional product, and if you’re willing to put in the effort, you can have one to call your own.

The good news is that the 3D printed enclosure only has four parts, albeit rather large ones, and none of which require support material. So it should be an easy print even on a relatively low-end machine. Of course, you’re not going to get that futuristic metallic look without a little work. You’ll need to do a considerable amount of sanding, filling, and paint work to get that kind of a surface finish. Then again, that rough “just printed” look has a certain cyberpunk appeal to it as well.

But the printed enclosure is only half the battle. Inside, [AraymBox] has soldered the USB to SATA adapter cables directly to the Raspberry Pi to keep things tight and compact. A micro USB breakout board was then used to add a power connector on the back of the device where the Ethernet and USB ports are, solving the issue of having one lonely USB cable coming out of the side of the case.

In the past we’ve seen other attempts to create a 3D printable enclosure for Pi servers, with varying levels of success. While some would argue that the better solution is to just throw the Pi and the drives in a large enough enclosure that it doesn’t matter what the wiring looks like, we appreciate the effort that some hackers are willing to put in to make something custom.

Keeping A 3D Printed NAS Updated With The Times

Back in 2018, [Paul-Louis Ageneau] created a 3D printed network-attached storage (NAS) enclosure for his Raspberry Pi. The design worked well, the Internet liked it when he posted the details on his blog, and all was right with the world. But of course, such glories are fleeting. Two years later that design needs updating, and thanks to the parametric nature of OpenSCAD, he’s been able to refresh his design for another tour of duty.

In our book, this is as much a cautionary tale as it is a success story. On one hand, it’s a testament to the power of CAD and desktop 3D printing. That a design can be tweaked and reproduced down the line with only minimal hassle is great for folks like us. But it’s also a shame that he didn’t get more than two years before some of the parts he used in the original NAS became unobtainium.

The main issue was that the integrated USB hub he used for the first version is no longer available, so the design had to be modified to accept a similar board. Unfortunately, the new hub is quite a bit wider than the old one. Resizing the entire case isn’t really an option since the Pi has to slide into it, so the hub now bumps out a bit on one side. He’s added a printable cover that cleans it up a bit, but the asymmetrical look might be a problem for some. While fiddling with the design, he also changed around the cooling setup so a larger fan could be mounted; now that the Raspberry Pi 4 is out, it can use all the cooling help it can get.

We covered the original version of the printed NAS back when it was first released, and it’s always good to see a creator coming back and keeping a project updated; even if it’s because hardware availability forced their hand.

New Year Habits – What Do You Do For Data Storage?

2020 is a year of reflection and avoiding regret, and one of the biggest practices we all know we should do better is back up our data. Inevitably there will be a corruption or accident, and we mourn the loss of some valuable data and vow to never let it happen again, and then promptly forget about good data retention practices.

I believe life is about acquiring memories, so it makes sense to me to try to archive and store those memories so that I can reflect on them later, but data storage and management is a huge pain. There’s got to be a better way (cue black and white video of clumsy person throwing up arms in disgust).

Nice Cloud You Have There; Shame if Something Happened to It

The teens of the century saw a huge shift towards cloud storage. The advantages of instantly backing up files and using the cloud as the primary storage for all your devices is appealing. It’s now easier to transfer files via the cloud than with a cable. With Google Docs and WordPress we have our most important documents and writing stored as database blobs on someone else’s servers. Facebook and Google and Flickr record all of our memories as photo albums. Unlimited storage is common, and indexing is so good that we can find photos with a vague description of their contents.

These things are instantly accessible, but lack permanence. Gone are newspaper clippings and printed photos discovered in a shoebox. When we aren’t in control of those services, they can disappear without any warning. Even some big offerings have packed up shop, leaving people scrambling to back up data before the servers were shut down. Google Plus is closed, Yahoo  Groups is closed, MySpace lost all content created prior to 2016, GeoCities closed in 2009, and Ubuntu One closed in 2014. It’s safe to say that no online content is safe from deletion. It’s also safe to say that cloud storage is a difficult location from which to extract your data.

With the risk of data leaks and privacy violations occurring daily, it’s also safe to say that some of your files should probably not be stored in the cloud in the first place. So, how do we do it well, and how do we get in the habit of doing it regularly?

Continue reading “New Year Habits – What Do You Do For Data Storage?”

Raspberry Pi NAS Makes Itself At Home In Donor PC

It’s safe to say that most of us have at least one Raspberry Pi hanging from a USB cable someplace, silently hammering away at some unglamorous task that you’d rather not do on a “real” computer. With as cheap as they are, it’s not like there’s a big concern about where it sets up shop. But if you’re like [Jeremy S. Cook] and want your $35 Linux computer to be a permanent member of the family, then his tips on turning an old PC into a gloriously overkill Pi NAS may be of interest.

The main component [Jeremy] salvages from the old Lenovo desktop PC is, obviously, the case itself. Stripped of its original components, the case gives him plenty of room to mount the Pi as well as a couple of hard drives and a powered USB hub. To prevent the bottom of the Raspberry Pi from shorting out against the metal computer case, he designed and 3D printed a mount for it. Everything else is held down with hook and loop fastener, making it quick and easy to move things around and make adjustments.

While it might not be strictly necessary, [Jeremy] also took the time to salvage the computer’s old heatsink. Being far too large to fit on the Pi as-is, he ran a line down the back of it with his mill and snapped it in half. He uses a bit of thermal tape to hold the bisected heatsink onto the Pi’s SoC, with a couple pieces of electrical tape to make sure it doesn’t short out on anything.

Raspberry Pi NAS builds are exceptionally popular, and we’ve seen more than we can count over the years. You can build one out of parts from IKEA, and if you don’t mind plastic, you can always 3D print the whole thing. If you really want to go minimal, you can even hang some files on the network with little more than a Pi Zero stuck into a USB port.

Continue reading “Raspberry Pi NAS Makes Itself At Home In Donor PC”

3D Printing A NAS Server Case

It’s good to back up, and despite that, few of us do. [Brian] we suspect is of the more diligent persuasion, given his strong enthusiasm for network attached storage. Recently, he found himself looking for a new case for his DIY build, and decided to go the 3D printed route.

The case is the design of one [Toby K], who sells the design online. [Brian] set out to produce the case himself using a Prusa i3, investing much time into the process. Total print time for the successful parts alone was over 227 hours, not including the failed parts and reprints.

Assembly caused some headaches, with various hinges and dovetails not fitting together perfectly first time. Not one to shy away from some proper down and dirty making, [Brian] was able to corral the various parts into fitting with a combination of delicate hammering, filing, and reprinting several broken pieces.

Overall, accounting for the filament used and hardware required, [Brian] spent over $200 producing the case. For those who just need a housing for their NAS, it doesn’t make a whole lot of financial sense. But for those who enjoy the build, and like the opportunity to customize their case as they see fit, the time and money can certainly be worth it. As [Brian] states, there aren’t too many cases on the market that ship with his logo on the grill.

We’ve seen other 3D printed case builds before, too. Video after the break.

Continue reading “3D Printing A NAS Server Case”