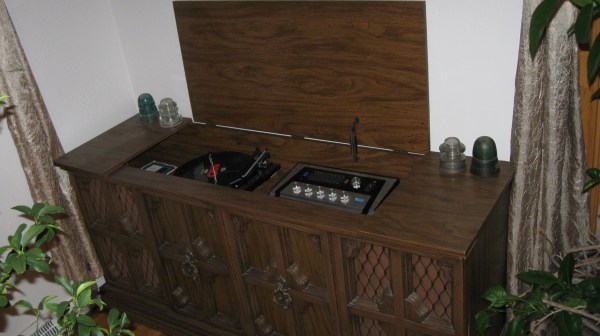
[smellsofbikes] recently came into possession of a 1970’s “stereo radio phonograph” cabinet consisting of a vinyl record player, AM and FM radio, and eight track tape player. The radio worked, the turntable didn’t sound too nice, and the tape player didn’t work at all. A new needle fixed the turntable, but the eight-track was in bad shape. So he replaced the tape player with a BeagleBoneBlack which plays streaming internet radio.
Hopefully, this fix is temporary, since he has carefully disconnected the tape player connections in the hope of fixing it soon. The swap out involved a fair bit of engineering, so he’s split his build log into several bite sized chunks. The first step was to set up the BBB, upgrade it and add in all the network and audio related stuff. Audio on the BBB is available only via the HDMI port, but [smellsofbikes] had a USB soundcard handy, so the next step was setting that up. He installed mpg321 – the command line mp3 player and set it up to play music streaming from somafm. Next up was getting some scripts and programs to run automatically during system bootup. The final part of the setup was adding a WiFi router as a repeater connected to the BBB via an ethernet cable. He could have used a tiny WiFi USB dongle, but he already had the router lying around, and he wanted to dedicate USB to audio functions alone, and use the Ethernet port for Internet.
He then worked on identifying the wires that go from the tape player to the amplifier, spliced them, and hooked them up to the audio sound card on the BBB. With this done, the upgrade was more or less complete – the system played streaming music and stations could be switched remotely (via SSH to BBB). [smellsofbikes] reckoned it would be nice to use the existing controls in the phonograph cabinet to control the internet streaming music, instead of controlling it via a remote computer. The cabinet had 4 indicator lamps that indicated which track was being played and a button to switch between tracks. He removed the old indicator panel and put in a fresh PCB, designed in KiCad and cut on his LPKF circuit board plotter. An aluminum knob machined out of hex bar-stock works as the new track change button. At this point, he called it a wrap. The BBB and Asus router go inside the cabinet, and the old (non-functional) tape player is put in place. Quite an interesting build, and we look forward to when he actually gets the tape player working. [Alan Martin], aka “The Most Interesting Engineer In The World” has told him that “it is a moral imperative that you repair the eight-track and get it working”. [Alan] has promised to send [smellsofbikes] a suitcase full of brand new, still in their plastic wrappers, eight-track tapes when he gets it working.

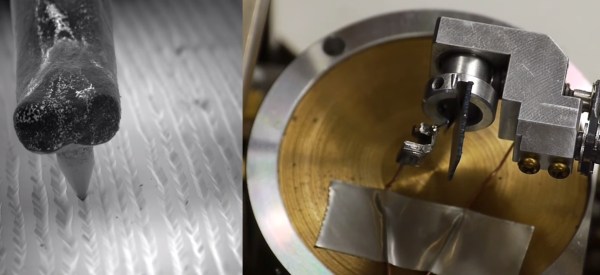
 . Vinyl is an insulator. [Ben] dealt with this by using his vacuum chamber to evaporate a thin layer of silver on the vinyl.
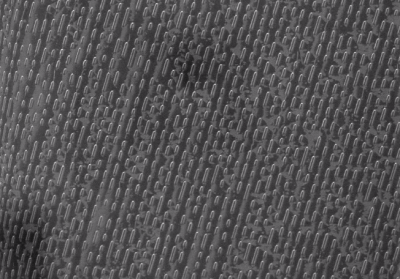 [Ben] wasn’t done though. He checked out a few other recording formats, including CD and DVD optical media, and