Neopixels? Try Liquid Nitrogen To Color Shift Your LEDs Instead

If you’re like us, you’ve never spent a second thinking about what happens when you dunk an ordinary LED into liquid nitrogen. That’s too bad because as it turns out, the results are pretty interesting and actually give us a little bit of a look at the quantum world.

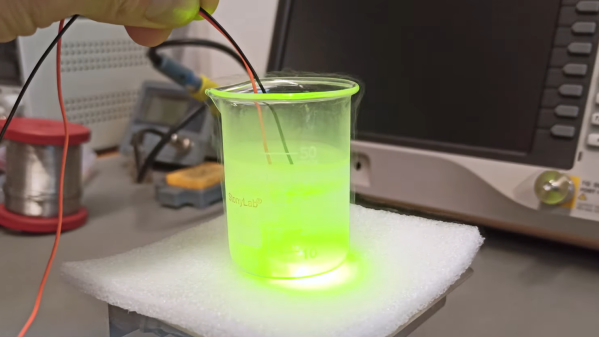
The LED fun that [Sebastian] over at Baltic Lab demonstrates in the video below starts with a bright yellow LED and a beaker full of liquid nitrogen. Lowering the powered LED into the nitrogen changes the color of the light from yellow to green, an effect that reverses as the LED is withdrawn and starts to warm up again. There’s no apparent damage to the LED either, although we suppose that repeated thermal cycles might be detrimental at some point. The color change is quite rapid, and seems to also result in a general increase in the LED’s intensity, although that could be an optical illusion; our eyes are most sensitive in the greenish wavelengths, after all.

So why does this happen? [Sebastian] goes into some detail about that, and this is where quantum physics comes into it. The color of an LED is a property of the bandgap of the semiconductor material. Bandgap is just the difference in energy between electrons in the valence band (the energy levels electrons end up at when excited) and the conduction band (the energy levels they start at.) There’s no bandgap in conductive materials — the two bands overlap — while insulators have a huge bandgap and semiconductors have a narrow gap. Bandgap is also dependent on temperature; it increases with decreasing temperature, with different amounts for different semiconductors, but not observably so over normal temperature ranges. But liquid nitrogen is cold enough for the shift to be dramatically visible.

We’d love to see the color shift associated with other cryogens, or see what happens with a blue LED. Want to try this but don’t have any liquid nitrogen? Make some yourself!

Continue reading “Neopixels? Try Liquid Nitrogen To Color Shift Your LEDs Instead”

Bending Light To Fit Technology

Solar power is an excellent way of generating electricity, whether that’s for an off-grid home or for the power grid. With no moving parts maintenance is relatively low, and the downsides of burning fuel are eliminated as well. But as much as it’s revolutionized power generation over the last few decades, there’s still some performance gains to be made when it comes to the solar cells themselves. A team at Stanford recently made strides in improving cell efficiency by bending the properties of sunlight itself.

In order to generate electricity directly from sunlight, a photon with a specific amount of energy needs to strike the semiconductor material. Any photons with higher energy will waste some of that energy as heat, and any with lower energy won’t generate electricity. Previous methods to solve this problem involve using something similar to a prism to separate the light out into colors (or energies) that correlate to specific types of cells calibrated specifically for those colors. This method does the opposite: it changes the light itself to an color that fits the semiconductor material. In short, a specialized material converts the energy from two lower-energy photons into a single higher-energy photon, which then strikes the solar panel to create energy.

By adding these color-changing materials as a layer to a photovoltaic solar panel, the panel can generate more energy with a given amount of light than a traditional panel. The major hurdle, as with any research, is whether or not this will be viable when produced at scale, and this shows promise in that regard as well. There are other applications for these materials beyond photovoltaics as well, and the researchers provide an excellent demonstration in 3D printing. By adding these color-change materials to resin, red lasers can be used instead of blue or ultraviolet lasers to cure resin in extremely specific locations, leading to stronger and more accurate prints.

Measuring Planck’s Constant With LEDs And A DMM

The remarkable thing about our universe is that it’s possible to explore at least some of its inner workings with very simple tools. Gravity is one example, to which [Galileo]’s inclined planes and balls bear witness. But that’s classical mechanics: surely the weirdness that is quantum mechanics requires far more sophisticated instrumentation to explore, right?

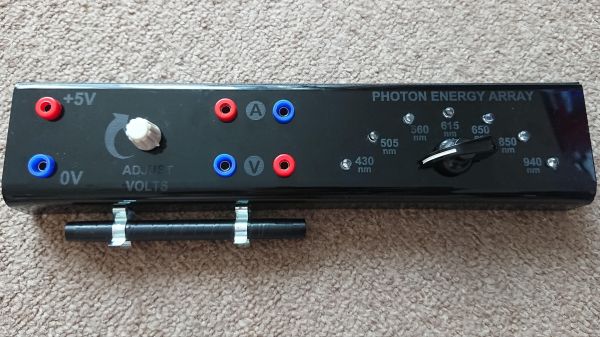
That’s true enough — if you consider a voltmeter and a Mark 1 eyeball to be sophisticated. That’s pretty much all you need for instruments to determine Planck’s constant to a decent degree of precision, the way that [poblocki1982]’s did. There’s a little more to it, of course; the method is based on measuring the voltage at which LEDs of various wavelengths start shining, so a simple circuit was built to select an LED from the somewhat grandly named “photon energy array” and provide a way to adjust and monitor the voltage and current.

By performing the experiment in a dark room with adapted eyes, or by using an opaque tube to block out stray light, it’s possible to slowly ramp the voltage up until the first glimmer of light is seen from each LED. Recording the voltage and the wavelength gives you the raw numbers to calculate the Planck constant h, as well as the Planck error Δh, with the help of a handy spreadsheet. [poblocki1982] managed to get within 11% of the published value — not too shabby at all.

Does this all still sound too complicated for you? Maybe a Watt balance made from Lego is more your speed.

A Scientist Made An Artificial Black Hole In The Lab, And You Won’t Believe What Happened Next

OK, that was a little click-baity, but then again, so was the announcement this week that a scientist had confirmed Hawking radiation with a lab-grown black hole. It sure got our attention, at least.

As it turns out, the truth is both less and more than meets the eye. The article above was eventually edited to better reflect the truth that, alas, we have not yet found a way to create objects so massive that even light cannot escape them. Instead, physicist [Jeff Steinhauer] and colleagues at the Technion-Israel Institute of Technology have developed an acoustic model of black holes, which is what was used to observe the equivalent of Hawking radiation for the first time. Hawking radiation is the theoretical exception to the rule that nothing makes it out of a black hole and would imply that black holes evaporate over time. The predicted radiation would be orders of magnitude weaker than the background radiation, though, making it all but impossible to detect.

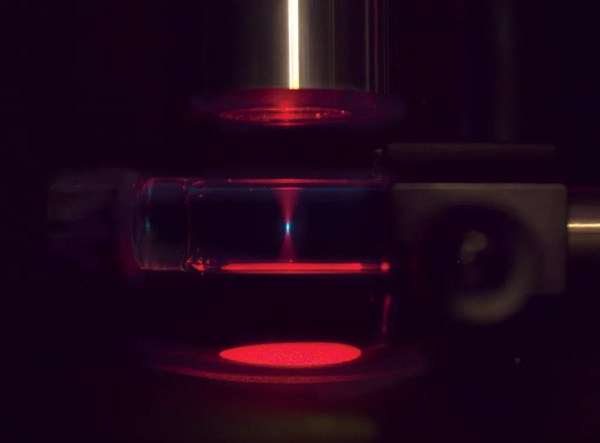
That’s where [Steinhauer]’s sonic black holes come in. In these experiments, phonons, packets of mechanical vibrations that stand in for photons, are trapped in a fast-moving stream of fluid. The point in the stream where its speed straddles the local speed of sound is the equivalent to a real black hole’s event horizon; phonons inside that boundary can never escape. Except, of course, for the sonic equivalent of Hawking radiation, which the researchers found after 97,000 attempts.

When we first stumbled upon this story, we assumed a lab-grown black hole, even an acoustic analog, would take a CERN’s-worth of equipment to create. It turns out to be far simpler than that; [Steinhauer], in fact, built his black hole machine singlehandedly from relatively simple equipment. The experiments do require temperatures near absolute zero and a couple of powerful lasers, so it’s not exactly easy stuff; still, we can’t help but wonder if sonic black holes are within the reach of the DIY community. Paging [Ben Krasnow] and [Sam Zeloof], among others.

[Featured image credit: Nitzan Zohar, Office of the Spokesperson, Technion]

Duality Of Light Explored By Revisiting The Double-Slit Experiment

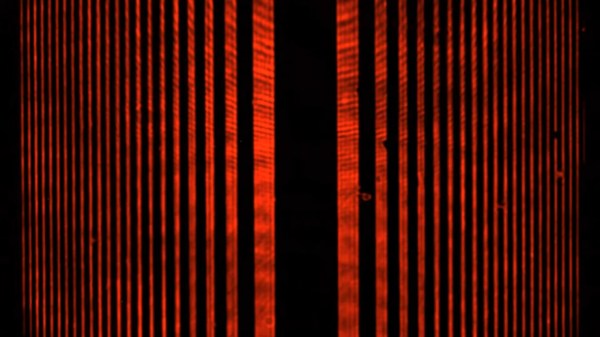
We’ve all seen recreations of the famous double-slit experiment, which showed that light can behave both as a wave and as a particle. Or rather, it’s likely that what we’ve seen is the results of the double-slit experiment, that barcode-looking pattern of light and dark stripes, accompanied by some handwaving about classical versus quantum mechanics. But if you’ve got 20 minutes to invest, this video of the whole double-slit experiment cuts through the handwaving and opens your eyes to the quantum world.

For anyone unfamiliar with the double-slit experiment,  [Huygens Optics] actually doesn’t spend that much time explaining the background. Our explainer does a great job on the topic, but suffice it to say that when coherent light passes through two closely spaced, extremely fine openings, a characteristic pattern of alternating light and dark bands can be observed. On the one hand, this demonstrates the wave nature of light, just as waves on the ocean or sound waves interfere constructively and destructively. On the other hand, the varying intensity across the interference pattern suggests a particle nature to light.

To resolve this conundrum, [Huygens] jumps right into the experiment, which he claims can be done with simple, easily sourced equipment. This is belied a little by the fact that he used photolithography to create his slits, but it should still be possible to reproduce with slits made in more traditional ways. The most fascinating bit of this for us was the demonstration of single-photon self-interference using nothing but neutral density filters and a CCD camera. The explanation that follows of how it can be that a single photon can pass through both slits at the same time is one of the most approachable expositions on quantum mechanics we’ve ever heard.

[Huygens Optics] has done some really fascinating stuff lately, from variable profile mirrors to precision spirit levels. This one, though, really helped scratch our quantum itch.

You’re Listening To Quantum Radio

Researchers at Delft University of Technology have created a detector that enables the detection of a single photon’s worth of radio frequency energy. The chip is only 10 mm square and the team plans to use it to explore the relationship of mass and gravity to quantum theory.

The chip has immediate applications in MRI and radio astronomy. Traditionally, detecting a single photon at radio frequencies is difficult due to the significance of thermal fluctuations. At lower frequencies, cryogenic cooling can reduce the issue, but as frequency increases the fluctuations are harder to tame.

The trick requires a qubit that samples the radio frequency energy. While the radio source is at 173 MHz, the qubit is at 1 GHz, allowing a fine time resolution. Coupling of the two is via an LC circuit that uses a Josephson junction which, of course, requires very cold temperatures. Continue reading “You’re Listening To Quantum Radio”

New Part Day : A Sensor Chip For 3D Color X-Ray Imaging

We all know CERN as that cool place where physicists play with massive, superconducting rings to smash atoms and subatomic particles to uncover secrets of matter in the Universe. To achieve this aim, they need to do a ton of research in other areas, such as development of special particle detectors.

While such developments are essential to the core research needs of the Centre, they also lead to spinoff applications for the benefit of society at large. One such outcome has been the Medipix Collaborations – a family of read-out chips for particle imaging and detection that can count single photons, allowing X-rays and gamma rays to be converted to electrical signals. It may not be possible for us hackers to get our hands on these esoteric sensors, but these devices are pretty interesting and deserve a closer look. Medipix sensors work like a camera, detecting and counting each individual particle hitting the pixels when its electronic shutter is open. This enables high-resolution, high-contrast, noise hit free images – making it unique for imaging applications.

Some months back, CERN announced the first 3D color X-ray of a human made possible using the Medipix devices. The result is a high-resolution, 3D, color image of not just living structures like bones, muscular tissues and vessels, but metal objects too like the wrist watch, seen in the accompanying photograph. The Medipix sensors have been in development since the 1990’s and are presently in their 4th “generation”. Each chip consists of a top semiconducting sensor array, made from gallium arsenide or cadmium telluride. The charge collected by each pixel is transported to the CMOS ASIC electronics via “bump bonds”. The integration is vertical, with each sensing pixel connected via the bump bond to an analog section followed by a digital processing layer. Earlier versions were limited, by technology, in their tiling ability for creating larger matrices of multiple sensors. They could be abutted on three sides only, with the fourth being used for on-chip peripheral logic and wire-bond pads that permit electronic read-out. The latest Medipix4 Collaboration, still under some development, eliminates this short coming. Through-silicon-via (TSV) technology provides the possibility of reading the chips through copper-filled holes that bring the signals from the front side of the chip to its rear. All communication with the pixel matrix flows through the rear of the chip – the peripheral logic and control elements are integrated inside the pixel matrix.

The Analog front end consists of a pre-amplifier followed by a window discriminator which has upper and lower threshold levels. The discriminator has four bits for threshold adjustment as well as polarity sensing. This allows the capture window to be precisely set. The rest of the digital electronics – multiplexers, shift registers, shutter and logic control – helps extract the data.

Further development of the Medipix (Tech Brief, PDF) devices led to a separate version called Timepix (Tech Brief, PDF). These new devices, besides being able to count photons, are capable of two additional modes. The first mode records “Time-Over-Threshold”, providing rough analog information about the energy of the photon. It does this by counting clock pulses for the duration when the signal stays above the discrimination levels. The other mode, “Time of Arrival”, measures arrival time of the first particle to impinge on the pixel. The counters record time between a trigger and detection of radiation quanta with energy above the discrimination level, allowing time-of-flight applications in imaging.

Besides medical imaging, the devices have applications in space, material analysis, education and of course, high energy physics. Hopefully, in a few years, hackers will lay their hands on these interesting devices and we can get to know them better. At the moment, the Medipix website has some more details and data sheets if you would like to dig deeper. For an overview on the development of such single photon detectors, check out this presentation from CERN – “Single X-Ray Photon Counting Systems: Existing Systems, Systems Under Development And Future Trends” (PDF).