A DIY self-balancing robot

3D-Printed Self-Balancing Robot Brings Control Theory To Life

Stabilizing an inverted pendulum is a classic problem in control theory, and if you’ve ever taken a control systems class you might remember seeing pages full of differential equations and bode diagrams just to describe its basic operation. Although this might make such a system seem terribly complicated, actually implementing all of that theory doesn’t have to be difficult at all, as [Limenitis Reducta] demonstrates in his latest project. All you need is a 3D printer, some basic electronic skills and knowledge of Python.

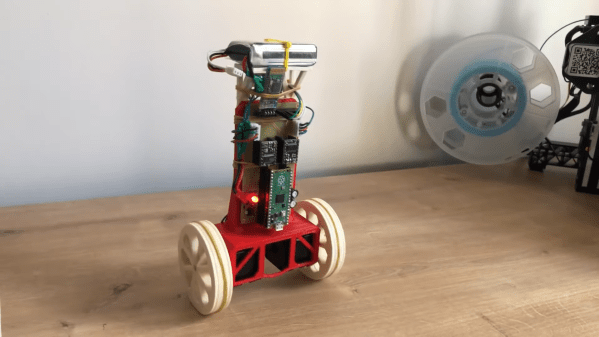
The components needed are a body, two wheels, motors to drive those wheels and some electronics. [Limenitis] demonstrates the design process in the video below (in Turkish, with English subtitles available) in which he draws the entire system in Fusion 360 and then proceeds to manufacture it. The body and wheels are 3D-printed, with rubber bands providing some traction to the wheels which would otherwise have difficulty on slippery surfaces.

A PCB driving two stepper motors
The PCB has just a few components, with most of the complexity handled by plug-in modules.

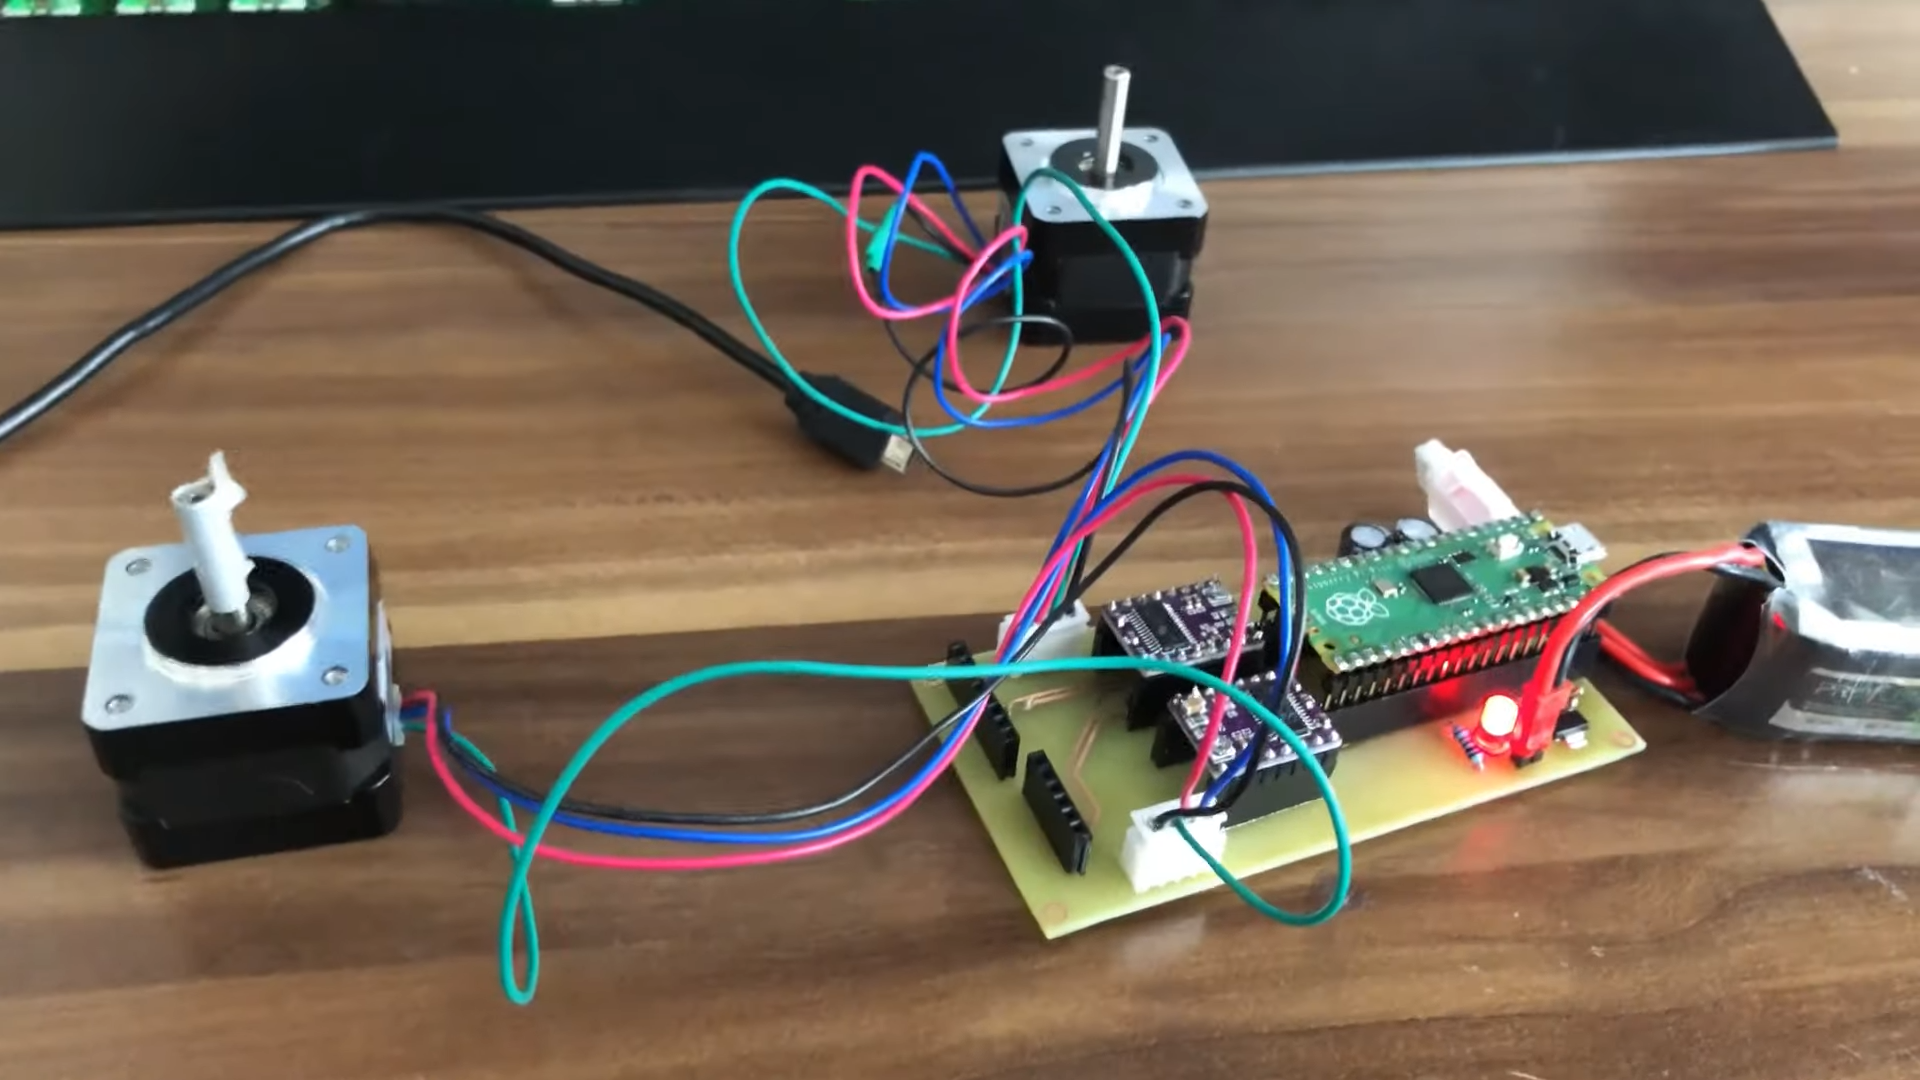
Two stepper motors drive the wheels, controlled by a DRV8825 motor driver, while an MPU-9250 accelerometer and gyroscope unit measures the angle and acceleration of the system. The loop is closed by a Raspberry Pi Pico that implements a PID controller: another control theory classic, in which the proportional, integral and derivative parameters are tuned to adapt the control loop to the physical system in question. External inputs can be provided through a Bluetooth connection, which makes it possible to control the robot from a PC or smartphone and guide it around your living room.

All design files and software are available on [Limenitis]’s GitHub page, and make for an excellent starting point if you want to put some of that control theory into practice. Self-balancing robots are a favourite among robotics hackers, so there’s no shortage of examples if you need some more inspiration before making your own: you can build them from off-the-shelf parts, from bits of wood, or even from a solderless breadboard.

Continue reading “3D-Printed Self-Balancing Robot Brings Control Theory To Life”

Drones Can Undertake Excavations Without Human Intervention

Researchers from Denmark’s Aarhus University have developed a method for autonomous drone scanning and measurement of terrains, allowing drones to independently navigate themselves over excavation grounds. The only human input is a starting location and the desired cliff face for scanning.

For researchers studying quarries, capturing data about gravel, walls, and other natural and man-made formations is important for understanding the properties of the terrain. Controlling the drones can be expensive though, since there’s considerable skill involved in manually flying the drone and keeping its camera steady and perpendicular to the wall it is capturing.

The process designed is a Gaussian model that predicts the wind encountered near the wall, estimating the strength based on the inputs it receives as it moves. It uses both nonlinear model predictive control (NMPC) and a PID controller in its feedback control system, which calculate the values to send to the drone’s motor controller. A long short-term memory (LSTM) model is used for calculating the predictions. It’s been successfully tested in a chalk quarry in Denmark and will continue to be tested as its algorithms are improved.

Getting a drone to hover and move between GPS waypoints is easy enough, but once they need to maneuver around obstacles it starts getting tricky. Research like this will be invaluable for developing systems that help drones navigate in areas where their human operators can’t reach.

[Thanks to Qes for the tip!]

Control the heat with a PID

Cozy Heat Control With An Arduino

[George Dewar] and his wife live in a typical 1940’s house in New Zealand , which in case you didn’t know, have a little insulation in the ceiling… and nowhere else. Like most, they put up with the cold — but after having a baby, [George] decided it was time to start controlling the heat a bit better.

They have an electric oil radiator which works well, but isn’t very smart. It only has 6 settings — not very useful when you’re trying to stay at a certain temperature. First off, they looked into a plug-in thermostat controller, and found a cheap one called the HeaterMate. Unfortunately it left a lot to be desired. For example, it didn’t seem to have PID control at all — and for an oil radiator, when you turn it off… it’s still going to heat the room for a while. He also found that because of the high current load of a heater … the device would read a few degrees over room temperature when operating. Unperturbed, [George] took this opportunity to design and build his own PID thermostat controller instead.  Continue reading “Cozy Heat Control With An Arduino”

Adding PID Control To A Non-Adjustable Iron

Do remember your first soldering iron? We do. It plugged into the wall, and had no way to adjust the temperature. Most people call these kind of irons “fire starters.” Not only are they potentially unsafe (mainly because of the inadequate stand they come with) they can be hard to use, slow to heat up, and you never know what temperature you are soldering at.

[Mike Doughty] wondered if you could hack a cheap iron to be temperature controlled. He began by taking apart an iron, and adding a K-type thermocouple to the mica heating element with the help of a fiberglass sleeve. After a few tries at fitting and finding the right placement for the thermocouple, he then reassembled the iron, and attached everything to an off-the-shelf industrial PID controller.

Not one to trust that everything was working, [Mike] began to test the iron. He used a Hakko FG-100 soldering iron tip thermometer to measure the “real” temperature of tip, and compared it to the value the K-type thermocouple was reporting it to be. The results were fairly impressive (as seen in the video after the break). Only about 10 degrees out. Not too shabby.

He concluded that although it did work, it wasn’t a replacement for a high quality soldering station. We suspect the real problem with this idea is that the mica heating element is way to slow to respond to any thermal load that the tip is given (but then neither did the unmodified iron.) If you’re interested in hacking together your own soldering station, you might be interested in the open source soldering iron driver.

[via Dangerousprototypes]

Continue reading “Adding PID Control To A Non-Adjustable Iron”

Boil Off Some White Gas In The Back Yard

Gas-still

[S Heath] is a Coleman lantern collector. Coleman lanterns can run from a variety of fuels, however they seem to run best with white gas, or Coleman fuel. Store bought Coleman fuel can cost upwards of $10USD/gallon. To keep the prices down, [S Heath] has created a still in his back yard to purify pump gas. We just want to take a second to say that this is not only one of those hacks that we wouldn’t want you to try at home, it’s also one that we wouldn’t try at home ourselves. Heating gasoline up past 120 degrees Celsius in a (mostly) closed container sounds like a recipe for disaster. [S Heath] has pulled it off though.

The still is a relatively standard setup. An electric hot plate is used to heat a metal tank. A column filled with broken glass (increased surface area for reflux) rises out of the tank. The vaporized liquid that does make it to the top of the column travels through a condenser – a pipe cooled with a water jacket. The purified gas then drips out for collection. The heart the system is a PID controller. A K-type thermocouple enters the still at the top of the reflux column. This thermocouple gives feedback to a PID controller at the Still’s control panel. The controller keeps the system at a set temperature, ensuring consistent operation. From 4000 mL of ethanol free pump gas, [S Heath] was able to generate 3100 mL of purified gas, and 500 mL of useless “dregs”. The missing 400 mL is mostly butane dissolved in the pump gas, which is expelled as fumes during the distillation process.

Continue reading “Boil Off Some White Gas In The Back Yard”

Hack Your Stove In The Name Of Homebrewing

stovehack

[Tim] is a homebrewer. Temperature profiling during the mashing process is apparently even more critical than the temperature curve of a solder reflow oven. His stove just wasn’t giving him the level of control he needed, so [Tim] added a PID temperature controller to his stove. Electric stoves generally use an “infinite switch” to control their burners. Infinite switches are little more than a resistor and a bimetallic strip in a single package. Not very good for accurate temperature control. The tricky part of this hack was to make it reversible and to have little visual impact on the stove. A stove top with wires hanging out would not only be dangerous electrically, it would also create a hazardous situation between [Tim] and his wife.

[Tim’s] brewpot only fit on the stove’s largest burner, so that was the only one that needed PID control. To keep things simple, he kept the commercial PID controller outside the stove’s enclosure. Inside the stove, [Tim] added a solid state relay. The relay is mounted to a metal plate, which screws to the back of the stove. The relay control lines run to an audio jack on the left side of the stove. Everything can be bypassed with a switch hidden on the right side of the stove. In normal operation, the switch is in “bypass” mode, and the stove works as it always has. When mashing time comes along, [Tim] flips the switch and plugs the jack into his PID controller. The temperature sensor goes into the brewpot itself, so no stove modification was needed there.

The end result is a very clean install that both [Tim] and his wife can enjoy.  Save a few bottles for us, [Tim]!

Kitchen Hacks: Home Made Meat Smoker


[Matt] noticed an overabundance of sous vide builds in the past week, so he decided to throw his Home made meat smoker into the ring. There’s not many things more delicious than a nice cut of smoked meat, and the fact that it’s very similar to the sous vide hacks we’ve seen is an added bonus.

[Matt] decided to build a ceramic smoker like a Big Green Egg. He took a cue from [Alton Brown] and used two terracotta planters and a hot plate for the smoker. For controlling the hot plate, the cheap $35 PID controller we’ve seen in a few sous vide builds was used. The PID can’t control the 7 amps of AC that the hot plate needs, so [Matt] used a solid-state relay he had lying around.

A stainless steel mixing bowl was placed on the hot plate for wood chips. So far, [Matt] has run his smoker for more than 12 consecutive hours, and the results are really promising – there wasn’t much change in temperature between the chill of the morning and the heat of afternoon. [Matt]’s build is great and perfect for venison jerky now that deer season is coming up.