A General-Purpose PID Controller

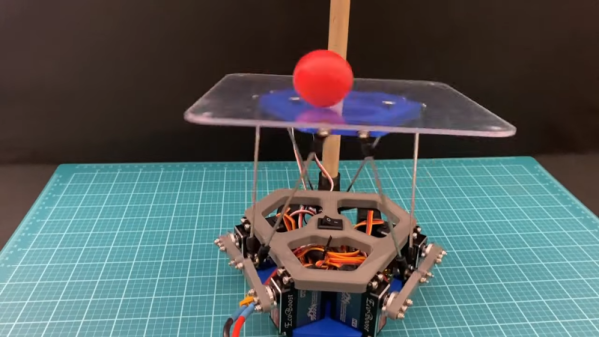
For those new to fields like robotics or aerospace, it can seem at first glance that a problem like moving a robot arm or flying an RC airplane might be simple problems to solve. It turns out, however, that control of systems like these can get complicated quickly; so much so that these types of problems have spawned their own dedicated branch of engineering. As controls engineers delve into this field, one of their initial encounters with a control system is often with the PID controller, and this open source project delivers two of these general-purpose controllers in one box.

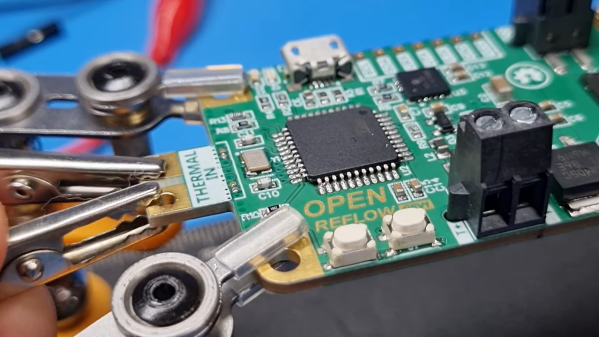
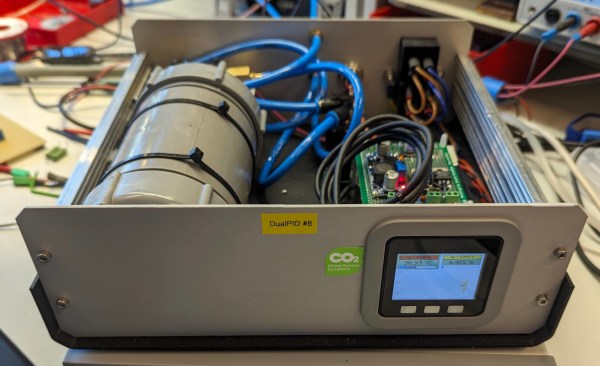
The dual-channel PID controller was originally meant as a humidity and temperature controller and was based on existing software for an ATmega328. But after years of tinkering, adding new features, and moving the controller to an ESP32 platform, [knifter] has essentially a brand new piece of software for this controller. Configuring the controller itself is done before the software is compiled, and it includes a GUI since one of the design goals of the project was ease-of-use. He’s used it to control humidity, temperature and CO2 levels in his own work at the University of Amsterdam, but imagines that it could see further use outside of his use cases in things like reflow ovens which need simple on/off control or for motors which can be controlled through an H-bridge.

The PID controller itself seems fairly robust, and includes a number of features that seasoned controls engineers would look for in their PID controllers. There are additionally some other open-source PID controllers to take a look at like this one built for an Arduino, and if you’re still looking for interesting use cases for these types of controllers one of our favorites is this PID controller built into a charcoal grill.

A Compact SMD Reflow Hotplate Powered By USB-PD

When it comes to home-lab reflow work, there are a lot of ways to get the job done. The easiest thing to do perhaps is to slap a PID controller on an old toaster oven and call it a day. But if your bench space is limited, you might want to put this compact reflow hotplate to work for you.

There are a lot of nice features in [Toby Chui]’s build, not least of which is the heating element. Many DIY reflow hotplates use a PCB heater, where long, thin traces in the board are used as resistive heating elements. This seems like a great idea, but as [Toby] explains in the project video below, even high-temperature FR4 substrate isn’t rated for the kinds of temperatures needed for some reflow profiles. His search for alternatives led him to metal ceramic heaters (MCH), which are commonly found in medical and laboratory applications. The MCH he chose was rated for 20 VDC at 50 watts — perfect for powering with USB-PD.

The heater sits above the main PCB on a Kapton-wrapped MDF frame with a thermistor to close the loop. While it’s not the biggest work surface we’ve seen, it’s a good size for small projects. The microcontroller is a CH552, which we’ve talked about before; aside from that and the IP2721 PD trigger chip needed to get the full 60 watts out of the USB-PD supply, there’s not much else on the main board.

This looks like a nice design, and [Toby] has made all the design files available if you’d like to give it a crack. Of course, you might want to freshen up on USB-PD before diving in, in which case we recommend [Arya]’s USB-PD primer.

Continue reading “A Compact SMD Reflow Hotplate Powered By USB-PD”

Bigfoot Turns Classic Sewing Machine Into A Leather-Eating Monster

If you try to sew leather on a standard consumer-grade machine, more often than not you’ll quickly learn its limits. Most machines are built for speed, and trying to get them to punch through heavy material at the low motor speeds often needed for leather work is a lesson in frustration.

How frustrating? Enough so that [Joseph Eoff] expended considerable effort to create this sewing machine speed controller for his nearly century-old Adler sewing machine. The machine was once powered by a foot treadle, which is probably why the project is dubbed “Bigfoot,” but now uses a 230 V universal motor. Such motors don’t deliver much torque when run at low speeds with the standard foot-pedal rheostat control, so [Joseph] worked up an Arduino-based controller with a tachometer for feedback and a high-power PWM driver for the motor.

There are a ton of details in [Joseph]’s post and even more in the original blog article, which is well worth a read, but a couple really stand out. The first is with the tachometer, which uses an off-the-shelf photointerrupter and slotted disc. [Joseph] was displeased with the sensor’s asymmetrical and unreliable output, so he made some modifications to the onboard comparator to square up the signal. Also interesting is the PID loop auto-tuning function he programmed into Bigfoot; press a button and the controller automatically ramps the motor speed up and down and stores the coefficients in memory. Nice!

The short video below shows Bigfoot in action with varying thicknesses of faux leather; there are also some clips in the original article that show the machine dealing with a triple thickness of leather at slow speed and not even breaking a sweat. Hats off to [Joseph] on a solid build that keeps a classic machine in the game. And if you want to get into the textile arts but don’t know where to start, we’ve got you covered.

Continue reading “Bigfoot Turns Classic Sewing Machine Into A Leather-Eating Monster”

Solder Two Boards At Once With This Dual Reflow Plate

Homebrew reflow projects generally follow a pretty simple formula: find a thrift shop toaster oven or hot plate, add a microcontroller and a means to turn the heating element on and off, and close the loop with a thermistor. Add a little code and you’re melting solder paste. Sometimes, though, a ground-up design works better, like this scalable reflow plate with all the bells and whistles.

Now, we don’t mean to hate on the many great reflow projects we’ve seen, of course. But [Michael Benn]’s build is pretty slick. The business end uses 400-watt positive temperature coefficient (PTC) heating elements from Amazon controlled by solid-state relays, although we have to note that we couldn’t find the equivalent parts on the Amazon US site, so that might be a problem. [Michael] also included mechanical temperature cutoffs for each plate, an essential safety feature in case of thermal runaway. The plates are mounted at the top of a 3D-printed case, which also has an angled enclosure for a two-color OLED display and a rotary encoder.

The software runs on an ESP32 and supports multiple temperature profiles for different solder pastes. The software also supports different profiles on the two plates, and even allows for physical expansion to a maximum of four heating plates, or even just a single plate if that’s what you need. The video below shows it going through its paces along with the final results. There’s also a video showing the internals if that’s more your style

We appreciate the fit and finish here, as well as the attention to safety. Can’t find those heating elements for your build? You might have to lose your appetite for waffles.

Continue reading “Solder Two Boards At Once With This Dual Reflow Plate”

Start Your Semiconductor Fab With This DIY Tube Furnace

Most of us are content to get our semiconductors from the usual sources, happily abstracting away the complexity locked within those little epoxy blobs. But eventually, you might get the itch to roll your own semiconductors, in which case you’ll need to start gearing up. And one of the first tools you’ll need is likely to be something like this DIY tube furnace.

For the uninitiated, [ProjectsInFlight] helpfully explains in the video below just what a tube furnace is and why you’d need one to start working with semiconductors. Perhaps unsurprisingly, a tube furnace is just a tube that gets really, really hot — like 1,200° C. In addition to the extreme heat, commercial furnaces are often set up to seal off the ends of the tube to create specific conditions within, such as an inert gas atmosphere or even a vacuum. The combination of heat and atmospheric control allows the budding fabricator to transform silicon wafers using chemical and physical processes.

[ProjectsInFlight]’s tube furnace started with a length of heat-resistant quartz glass tubing and a small tub of sodium silicate refractory cement, from the plumbing section of any home store. The tube was given a thin coat of cement and dried in a low oven before wrapping it with nichrome wire. The wrapped tube got another, thicker layer of silicate cement and an insulating wrap of alumina ceramic wool before applying power to cure everything at 1,000° C. The cured tube then went into a custom-built sheet steel enclosure with plenty of extra insulation, along with an Arduino and a solid-state relay to control the furnace. The video below concludes with testing the furnace by growing a silicon dioxide coating on a scrap of silicon wafer. This was helped along by the injection of a few whisps of water vapor while ramping the furnace temperature up, and the results are easily visible.

[ProjectsInFlight] still needs to add seals to the tube to control the atmosphere in there, an upgrade we’ll be on the lookout for. It’s already a great start, although it might take a while to catch up to our friend [Sam Zeloof].

Continue reading “Start Your Semiconductor Fab With This DIY Tube Furnace”

Internal Heating Element Makes These PCBs Self-Soldering

Surface mount components have been a game changer for the electronics hobbyist, but doing reflow soldering right requires some way to evenly heat the board. You might need to buy a commercial reflow oven — you can cobble one together from an old toaster oven, after all — but you still need something, because it’s not like a PCB is going to solder itself. Right?

Wrong. At least if you’re [Carl Bugeja], who came up with a clever way to make his PCBs self-soldering. The idea is to use one of the internal layers on a four-layer PCB, which would normally be devoted to a ground plane, as a built-in heating element. Rather than a broad, continuous layer of copper, [Carl] made a long, twisting trace covering the entire area of the PCB. Routing the trace around vias was a bit tricky, but in the end he managed a single trace with a resistance of about 3 ohms.

When connected to a bench power supply, the PCB actually heats up quickly and pretty evenly judging by the IR camera. The quality of the soldering seems very similar to what you’d see from a reflow oven. After soldering, the now-useless heating element is converted into a ground plane for the circuit by breaking off the terminals and soldering on a couple of zero ohm resistors to short the coil to ground.

The whole thing is pretty clever, but there’s more to the story. The circuit [Carl] chose for his first self-soldering board is actually a reflow controller. So once the first board was manually reflowed with a bench supply, it was used to control the reflow process for the rest of the boards in the batch, or any board with a built-in heating element. We expect there will be some limitations on the size of the self-soldering board, though.

We really like this idea, and we’re looking forward to seeing more from [Carl] on this.

Continue reading “Internal Heating Element Makes These PCBs Self-Soldering”

Stewart Platform Keeps Its Eye On The Ball

Although billed as a balancing robot, [Aaed Musa’s] robot doesn’t balance itself. It balances a ball on a platform. You might recognize this as something called a Stewart platform, and they are great fun at parties if you happen to party with a bunch of automation-loving hackers, that is. Take a look at the video below to see the device in action.

If you want to duplicate the project, there’s a bit of expense, but the idea behind it is explained in the video. Much of the robot is 3D printed with threaded inserts. Even the ball is 3D printed in two parts along with a cubic connector to hold the two hemispheres together. The acrylic platform was cut with a water jet, although you could just as easily have cut it with hand tools.

Continue reading “Stewart Platform Keeps Its Eye On The Ball”