It seems like most hackers have never played a game without at least wondering how to cheat at it. It’s not that we’re a dishonest lot, at least not as a rule. It’s more that most games hold less challenge for us than does figuring out how to reverse engineer the game’s mechanics. We don’t intend to cheat; it just sort of happens.
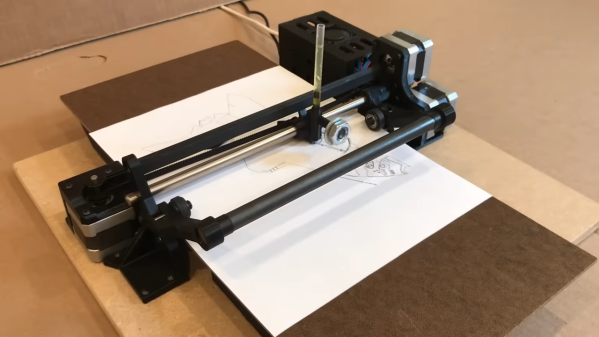
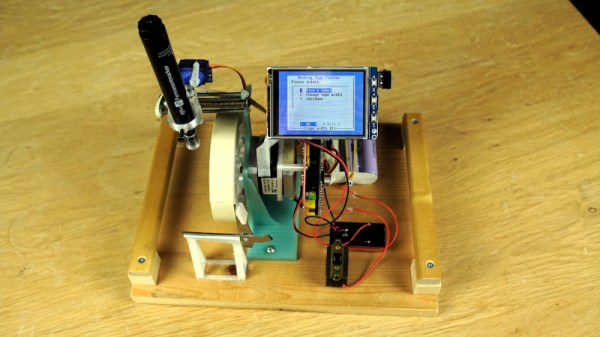
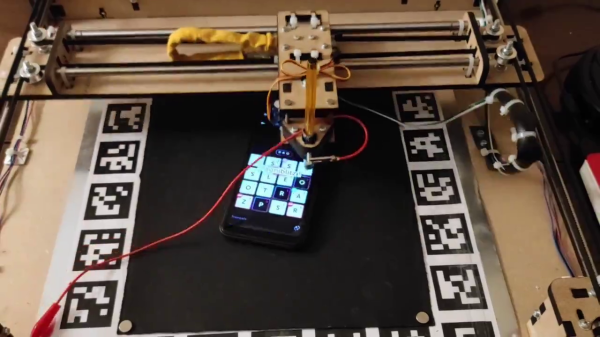
Or at least that’s the charitable way to look at such smartphone game cheats as this automated word-search puzzle solver. The game is Wordblitz, which is basically an implementation of classic Boggle along with extra features to release more dopamine and keep you playing. Not one to fall for that trick, [ghettobastler] whipped up a quick X-Y gantry from MDF using a laser cutter, added a stylus in the form of a cotton swab tipped with aluminum foil, and a vision system based on a simple web camera. The bed of the gantry has a capacitive plate so the stylus can operate the phone, along with a frame of ArUco fiducial marker to aid in locating the phone.
A Raspberry Pi handles the machine vision part of the process, which uses OpenCV to estimate the phone’s location and extract the current game tiles. The words in the game field are located by a solver that [ghetto] had previously written; a script then streams G-code to the plotter to peck out the answers at blazing speed, or at least faster than even [Peggy Hill] could manage. See the video below for a sample game being solved.
One word of warning if you choose to build this: [ghettobastler]’s puzzle-solving algorithm is based on a French dictionary, so you’ll have to re-teach it for other languages. But whatever language it’s in, this reminds us a bit of some of the Wordle solvers we’ve seen recently.
Continue reading “Purpose-Built Plotter Pitches In To Solve Wordblitz On Your Phone”