The Ifs Make Learning To Code Child’s Play

Anyone who has done the slightest bit of programming knows about the “Hello, World!” program. It’s the archetypal program that one enters to get a feel for a new language or a new architecture; if you can get a machine to print “Hello, World!” back to you, the rest is just details. But what about teaching kids to program? How does one get toddlers thinking in logical, procedural ways? More particularly, what’s a “Hello, World!” program look like for the pre-literate set?

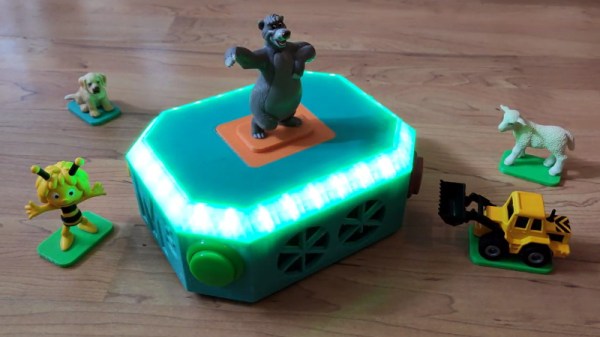
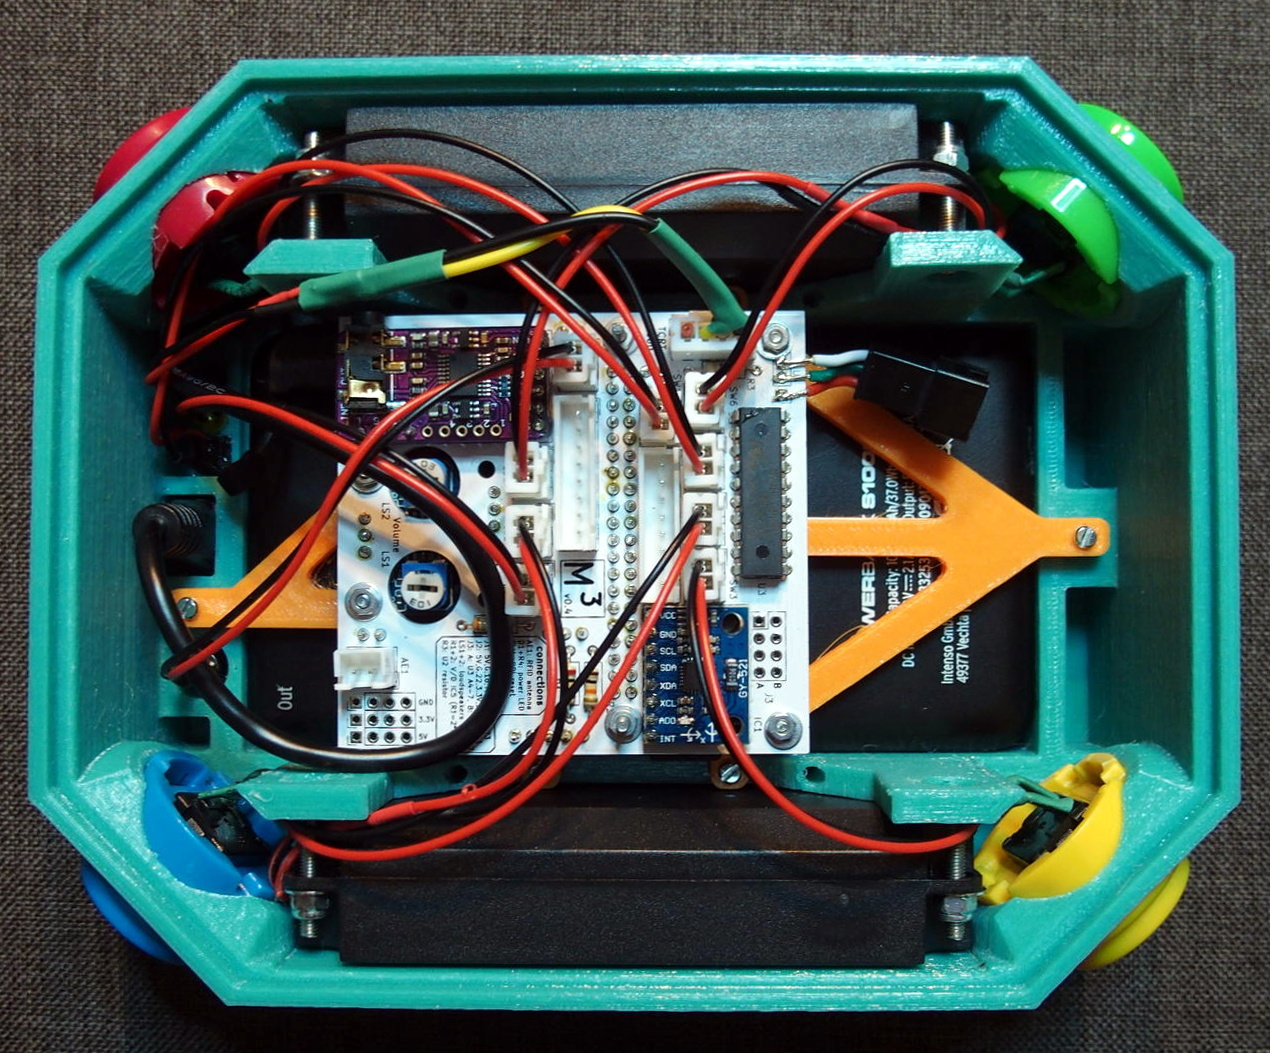
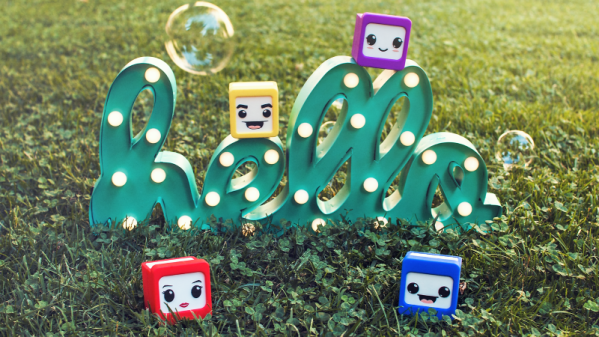
Those are the sort of questions that led to The Ifs by [Makeroni Labs]. The Ifs are educational toys for teaching kids as young as three the basics of coding. Each If is a colorful plastic cube with a cartoon face and a “personality” that reflects what the block does – some blocks have actuators, some have sensors. The blocks are programmed by placing magnetic tabs on the top representing conditions and actions. A kid might choose to program a block to detect when it’s being shaken, or when the lights come on, and then respond by playing a sound or vibrating. The blocks can communicate with each other too, so that when the condition for one block is satisfied, something happens on another block.

The Ifs look like a lot of fun, and they’re a great jumpstart on the logical thinking skills needed for coders and non-coders alike. We’re not alone in thinking this is a pretty keen project – the judges for this year’s Hackaday Prize selected The Ifs as one of the twenty finalists. Will it win? We’ll find out next week at the 2019 Hackaday Superconference. If you won’t be in Pasadena with us, make sure you tune in to the livestream to watch the announcement.

3D Print Your Very Own Mechanical Computer

Most Hackaday readers are familiar with computers from the 70s and 80s, but what about ones even older than that? The Digi Comp 1 was a commercially available computer from the 1960s that actually cost less than a modern-day microcontroller. The catch? It was mechanical rather than electrical. Thanks to retro-wizard [Mike Gardi], now anyone can build a replica of one.

Admittedly the Digi Comp 1 was more of a toy than a tool, but it was still a working computer. It contained three flip-flops (memory) and had a lever that acted as a clock, allowing the user to perform boolean operations and some addition and subtraction. Certainly not advanced, but interesting nonetheless. [Mike]’s version of the Digi Comp 1 has an extra bit when compared to the original and includes some other upgrades, but largely remains faithful to the original design.

If you want to print one of these on your own, [Mike] has made all of the files available on Thingiverse. He has also experimented with other mechanical computers as well, including the sequel Digi Comp 2. We’ve seen some recent interest in that mechanical computer lately as well.

Continue reading “3D Print Your Very Own Mechanical Computer”

Why Buy Toys When You Can Build Them Instead?

Like many creative individuals who suddenly find themselves parents, [Marta] wanted to make something special for his children to play with. Anybody can just purchase an off-the-shelf electronic toy, but if you’ve got the ability to design one on your own terms, why not do it? But even compared to the fairly high standards set by hacker parents, we have to admit that the amount of time, thought, and effort that was put into the “Marta Musik Maschine” is absolutely phenomenal.

[Marta] was inspired by the various commercial offerings which use RFID and other technologies to identify which characters the child is playing with and respond accordingly. But since he didn’t want to get locked into one particular company’s ecosystem and tinkering with the toys seemed frowned upon by their creators, he decided to just come up with his own version.

Over the course of many posts on the Musik Maschine’s dedicated website, [Marta] explains his thought process for every design consideration of the toy in absolutely exquisite detail. Each of the writeups, which have helpfully been broken down for each sub-system of the final toy, are arguably detailed and complete enough to stand as their own individual projects. Even if you’re not looking to get into the world of DIY electronic toys, there’s almost certainly an individual post here which you’ll find fascinating. From the finer points of interfacing your Python code with arcade buttons to tips for designing 3D printed enclosures, there’s really something for everyone here.

The children of hackers are often the envy of the neighborhood thanks to the one-of-a-kind playthings provided by their parents, and considering the level of commitment [Marta] has put into a toddler toy, we can’t wait to see what he comes up with next.

Continue reading “Why Buy Toys When You Can Build Them Instead?”

Meccano Max Gets Hacked

There are plenty of “smart” toys out in the marketplace, some with more features than others. Nevertheless, most makers desire complete control over a platform, something that’s often lacking in any commercial offering. It was just this desire that motivated [MrDreamBot] to start hacking the Meccano Max.

Meccano Max is a small-statured companion robot, at about 30 centimeters high. Not content with the lack of an API, [MrDreamBot] decided to first experiment with creating an Arduino library to run Max’s hardware. With this completed, work then began on integrating a Hicat Livera devboard into the hardware. This is an embedded Linux system with Arduino compatibility, as well as the ability to stream video and connect over WiFi. Thus far, it’s possible to control Max through a browser, while viewing a live video feed from the ‘bot. It’s also possible to customize the expressions displayed on Max’s face.

Oftentimes, it pays to replace stock hardware rather than try and work with the limitations of the original setup, and this project is no exception. With that said, we’re still hoping someone out there will find a way to get Jibo back online. Look after your robot friends! Video after the break.

Continue reading “Meccano Max Gets Hacked”

Learning Through Play Hack Chat With Greg Zumwalt

Join us Wednesday at noon Pacific time for the Learning Through Play Hack Chat!

You may think you’ve never heard of Greg Zumwalt, but if you’ve spent any time on Instructables or Thingiverse, chances are pretty good you’ve seen some of his work. After a long career that ranged from avionics design and programming to video game development, Greg retired and found himself with the time to pursue pet projects that had always been on the back burner, including his intricate 3D-printed automata. His motto is “I fail when I decide to stop learning,” and from the number of projects he turns out and the different methods he incorporates, he has no intention of failing.

Please join us for this Hack Chat, where we’ll discuss:

  • Lifelong learning through play;
  • Toy-building as a means to skillset growth;
  • Sources of inspiration and getting new ideas; and
  • What sorts of projects Greg has in the pipeline.

You are, of course, encouraged to add your own questions to the discussion. You can do that by leaving a comment on the Learning Through Play Hack Chat and we’ll put that in the queue for the Hack Chat discussion.

join-hack-chatOur Hack Chats are live community events on the Hackaday.io Hack Chat group messaging. This week we’ll be sitting down on Wednesday, March 13, at noon, Pacific time. If time zones have got you down, we have a handy time zone converter.

Click that speech bubble to the right, and you’ll be taken directly to the Hack Chat group on Hackaday.io. You don’t have to wait until Wednesday; join whenever you want and you can see what the community is talking about.

The Voice Of Dave, Now In Toy Form

Dave Jones is something of a celebrity in the hacker and maker communities, bringing his considerable knowledge and experience to bear on a wide variety of electronic and engineering topics. His unique voice and candor have endeared him to many, and he’s one of the more quotable YouTubers currently on the scene. With that in mind, [Andrei Aldea] decided to build a Speak ‘n’ Say in his honor.

The build was inspired by an earlier effort by [Ben Heck]. [Andrei] started by disassembling the Speak ‘n’ Say, and determined that there was a simple button matrix that would allow the toy’s position to be read easily. These buttons were wired into an Arduino Nano, which then reads an SD card and plays sound samples using the MP3 Module from DFR Robot.

[Andrei] made sure the toy was replete with custom graphics, which complete the look. Additionally, each Dave quote on the board has a series of soundbites, chosen randomly by the Arduino, giving a little more variety than the original toy.

It’s a fun build, and we’d love to see a version with line-out or some bigger speakers to blast the Gospel of Dave at a truly impressive volume. We’ve seen other speaking Arduinos, too – like this imposing HAL build. Video after the break.

Continue reading “The Voice Of Dave, Now In Toy Form”

POV Tops Hobbyist Abilities

Sometimes a beautiful project is worth writing on that merit alone, but when it functions as designed,someone takes the time to create a thorough and beautiful landing page for their project, we get weak in the knees. We feel the need to grab the internet and point our finger for everyone to see. This is one of those projects that checks all our boxes. [Nathan Petersen] made a POV toy top called Razzler, jumping through every prototyping hoop along the way. The documentation he kept is what captured our hearts.

The project is a spinning top with an integrated persistence-of-vision (POV) display. That’s the line of LEDs that you see here. To sync up the patterns, the board includes an IMU, but detecting angular velocity with either gyroscope or accelerometer proved problematic. [Nathan’s] writeup of this is worth the read itself, but you’ll also enjoy the CNC workworking part of the project used to create the body of the spinning top.

This was [Nathan]’s first big solo project, and so many of the steps are explained by someone who just entered the deep-end very quickly. If you have experience, you may grin at the simplified reasonings, but for a novice, it makes for an approachable lesson. The way he selects hardware and firmware is pragmatic and perhaps even overkill, so you know he’s going into engineering. This overshot saved him when there were communication problems which needed a sacrifice of some processing power to run I2C on some GPIO.

We hope you enjoy reading about this combinations of POV, firmware (or is it?), and centrifugal force.