PIC Based Picture Frame

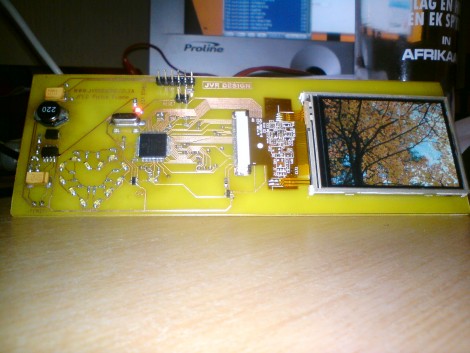
Take a PIC 24HJ256GP206 processor and add a dash of knock-off touchscreen and a pinch of SD card compatibility for a DIY digital picture frame. [Daniel] wrote his own driver for the HX8347 controlled LCD that can achieve 15 FPS at 320×240 resolution with 16-bit color. As this was a gift for his wife, [Daniel] included a heart-shaped ring of LEDs that fade in and out like an electronic pulse. He notes that the JPEG decoder runs rather slow but that’s mostly because of the bottleneck caused when accessing data from the SD card. We’ve got more pictures and a link to the source code after the break.

Continue reading “PIC Based Picture Frame”

Nixie Sudoku: A Look At The Hardware

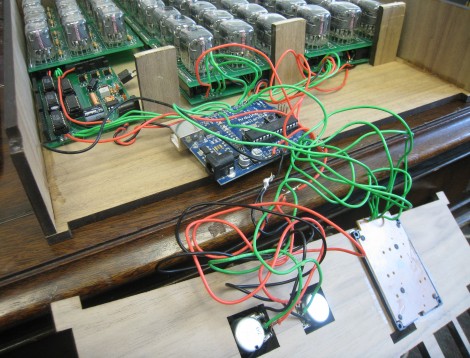
We’re always happy to receive a tour of the guts that make things work. [John Sarik] posted several pictures and descriptions of the hardware that makes up his Nixie Sudoku build. The modular design uses professionally made circuit boards which greatly improve the durability of a large set of circuits such as this.

The design draws on good ideas from similar hardware. The Nixie Duo kit from Ogi Lumen allows tubes to be mounted on top of driver boards with cascading shift registers for control of up to 8 tubes. The ArduiNIX shield makes the high voltages needed for Nixies easy to control with an Arduino. No, [John] didn’t just order these kits and plug them into each other. He designed his own boards to suit his needs. Each driver board can control 9 tubes in a 3×3 grid, all on one PCB. His high voltage board can supply enough juice for the whole system which is tied together with a single Arduino board.

His writeup is quite interesting so do take a look. He also filmed a walk through video which we’ve embedded after the break. It clears up some questions, such as showing the use of a blinking decimal point to indicate the current cursor position.

Continue reading “Nixie Sudoku: A Look At The Hardware”

Android Development 101- Part 2:Graphical Elements

In this tutorial, we will be continuing from where we left off with the “hello world” application.  This time adding a graphical user interface (GUI) and a “toast”. The GUI will consist of a button, textbox and a label. The “toast” will be issued onto the screen when the button is pressed.

Some may wonder what a toast is.  Well, for non-programmers, a toast is a text notification that for the most part is used only to display an error on the screen (I am a big fan of using toasts instead of an alert on the screen as its less intrusive).  For this article we will use a toast to display a message on the screen that will take the text in the textbox and issue a “Hello Greg” onto the bottom of the screen.  After this article completed you will be able to successfully make toast commands, design the layout of the hello world program, and pull text from a textbox.

Continue reading “Android Development 101- Part 2:Graphical Elements”

Xbox 360 Hard Drive Adapter (redux)

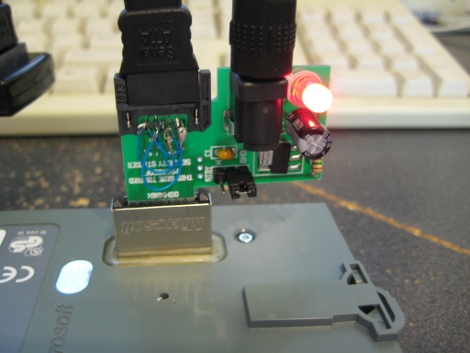
[Chlazza] let us know about their Xbox hard drive to SATA adapter, allowing the use of an Xbox 360 (original) hard drive on a PC without voiding the drive’s warranty. Looking for a fun and enriching experience read: really bored and inspired by a previous adapter we featured, [Chlazza] set out to make their own and ended up succeeding with a board that costs less than $1 in parts. Of course the drive uses its own Fat32 based file system so there is still some hacking to do if you intended to read the data, but this is a step in the right direction.

My What A Large Capacitor Bank You Have

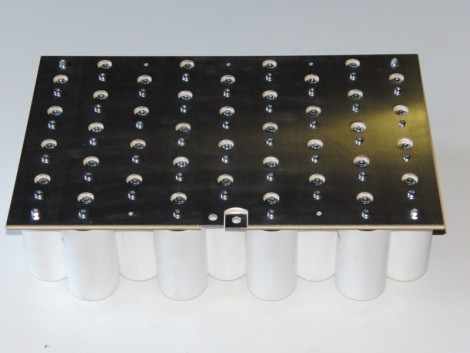
[Daniel Eindhoven] put together this 11,344 Joule capacitor bank that he says would be perfect for weapons such as a rail gun, coil gun, or electrothermal-chemical gun. He machined a couple of aluminum plates to act as a positive and negative bus. The two are separated by a denuded sheet of PCB (making us wonder how he got the copper to peel off like that). Once charged there’s the little problem of how to discharge the system without getting bit, which [Daniel] solved by building a pneumatic switch. We didn’t find the test-fire footage very interesting but we did embed the demonstration of his switch after the break.

Continue reading “My What A Large Capacitor Bank You Have”

Building A Remote Control

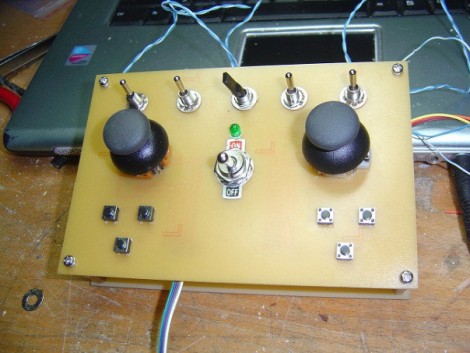
Here’s a homebrew remote control that [Jad Berro] is developing. He’s using a tank robot to test it out but eventually he plans to use it to control an RC plane thanks the 434 MHz wireless module inside. There’s no shortage of input, with two analog sticks from a PlayStation controller, several momentary push buttons, and some toggle switches. Although it’s not shown in the picture above there is also a 16×2 character display that serves as part of the interface. With a navigable menu the only limit to what you can do is the programming space available on the ATmega168 that inhabits the homemade Arduino board at the heart of the system. It certainly would give the robot remote from Friday a run for its money.

Arm Mounted Light Cannon; Villains Beware

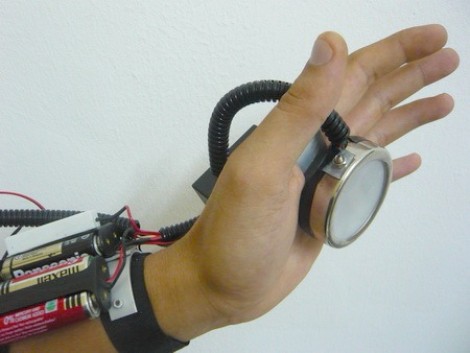
In a hack worthy of the flick Kick Ass, [Chein] built this arm-mounted light weapon. The lamp in the palm of your hand has a ring of LEDs for a nice glowing effect, but the real story is the xenon bulb at its center. The flash capacitor and charge circuit from a disposable camera are used to step up the battery voltage to 330V for an intense and slightly blinding discharge. The charging is started when you press a button on the back of the hand harness, with the flash coming when one of your fingers touches a conveniently positioned trigger. Check it out after the break.

This non-lethal weapon makes for a nice alternative to the dangers involve in playing with fire.

Continue reading “Arm Mounted Light Cannon; Villains Beware”