Giving Siri The Keys To Your House

We haven’t really covered many hacks having to do with Apple’s newest iPhone feature Siri. We’d bet you’ve already heard a bunch about the voice-activated AI assistant and here’s your chance to give it the keys to your house. This project uses Siri to actuate the deadbolt on an entry door in a roundabout sort of way.

This is really just a Siri frontend for an SMS entry system seen in several other hacks. The inside of the door (pictured above) has a servo motor mounted next to, and attached via connecting rod with, the lever-style deadbolt. An Arduino equipped with a WiFly shield controls that servo and is waiting for instructions from the Google app engine. But wait, they’re not done yet. The app engine connects to a Twilio account which gives it the ability to receive SMS messages. Long story short; Siri is sending a text message that opens the door… eventually. You can seen in the demo after the break that the whole process takes over twenty seconds from the time you first access Siri to the point the bolt is unlocked. Still, it’s a fine first prototype.

There’s a fair amount of expensive hardware on that door which we’d like to see converted to extra feaures. [CC Laan] has already added one other entry method, using a piezo element to listen for a secret knock. But we think there’s room for improvement. Since it’s Internet connected we’d love to see a sensor to monitor how often the door is opened, and perhaps a PIR sensor that would act as a motion-sensing burglar alert system.

Don’t need something this complicated? How about implementing just the secret knock portion of the hack?

Continue reading “Giving Siri The Keys To Your House”

Washing Machine Powered Bike

[Ameres Valentin] was looking for a less expensive way to get around after spending in excess of 100 Euros a month on public transportation in Munich. His solution is an electric bicycle powered by a washing machine motor. It’s a 300 Watt motor that runs on 24 Volts, capable of around 3000 RPM. We’re used to seeing hub motors or chain drives on electric vehicle hacks, but it looks like [Ameres] is using a flywheel on the motor shaft to drive the rear wheel of the bike through direct contact.

Inside the saddle bag you’ll find two 12 volt 12 amp hour sealed lead acid batteries which are used in series. It looks like he charges these with a wall wart (that we think might use a switching power supply) modified with a couple of large alligator clamps. A push button mounted on the handlebars makes it go.We wonder if he’s still able to pedal when the batteries are running low? We don’t see a way to disengage the motor from the rear wheel so we’d bet this is something of an issue. Then again, if that charge actually works you’re never far from an opportunity to top off the batteries.

Check out a quick clip of the motor spinning the wheel embedded after the break.

Continue reading “Washing Machine Powered Bike”

Fattening A Thin Client To Run A Debian Desktop

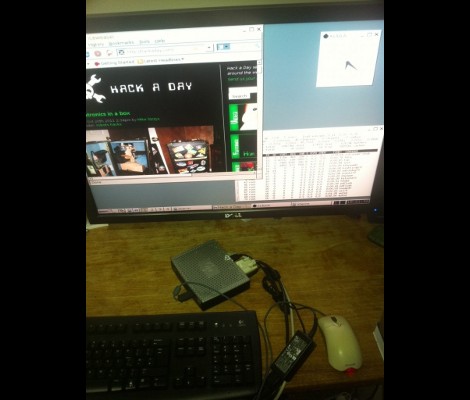
While watching his thin client boot up [Nav] noticed that it’s using some type of Linux kernel. He wondered if it were possible to run a full-blow desktop distribution on the device. A little poking around he got a Debian desktop distribution running on a thin client.

The hardware he’s working with is an HP t5325. It’s meant to be a dumb client, connecting to a backend machine like a Windows Terminal Server or via SSH. But it’s got a 1.2 GHz ARM processor and [Nav’s] preliminary investigations revealed the it’s running a version of Debian for ARM. He used CTRL-C during the boot sequence to derail that process and dump him to a shell. The login was easy enough to guess as the username and password are both ‘root’.

Once he’s got that root access it was slash and burn time. He got rid of the HP-specific setup and made way for additional Debian modules like the apt system. This isn’t trivial, but he’s worked out a bunch of sticking points which makes the process easier. With the repository tools loaded you can install Xserver and Gnome for a full-blown desktop on the embedded hardware.

Using An LCD’s Poor Viewing Angle To Your Advantage

Early LCD monitors had some pretty awful issues when not viewed from directly in front of the screen. These days the technology has really minimized this flaw, but if you still have a cheap monitor on hand you might want to pull it out and give this hack a try. [Chris Harrison] is using oblique viewing angles to display additional information on cheap montiors.

Take a look at the two images above. The one on the left is taken from directly in front of the monitor and looks normal. But if you view the same screen from the side, the financial information is obscured. This is by design. Using very light colors, the obscuring characters are almost indiscernible from straight on, but you can just see them there a little bit (they look like burn-in does on a CRT screen). But from the side, these light colors become quite bold and blend with the rest of the data on the screen.

This works because of the polarizing filters on an LCD screen. You might want to watch [Bill Hammack] explain how an LCD works if you’re not familiar. Because the viewing angle color changes are a flaw and not a feature, manufacturers make the up-and-down angles the worst to improve on side-to-side viewing. [Chris’] experiments play into that by using a computer monitor on its side. Check out the video after the break to see some of the different applications that he uses this for.

Continue reading “Using An LCD’s Poor Viewing Angle To Your Advantage”

Logging Bubble Frequency And Pressure In Your Fermenter

In an attempt to add technology to his brewing process [hpux735] build a sensor rig that monitors bubbles and pressure during fermentation. What does this have to do with brewing great beer? We’re not sure and neither is [hpux735], but he’s got some preliminary readings to spark your imagination.

The bubble sensor itself was inspired by a SparkFun Tutorial where fermenting wine was monitored with a data logger. It uses an optical gate to detect the passage of air. But the goal here was to combine bubble frequency with internal pressure measurements to calculate how much CO2 is being vented. Perhaps it would be possible to get an idea of how close the batch is to completion based on those calculations. A hole was drilled into the fermenter side of an airlock to take these pressure readings.

This actually works quite well during secondary fermentation when the bubble frequency is quite slow. The hardware is able to discern a pressure difference before and after a bubble has passed the lock. Unfortunately the system breaks down during the vigorous bubbling that takes place soon after pitching yeast. See a few bubble-counting clips in the video after the break.

Continue reading “Logging Bubble Frequency And Pressure In Your Fermenter”

Altoid Tin Etching Tutorial

Eminent steampunker [Jake Von Slatt] wrote a small article on etching candy tins for The Steampunk Bible, but the limited space available in the book didn’t allow for a full exposition. To make amends for his incomplete tutorial, he posted this walk through to compliment the Bible’s article.

The process is very similar to the many tutorials we’ve seen on home-etching PCBs using the toner transfer method. Removing the paint from the Altoid tin, creating a mask, printing it on the Sunday circulars, and taking an iron to the tin is old hat for home fabbers.

Unlike PCB manufacturing, [Mr. Von Slatt] doesn’t bother with Ferric Chloride or other nasty chemicals – he does everything with electrolysis. After adding a few tablespoons of table salt to a bucket of water, [Jake] takes a DC power supply and connects the positive lead to the lid and the negative lead to the base. a bit of electrical tape around the corners of the lid keeps the metal from getting too thin.

A nice Copper finish can be applied to a finished tin by swabbing on a solution of Copper Sulfate – a common ingredient in “Root Kill” products. Of course that’s not a necessary step; you can easily enjoy and elegant Altoid tin bare metal.

Adding A Compact Flash Reader To A Korg Triton

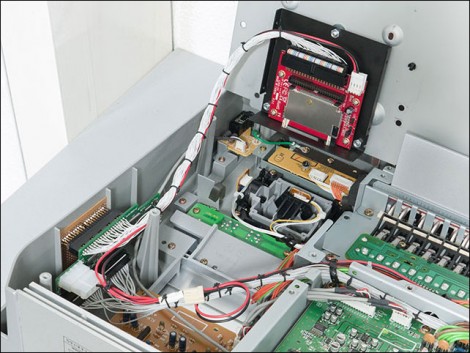
[Roberto Barrios] has a Korg Triton sampling keyboard which he enjoys very much, but has grown tired of using media of yesteryear to store his work. He had the option of floppy disk or Jazz drive and for a time he was using a floppy-to-USB emulator, but the keyboard still insisted on a 1.44 Mb storage limit using that method. He decided to crack open the case and add his own CF reader.

It should be noted that this hack could have been avoided by using the 25-pin connector on the back of the keyboard. He didn’t want to have external hardware, which is understandable if you’re gigging–it’s just more equipment to keep track of. His solution uses the floppy disk drive opening to mount the card reader. His electrical connections are made with a ribbon cable. He cut off one end, and soldered the individual wires to the contacts on the motherboard. The reader is seen as a SCSI drive by the Korg firmware thanks to a SCSI-to-IDE adapter, so the storage limitation is based quite fittingly on the size of the CF card used.

Look at that cable management. You’d think it came straight from the factory like this!