Wiimote-based Whiteboard Lets You Write On Any Surface

propeller_whiteboard

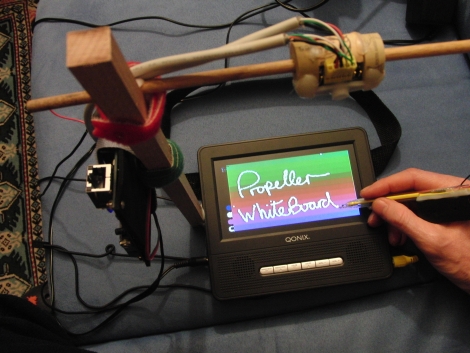
The Wiimote is a fantastic tool for hackers, given their affordability and how easy they are to work with. [Gareth] had a “eureka” moment while working on another Wiimote-based project, and with some alterations, converted it into an electronic whiteboard.

The whiteboard was built using the IR sensor he extracted from a Wiimote, which is wired to an EasyProp board to process the input. The Wiimote is aimed at a LCD screen, which can be “drawn” upon using a light pen he constructed from an IR led and a few batteries. Any movement of the pen is tracked by the Wiimote’s IR sensor and converted to an XY coordinate, which is then painted on the screen. The sensor has the ability to track up to four points at a time, so you can theoretically use up to four pens simultaneously.

[Gareth] points out that the sensor is not limited to tracking small displays, as the white board can be easily scaled up in size using any kind of rear projection device.

Continue reading to see a video of his whiteboard in action.

Continue reading “Wiimote-based Whiteboard Lets You Write On Any Surface”

Simple Fixes Breathe New Life Into Aging Game Consoles

dreamcast_repair

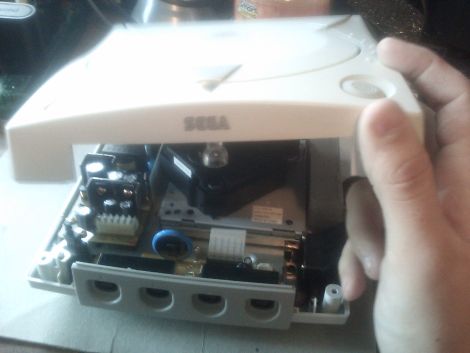
While the Sega Dreamcast has long been out of production, there is an avid fanbase that loves the console dearly. As with many CD/DVD-based consoles, the Dreamcast can sometimes run into issues reading discs, at which point all games are unplayable.

Instructables user [Andrew] got his hands on a pair of the consoles and found that one could not read CDs, while the other suffered from a fried controller interface board, the result of a controller wiring mix-up on his part. Determined to get the consoles up and running again, he disassembled them and got to work, sharing his fixes with us.

The CD drive fix is a pretty standard one. He first needed to locate the potentiometer that regulates the laser. Once he did, a slight counter-clockwise turn is all it required in order to increase the laser’s voltage. Once he did this, he popped in a game to see if it worked. No longer greeted with a disc read error when he powered on his Dreamcast, he reassembled the console and began work on the other one.

To fix his controller issues, [Andrew] had to remove the entire controller board from the console. He eventually located a resistor that had been damaged by his wiring mishap, and replaced it. The console was tested and seeing that the controllers worked again, he put everything back together.

While this pair of fixes is not incredibly complex, it’s nice to see people sharing their tips for bringing these consoles back to life.

These Apple-inspired Speakers Would Make Steve Jobs Envious

isound_speakers

Reader [Brett] sent in the build log of his beautiful set of Apple-inspired computer speakers for us to look over. Having seen our recent post on DIY speakers, he thought he would throw his hat into the ring as well, and we’re glad he did.

He wanted a nice set of speakers to complement his iMac, but couldn’t find anything he liked that would provide the sound quality he was looking for while closely matching the design of the computer. The speakers are constructed out of MDF with CNC milled acrylic front and back panels. Hand-built crossovers reside inside the speaker boxes, which provides for a clean, polished look. He originally planned on building a pair of subwoofers into his desk, but ultimately settled on building a single subwoofer to sit on the floor.

The finished product is simply stunning, and we would have a hard time believing they were a DIY project if we didn’t see them come together piece by piece. Do you think you can match [Brett’s] handiwork?  If so, feel free to share your speaker builds in the comments.

Chilling Drinks With Your Friends’ Faces

facecube

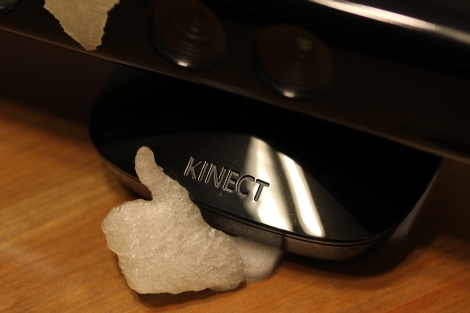
3D printing of Kinect-mapped models seems to be all the rage lately. [Nirav] caught the bug and has developed software which allows him to join in the fun. Frustrated by the lack of documentation and source code for the Fabricate Yourself project, he set out to create his own open-source process for scanning people and objects to share with the hacking community.

His software allows you to aim the Kinect and capture a 3D scan of any object, after which you need to use MeshLab or similar software to turn the scan into a STL file for printing. He says that the process is a bit tedious at the moment, but he is working hard to condense it down into a single step.

While he can scan and print pretty much anything he wants, his ultimate goal is to create ice cube trays for his friends featuring molds of their faces. The project has a lot of promise, though we’re not sure about our friends crunching on our faces after finishing their drink.

limpy_the_robot

Remote-controlled Robot Toy From Air Freshener Parts

[jcopro] is pretty fond of Glade automatic air fresheners. Using a pair of them, he built a simple remote-controlled toy which he shared with us over the weekend. You may remember that he built a remote shutter release system for his camera using these air fresheners, which we featured a few weeks ago.

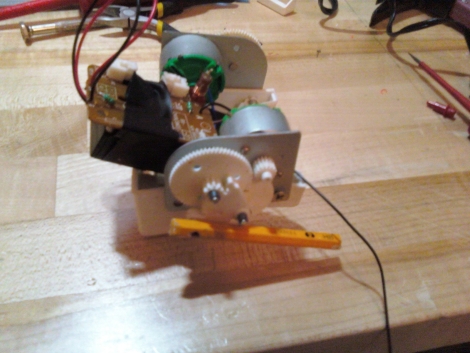
Instead of throwing away the shell of the air fresheners after gutting them for motors and gears, he decided to use the excess plastic as a robot chassis. Using a pair of pencils for legs, he constructed his robot, “Limpy.” He removed a pair of motors and control board from an old toy, mounting it to his creation with a few strips of electrical tape.

He admits that he’s reluctant to even call the toy a robot, but he had fun building it, and suggests that it would make a great beginner project. We agree – it would make a great project for kids, especially if you are looking to reuse an old remote-controlled toy they no longer play with.

Continue reading “Remote-controlled Robot Toy From Air Freshener Parts”

Minty FM Transmitter

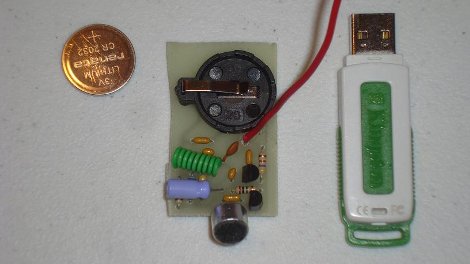
[Chis] wanted an FM transmitter bug device packed in a mint tin, and that is just what he made. Featuring only 17 discrete parts, running off of a 3volt coin cell battery, and small enough to fit inside of a plastic mint box and still have plenty of room for the mints.

Using a simple design the audio enters the device through a electret microphone and hits a transistor for amplification, the signal is then passed to the oscillator section of the circuit which features an LC tank type design which generates the carrier frequency and mixes that with the signal for a range of about 100 feet indoors.

Each section is broken down into steps where it is thoroughly explained with animations, theory, and simulation, if you are wondering how a transistor, wire, and capacitors make an FM transmitter, or if you would like to just make the final project, schematics, pcb files, and assembly instructions are provided as well.

Join us after the break for a short video and be sure to check out the other radio transmitters we have featured as well.

Continue reading “Minty FM Transmitter”

TV Oscilloscope

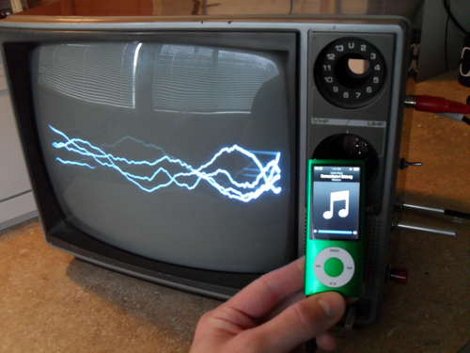
Need an oscilloscope? Want to see the music? Don’t have money, but do have a old TV? Then this TV to oscilloscope mod may be right up your alley. Now don’t go running off just yet, when you’re working inside of a CRT device you are exposed to mains current, high voltage, and high frequency, so extra care needs to be observed .

If you have your rubber welding gloves, and have discharged all your fat capacitors (including the CRT) its pretty much the same magic trick as couple we have previously featured. Patch an amplified input signal into the vertical deflection coil and let her go, but this instructable features much more detailed instruction, and photos so you have a much better chance of replicating this (not quite lab grade) potentially useful device.

Join us after the break for a short video.

Continue reading “TV Oscilloscope”