18650_things_to_do_with_dead_laptop_batteries

Things To Do With Your Laptop Batteries When They’re Dead

[Roy] over at GeekDad had a dead laptop battery on his hands, and decided he would disassemble it to see what useful things he could do with the cells inside. He mentions in his article that even though your laptop might be convinced that its battery is toast, more often than not just one or two cells are damaged. This may not be news to all of our readers, but is worth pointing out to those who might not be aware.

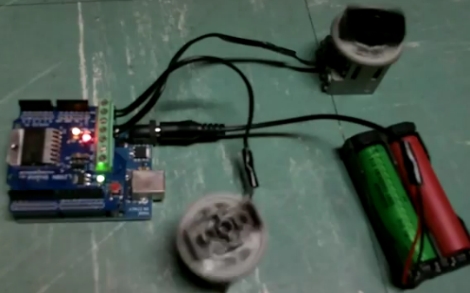
With the bad cells separated from the good, [Roy] thought up a couple of different uses for his newly acquired batteries. His initial idea was to power an LED flashlight that was made to run on the 18650 cells he recovered from his laptop – not a stretch of the imagination, but definitely useful. The second use he came up with was to pair two of the cells together in order to simultaneously power an Arduino and some small Lego motors.

[Roy] lays out all of the standard caveats you would expect regarding the care and feeding of the lithium cells, and even suggests rebuilding the laptop battery as an option for the more skilled members of his audience.

Now we understand that dismantling and re-using old laptop cells is not necessarily groundbreaking, but it’s definitely something that’s worth a bit of discussion. [Roy] admits that his two ideas fall far short of the “18650 Things” his article title suggests, so how about adding a few of your own?

If you have stripped down some laptop batteries to salvage the cells, let us know what you did with them in the comments – we would be interested in hearing about it.

Space Camera Streams Data During Flight

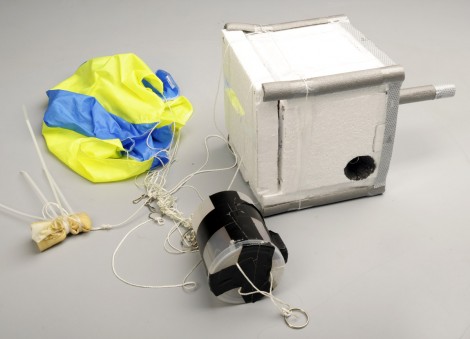
Take the risk of not recovering your hardware out of a near-space camera launch by streaming the data during flight. [Tim Zaman] is part of a team that developed the rig seen above. It sent 119 image back during the recent balloon launch. This included transmissions from as high as 36 kilometers.

The main hardware included a BeagleBoard with connected Webcam housed in a Styrofoam cooler for thermal protection. Pair that with a GPS module for location tracking, and a GPRS module for data transmission and you’re in business.

But that’s not all that went up. The team built a backup hardware module in case the primary failed. This one also had a GPS and GPRS radio, but was driven by an Arduino.

The radio connection made it easy to recover the hardware. GPS data led the team directly to the landing site. The package came to rest on the roof of a building, but we guess that’s more convenient than getting snagged at the top of a huge tree.

Don’t miss the hardware detail video that we’ve embedded after the break.

Continue reading “Space Camera Streams Data During Flight”

Motorized Blinds Put Control At Your Fingertips

remote_controlled_motorized_blinds

While [Bremster] likes the view from his office window, he often needs to get up and adjust the blinds several times throughout the day in order to keep the glare from killing his eyes. Like any other enterprising hacker, he decided that constantly adjusting them was too repetitive, and that he could automate the process with electronics.

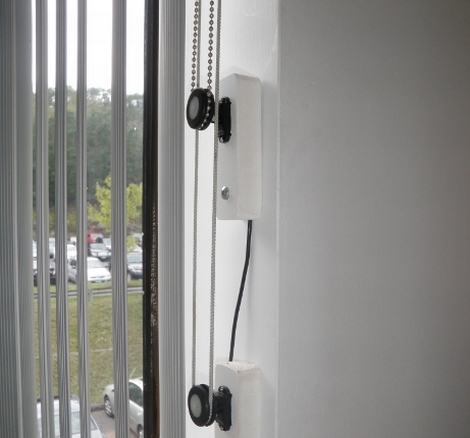
He thought that RC car servos would be a great choice to control the blinds, since they are cheap and the geared drive system offers a lot of torque at low speeds. After modifying the servos to enable continuous rotation, he set off to the hardware store in search of a way to mount them to the blinds’ looped cords.

After mounting some nylon spacers with rubber grommets on the servo arms, he installed them into a set of brackets he built and gave the blinds a spin. Now, he can easily control his blinds from the comfort of his desk with the simple flick of a switch – that’s the kind of laziness ingenuity we can respect!

Continue reading to see a quick video of his motorized blinds in action.

Continue reading “Motorized Blinds Put Control At Your Fingertips”

rfid_door_lock_tutorial

Easily Movable RFID Door Lock Is Great For Dorm Rooms

One of the first things that [Eric] hacked together when he got to college was an RFID door locking system. He found that he was often in a rush to get in and out of his dorm room, and that using a simple wireless key was a great way to streamline his days.

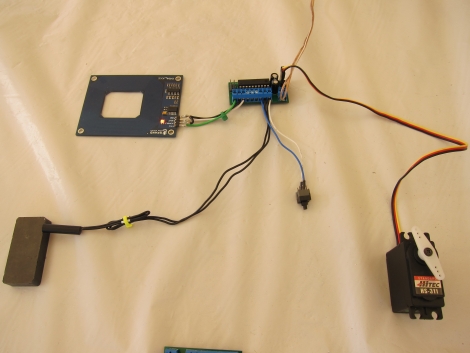
Over the years, he has refined his design, and while his original prototype was functional, it was a bit rough around the edges. In the video posted on his site, he thoroughly explains how his system was built, and shows off the revisions he has made over time. One key consideration when building this system was the fact that the installation had to be non-permanent. Since schools typically frown on physically altering your rooms, he found a non-intrusive means to mount his system in the way of zip ties and foam board.

His RFID door lock looks to work quite nicely, and we especially like the inclusion of the reed switch to ensure that the system knows if the door has been opened or not. If you have about half an hour to spare and are interested in building an RFID entry system of your own, be sure to check out [Eric’s] video below for all the details.

Continue reading “Easily Movable RFID Door Lock Is Great For Dorm Rooms”

Arduino Releases New Products; Help Them Develop ARM-based Arduino

The Arduino folks took advantage of Maker Faire New York to announce their new line of products. There’s several interesting new additions to their product line.

They’ve got a WiFi shield in the works that utilizes a module from H&D Wireless in conjunction with an AVR32 processor to take the workload off of the ATmega chip on the Arduino board. It even has room for you to run your own code on the shield’s processor.

Notable (but of less interest to us) is the 1.0 release of the IDE and the development of a new low-cost board. That hardware is intended to make USB device development easier for those already familiar with the Arduino platform.

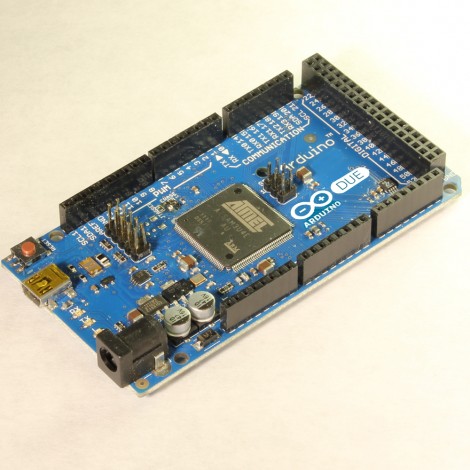
But the big news that caught our eye is the announcement of an ARM Cortex-M3 Arduino called the Due (we already wish that had been named something different just for search term contrast to the Duemilanova). The hardware hasn’t been finalized yet, although you can see a prototype in the picture above. They want community input on the final touches, so get in there and give them a hand!

[Thanks Insapio and Tom]

Using Classic Game Controllers With A Wii

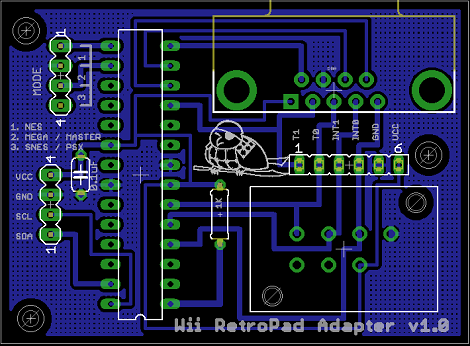
[Bruno]’s Wii RetroPad Adapter was sent into the tip line, and we’re loving the possibility of using Playstation 2, Genesis, NES and SNES controllers with our Wii.

While there are commercial solutions that connect an NES or SNES controller to a Wii, everything connects to the GameCube port and there is no adapter for Sega or Playstation controllers. For his build, [Bruno] used an ATmega168 to read data from the classic controllers and translate that to the Wiimote I2C bus. Think of it as a new classic controller with the same form factor your 8-year-old self knew and loved.

The schematic for the build is very simple and [Bruno] has all the software out in the open. Even the PCB is single sided and looks like it would be a great candidate for a homebrew PCB. There’s no indication [Bruno] is trying to monetize his creation, so he’s either doing right, or so very wrong. Check out the Dualshock 2/Mario 3 demo of this board after the break.

Continue reading “Using Classic Game Controllers With A Wii”

Toaster Oven Forgoes Pop-Tarts, Reflows Solder

For SMD work, solder paste and a heat gun is great. Heat guns aren’t the cheapest thing, so [Karel] decided to make cheap reflow oven out of a toaster oven. With a PCB taken from a laminator temperature control board, the build was fairly successful, so [Karel] decided to add a thermistor to his oven.

There was a problem with placing this thermistor near the board: solder melts in a reflow oven, so [Karel] needed to figure how to connect the thermistor to the control board outside the oven. The solution was crimping thin copper tubing to the thermistor leads and passing that tube through the wall of the oven. Epoxy was used to avoid an electrical short. A low tech solution, but very effective. After applying some solder paste and going in the oven, this board looks very clean. There are a few solder bridges, but nothing a wick can’t take care of.

[Karel] is now working on an update to the temperature controller that controls the oven over a serial connection. Check out the video of a few temperature cycles after the break.

Continue reading “Toaster Oven Forgoes Pop-Tarts, Reflows Solder”