HDCP Falls To FPGA-based Man-in-the-middle Attack

fpga-hdcp-maninthemiddle-attack

It’s been a little while since we talked about HDCP around here, but recent developments in the area of digital content protection are proving very interesting.

You might remember that the Master Key for HDCP encryption was leaked last year, just a short while after Intel said that the protection had been cracked. While Intel admitted that HDCP had been broken, they shrugged off any suggestions that the information could be used to intercept HDCP data streams since they claimed a purpose-built processor would be required to do so. Citing that the process of creating such a component would be extremely cost-prohibitive, Intel hoped to quash interest in the subject, but things didn’t work out quite how they planned.

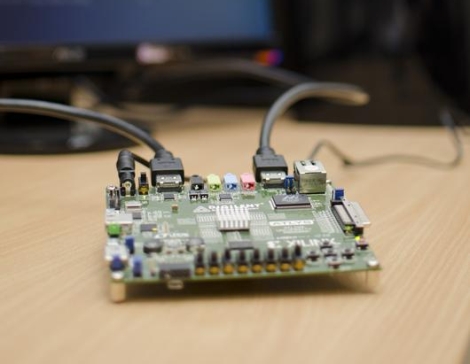
It seems that researchers in Germany have devised a way to build such a processor on an extremely reasonable budget. To achieve HDCP decryption on the fly, the researchers used a standard off the shelf Digilent Atlys Spartan-6 FPGA development board, which comes complete with HDMI input/output ports for easy access to the video stream in question. While not as cheap as this HDCP workaround we covered a few years ago, their solution should prove to be far more flexible than hard wiring an HDMI cable to your television’s mainboard.

The team claims that while their man-in-the-middle attack is effective and undetectable, it will be of little practical use to pirates. While we are aware that HDMI data streams generate a ton of data, this sort of talking in absolutes makes us laugh, as it often seems to backfire in the long run.

[via Tom’s Hardware]

Custom Massive LED Panel Lights Up The Party

giant-led-sign

The guys at BuildLounge wrote us to share a giant LED sign they came across in the submission pile for their “Win a Laser Cutter” contest that’s currently under way. [Stephen Shaffer] helps run a huge party called Fantastic Planet, for which the group typically outsources the lighting arrangements. They got tired of hiring light guys several times a year and built their own mega display for the festivities instead.

The LED sign consists of 1,474 LEDs that output well over 10,000 lumens. The sign was produced for just about $800, which is very reasonable for a display of its size. The whole thing is controlled by a pair of Arduinos paired with 34 MIC5891 shift registers, all mounted on custom designed PCBs that the group produced in-house.

The display looks great, but don’t take our word for it – check out the video below to see it in action.

If you are interested in taking a closer look at how it was built, swing by the build thread to see more details.

Continue reading “Custom Massive LED Panel Lights Up The Party”

Building A Computer Around A 6502 Processor

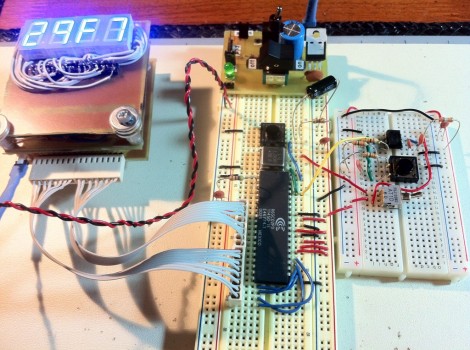
When it came time to try out some old-school computing [Quinn Dunki] grabbed a 6502 processor and got to work. For those that are unfamiliar, this is the first chip that was both powerful, affordable, and available to the hobby computing market back in the 1970’s. They were used in Apple computers, Commodore 64, and a slew of other hardware.

The first order of business in making something with the chip is to establish a clock signal. She sourced a crystal oscillator which runs at 1 MHz, but also wanted the option to single step through code. Her solution was to build two clock signals in one. A toggle switch allows her to choose the crystal, or a 555 timer circuit which uses a push button to fire each clock pulse.

Check out the video after the break to see some single stepping action. There’s no memory on board just yet. But the input pins have been hard-wired to voltage or ground to simulate data input. We wondered what she was up to with that HEX Out project which stiffs the logic on the data bus. Looks like it’s extremely useful in this project!

Continue reading “Building A Computer Around A 6502 Processor”

Siri As A Lippy And Sometimes Profane Television Remote

If the addition of Siri to your iPhone has given you a somewhat-real life companion (and hope that you might not be forever alone) this hack is right up your alley. [Todd Treece] built a hardware fixiture for the living room which bridges the gap between Apple’s new digital assitant and your television.

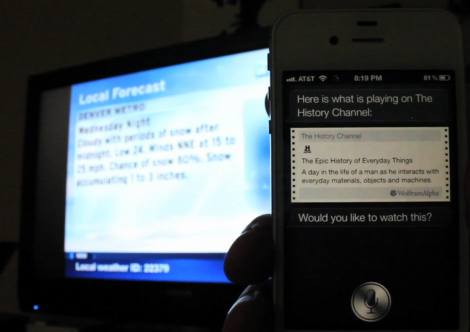
The box itself is an Arduino with a WiFly shield and the hardware necessary to make it a universal infrared remote control. He mounted it on the underside of his end table, with the IR LED in line-of-sight for the television. Using SiriProxy he’s added functionality that lets you request a channel change either by the name of the network, or the channel number.

As you can see in the video after the break, Siri has some strong opinions on the quality of programming for certain channels. That and contempt for your inability to just change the channel yourself. But this setup does augment your remote control experience by giving you a synopsis of what’s playing right now for the channel you’ve requested.

Continue reading “Siri As A Lippy And Sometimes Profane Television Remote”

Arduino Weather-station To Internet Bridge

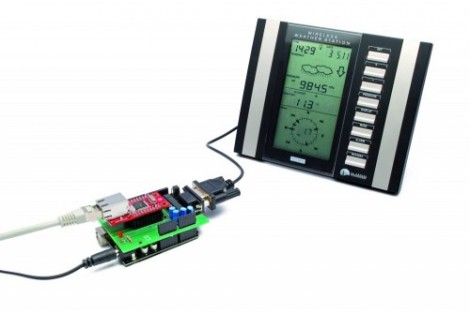
Here’s a project that looks to eliminate the PC necessary for pushing weather station data to the Internet. When you think about it, getting data from your own weather sensing hardware to a site like Weather Underground doesn’t require very much processing at all. The largest chunk of the puzzle is a window to the Internet, and that can be easily accomplished with a microcontroller rather than an always-on computer.

In this case, [Boris Landoni] is using an Arduino along with an RS232 shield and an Ethernet shield. The weather station, a La Crosse WS23xx series, already has an RS232 serial port for grabbing the data. The shield is necessary to step the voltage down to levels that will play nicely with Arduino. It also gives you a D-Sub connector for easy hook up. From there he hit up the documentation for Weather Undeground API, writing code to build the necessary string which is pushed over the Ethernet connection at regular intervals.

If your weather station only offers a USB port you’re not out of luck. Using an embedded platform with USB host functionality you can achieve the same results as we see here.

Graphical Programming With The Arduino IDE

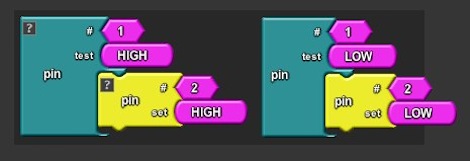
The Arduino is an excellent first embedded development kit, provides a great introduction to electronics, and has the potential to get children into programming. [David] thinks throwing C at non-programmers isn’t the best way to learn programming, so he developed ArduBlock , a graphical programming language for the Arduino.

We’ve seen a number of graphical, block-based programming languages in our time, most notably Scratch. [David] found a project called OpenBlocks that serves as the basis for Android App Inventor.

[David] forked the OpenBlocks project and started working on his new graphical programming language. ArduBlocks uses the Arduino IDE, so everything possible in C with an Arduino should be possible with ArduBlocks. There’s a lot of thought put into the design of the blocks – the first iteration was far too ‘busy,’ but [David] cleaned it up and made the projects understandable.

For an absolute beginner, we couldn’t imagine anything better. ArduBlocks would be great for children, and we can’t wait to see a proper implementation of ArduBlocks with a touch screen.

Funtendo Connects All Your Nintendo Controllers To A PC

For those of us who can’t be bothered to dig out or N64 whenever we want to play Ocarina of Time or our NES whenever we get the urge to play Battletoads, emulators are a godsend. There is a problem, though. A keyboard doesn’t provide the right experience as a the classic NES ‘brick’ or the N64 tritopus controllers. Enter the Funtendo, a breakout box that converts all your well-loved controllers to USB.

The Funtendo uses the Gadget Gangster Propeller Platform with a terminal block module. Putting together the electronics is fairly easy; just strip the ends of the controllers and screw them down to the terminal blocks. N64, NES and Wii Classic Controllers are supported by the Funtendo. Going for the Classic Controller over a Super Nintendo controller reduces the complexity of the build. The Classic Controller can play SNES games and uses an I2C bus, making it easier to wire.

For interfacing the controllers to the computer, the Parallax Propeller Tool, Parallax serial terminal, and PPJoy convert button mashing into readable buttons for the emulator. The build may take more time than pulling an NES out of the attic, but even with a large project box it takes up much less space.

Check out the demo of the Funtendo after the break.

Continue reading “Funtendo Connects All Your Nintendo Controllers To A PC”