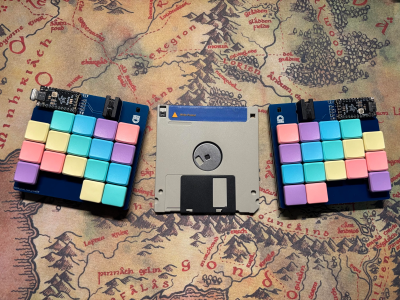
A Hackaday.io page screenshot, showing all the numerous CH552 projects from [Stefan].

All The USB You Can Do With A CH552

Recently, you might have noticed a flurry of CH552 projects on Hackaday.io – all of them with professionally taken photos of neatly assembled PCBs, typically with a USB connector or two. You might also have noticed that they’re all built by one person, [Stefan “wagiminator” Wagner], who is a prolific hacker – his Hackaday.io page lists over a hundred projects, most of them proudly marked “Completed”. Today, with all these CH552 mentions in the Hackaday.io’s “Newest” category, we’ve decided to take a peek.

The CH552 is an 8-bit MCU with a USB peripheral, with a CH554 sibling that supports USB host, and [Stefan] seriously puts this microcontroller to the test. There’s a nRF24L01+ transceiver turned USB dongle, a rotary encoder peripheral with a 3D-printed case and knob, a mouse wiggler, an interface for our beloved I2C OLED displays, a general-purpose CH55x devboard, and a flurry of AVR programmers – regular AVRISP, an ISP+UPDI programmer, and a UPDI programmer with HV support. Plus, if USB host is your interest, there’s a CH554 USB host development board specifically. Every single one of these is open-source, with PCBs designed in EasyEDA, the firmware already written (!) and available on GitHub, and a lovingly crafted documentation page for each.

[Stefan]’s seriously put the CH552 to the test, and given that all of these projects got firmware, having these projects as examples is a serious incentive for more hackers to try these chips out, especially considering that the CH552 and CH554 go for about 50 cents a piece at websites like LCSC, and mostly in friendly packages. We did cover these two chips back in 2018, together with a programming guide, and we’ve seen things like badges built with its help, but having all these devices to follow is a step up in availability – plus, it’s undeniable that all the widgets built are quite useful by themselves!

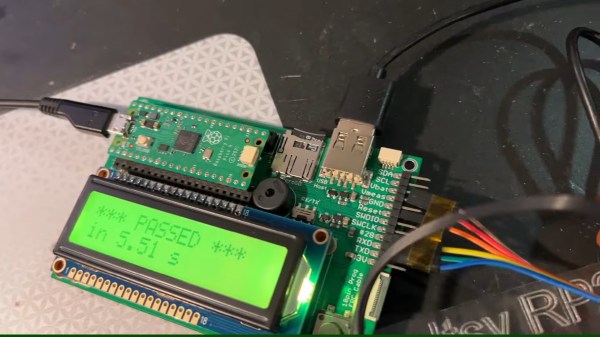
Showing a board with a Pi Pico plugged into it, a USB-A socket marked "USB host", and a character display that says "PASSED" referring to the board being the brains of a testing jig.

USB Host On RP2040 – With PIO

Folks from [Adafruit] are showing off a neat hack – USB host on RP2040, using the now-famous PIO peripheral. [Adafruit] builds a lot of RP2040 boards, and naturally, you gotta test them before you ship them to customers. They’ve been using very specific Teensies for that, and at some point, those became unobtainium. Based on the work of [sekigon-gonnoc] and with help of [Thach], they’ve made their TinyUSB library support bitbanging of USB over PIO, and successfully ported their test jig firmware to it!

The base Pico-PIO-USB repo by [sekigon-gonnoc] shows a pretty impressive state of affairs – with low-speed and full-speed USB host and full-speed USB device modes supported, and quite a few examples to get you started. [Adafruit]’s work integrates this code into their TinyUSB stack, specifically focusing on MST (mass storage) features – as this is what you need to program a RP2040. Of course, they also provide a mass storage example to boot!

Test jigs are pretty important to have when making multiple pieces of a board, and with RP2040 supporting more and more interfaces thanks to PIO, it sounds like the perfect chip for your next production testing-intended PCB. With the jig brains taken care of, you’ll want to look into building no less important mechanical part, and we’ve covered quite a few ways to sort that out – here’s an OpenSCAD script that generates lasercutting files out of KiCad boards, or a jig built out of scrap copperclad FR4, and a pretty extensive tutorial on making your own lasercuttable jigs, to boot.

Continue reading “USB Host On RP2040 – With PIO”

UsbXlater For PS4 Keyboard And Mouse Action

USB

[Frank Zhao]—an awesome guy, an inadvertent Hackaday contributor, and an Adafrut fellow—has come up with a device to use a keyboard and mouse with Playstation 4 games. He calls it the UsbXlater, and even if [Frank] can’t get it working with his PS4, it’s still going to be an awesome tool.

On the board are two USB ports and an STM32F2 microcontroller. The micro provides a USB host interface and a USB device interface, enabling it to translate mouse movements and keystrokes into something a PS4 can understand.  While this project was originally designed to use a keyboard and mouse on [Frank]’s shiny new PS4, it’s not quite working just yet. He’s looking for a few gamer/dev folks to help him suss out the communication between a keyboard/mouse, the UsbXlater, and a PS4.

Of course, even if this device is never used for what it’s designed for, it’s still a very, very interesting tool. With two USB ports, the UsbXlater could act as a signal generator for USB devices and hosts, analyze USB traffic, or provide other applications that haven’t even been thought of yet.

[Frank] is hitting his head against the wall trying to figure out the PS4 protocol, so if you have some USB skills, feel free to hit him up for a blank PCB, though preference falls to people who will game with it and to those with a USB traffic analyzer. If you lack the skills for USB development, [Frank] is still looking for a better name for his device.

Android 3.1 Devices Have USB Host Mode. Here’s How To Use It.

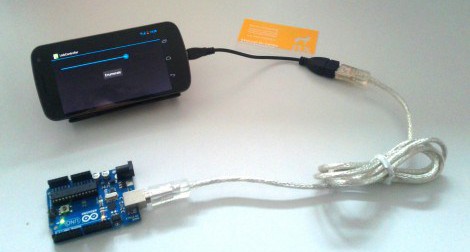
With the coming of Android 3.1 you finally have the option of using the device as a USB host. This may be through a USB OTG (On-the-Go) adaptor, but nonetheless it’s a feature which was sorely missed until now. [Manuel] put together a guide on using Android as a USB host. As you can see, his example hardware is an Arduino board but this is applicable with just about any device.

The tutorial implements a test app for the Android device where a slider will set the brightness of the Arduino’s on-board LED. The Arduino sketch is nothing special, it just reads data received on the UART. This means that it doesn’t care if it’s connected to an Android, PC, OSX, or Linux system, it goes about its business until the RX interrupt updates the data variable.

This will greatly simplify a lot of projects we’ve seen, such as this message scrolling belt buckle. That used extra hardware to make the Arduino the host, a step that is now necessary.

USB Host Mode For Droid

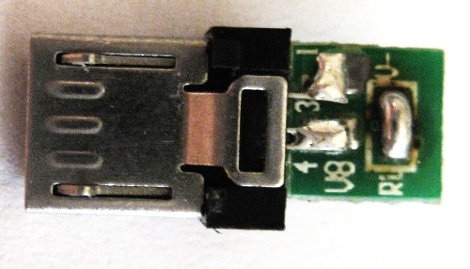
There’s a simple hack to use your Motorola Droid phone as a USB host. It is a hardware-only hack that doesn’t require you to crack open your phone, root it, or even to change firmware (although device drivers in the stock Android image may be quite limited). The dongle above is used as a key to enable the mode while the phone is booting. This was repurposed from a car charging cable by removing the wires and resistor and shorting the resistor pads. Once the phone is in host mode the dongle is swapped for a simple USB-mini to USB-A socket adapter, built from two cables you probably have lying around. Now you can plug in any device you want.

[Thanks Freezer90]

Accessing BGA Pins

[Philip] developed a method of tracking down the pins of a Ball Grid Array. He wanted to do so in order to add USB host functionality to his HP Jordan 720. The method doesn’t directly connect to the BGA but instead finds a via or other access point to serve as a solder point. He first looks up the pin in the BGA datasheet. Once located, he uses the bristle of a toothbrush (teal) to act as a backstop and feeds in some enameled wire (brown) to the appropriate ball. A multimeter is used to check connectivity between the wire and the vias around the chip.

Patience young grasshopper, this should work but it might take a while.

Driving USB Peripherals With Arduino

arduino-driving-USB-keyboard

Circuits@Home have managed to host a USB keyboard with an Arduino and display the keyboard inputs on a character LCD. This uses the USB host shield we covered in August. That host shield includes a MAX3421 which is used here to drive the character LCD.

The control code for the keyboard ends up being fairly simple. The keyboard is polled for entries. The HID input is then examined and converted to ASCII codes for use with the LCD screen. This could make for an excellent controller or debugger for embedded systems. The Arduino, shield, and LCD could be integrated into the keyboard itself with an I/O port for connecting to your project. Commands can be typed out and sent through the I/O port when enter is pressed, with feedback displayed on the screen.

The example code provided with this project lays out the framework for hosting peripherals. We’re looking forward to more projects, and code libraries that take advantage of this new functionality.