Fix Broken Buttons On Your ASUS Computer Monitors

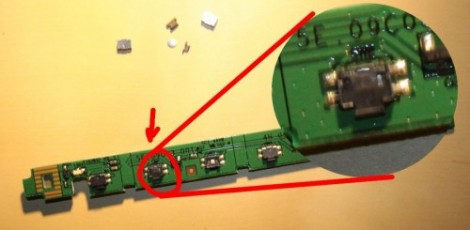
One of the perks of writing for Hackaday is that we often find hacks that we’ve been meaning to do ourselves. Here’s one that will let us fix our borked ASUS computer monitor buttons. [Silviu] has the same monitor we do, an ASUS VW202, and had the same problem of stuck buttons. We already cracked ours open and realized that the buttons are not easily replaced (you’ve got to source the right one). We just unstuck the offender and vowed not to press that button again, but [Silviu] actually figured out how to disassemble and repair the PCB mount switches.

As with most consumer electronics these days the worst part of the process is getting the monitor’s case apart. The plastic bezel has little spring tabs all around it that must be gently pried apart. Once the PCB which hosts the buttons was removed, he took the metal housing off of the broken switch. Inside he found that a bit of metal particulate (leftovers from manufacturing?) were causing the problem. A quick cleaning with a cotton swab removed the debris and got the tactile switch working again.

Adding Digital Game Indicators To A Neo Geo Arcade Cabinet

neogeo

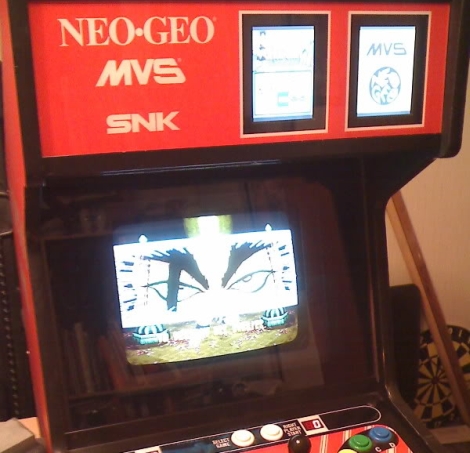
[George] is a Neo Geo aficionado, and among his collection of paraphernalia, he has a MVS-Mini game console. His mini “Multi Video System” is a 2-slot model, meaning that it can hold two game cartridges at a time, which are indicated by plastic cards inserted in the cabinet’s face plate. Instead of swapping those cards out each time he changed cartridges, he thought it would be far cooler to install digital displays instead.

He scoured just about every retail store he could before finding a handful of small 5” digital picture frames that looked to fit the bill. After some careful cabinet modifications he had them wired up and ready for display. The frames don’t hold a ton of pictures, but they do support the use of SD cards. [George] says that he’ll likely just buy a ton of small SD cards, swapping them out whenever he changes games, though over time that might become as tedious as swapping out the plastic cards.

We would love to see [George] take his new digital display up a level, so be sure to share your ideas in the comments. Perhaps we can persuade him to automate things a bit.

Controlling A Cute Ikea Night Light With Android On The Cheap

When [trandi]’s wife saw a cute night light at Ikea, she had to have it. She actually bought several of these for when her husband would inevitably crack one open and start tinkering with the microcontroller inside. The inevitable hack is pretty cool, and also gives us some ideas for interfacing with Android on the cheap.

The build started as an Ikea Spoka night light, an adorable anthropomorphized night light with a squishy silicone skin. Inside the Spoka are a dozen tri-color LEDs that [trandi] can cycle through with the push of a button. After deciding to control the lights inside the Spoka with an Android phone he reached for an IOIO Android breakout board. Fate intervened and [trandi] ended up with a ridiculously cheap Bluetooth modules that provides a simple serial connection to other Bluetooth devices.

The build reuses the blue, red, orange LEDs in the night light but replaces the no-name 8-pin micro with an ATtiny2313. [Trandi] wrote a small Android app to control the color over a Bluetooth serial connection. Check out his demo after the break.

Continue reading “Controlling A Cute Ikea Night Light With Android On The Cheap”

Reverse Geocache Box Looks Great And Packed With Features

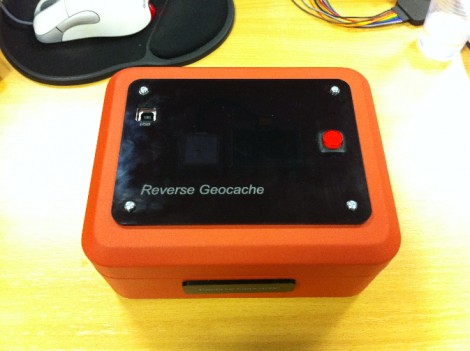
[Ranger Bob] crafted this great looking Reverse Geocache box. Our favorite feature is the black piece of acrylic on top. It’s laser cut (not sure if the letters are engraved or not) and gives a great finished look while hiding a couple of things at the same time.

The orange box is a metal cash box, and there’s a smooth indentation in the lid where the handle resides when not being carried. [Bob] removed the handle and mounted the GPS module in that void. But there’s also an OLED display mounted next to it. As you can see in the demo video after the break, the screen is bright enough to be seen clearly through the smoky acrylic covering that depression.

This project gave [Bob] the chance to order his first professionally made circuit board. He did the design in Eagle, managing to keep within the 5cmx5cm limits of Seeed Studio’s least expensive Fusion PCB option. The board hosts the PIC 18F87J50 responsible for handing the screen, GPS module, input button, and USB port. Power comes from an internal Lithium battery.

We’ve featured a lot of Reverse Geocache boxes and they’re still one of our favorite projects because so much love goes into the design and build process. Here’s another one that we chose randomly for your amusement.

Continue reading “Reverse Geocache Box Looks Great And Packed With Features”

Doom For Your Calculator Gets A Color Upgrade

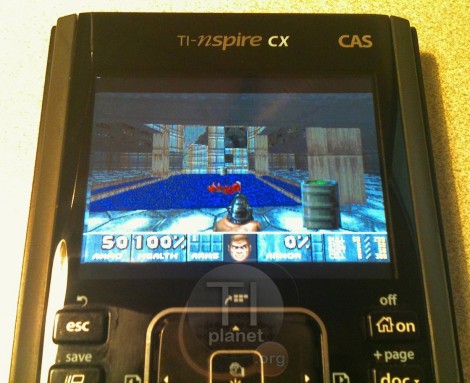
You’re not still playing nDoom in black and white, are you? What decade do live in? Thankfully, the Doom port for TI-nspire calculators has been upgraded to support color. That is if you’ve got the hardware to run it.

The video after the break (and the image above) shows a TI-nspire CX running the popular first-person-shooter. It’s seen several upgrades since the beta version which we saw piggy-backed with a different TI-83 hack a year ago. The control scheme has been tweaked, and a menu system was added. It’s not the same on-screen menu that you would see with the DOS version of the game, but it accomplishes that same thing. This port is packaged with the Ndless program that unlocks the hardware so that you can perform your own hacks.

Unfortunately there is still no sound available for the game but that is a project for a different time. We know it must be possible because we’ve seen a TI-84+ used to play music stored on a thumb drive. Continue reading “Doom For Your Calculator Gets A Color Upgrade”

Building A Variable Frequency Drive For A Three-phase Motor

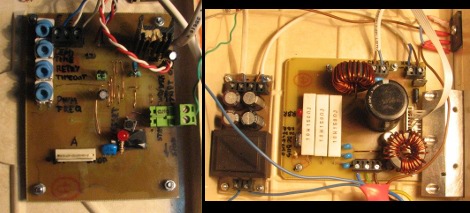
Here are the power and driver boards that [Miceuz] designed to control a three-phase induction motor. This is his first time building such a setup and he learned a lot along the way. He admits it’s not an industrial quality driver, but it will work for motors that need 200 watts or less of power.

The motor control board uses an MC3PHAC driver IC and an IRAMS06UP60A handles the power side of things. The majority of the board design came from studying the recommended application schematics for these two parts. But that’s far from all that goes into the setup. Motor drivers always include levels of protection (the whole reason to have a driver in the first place) and that comes in several different forms. [Miceuz] made sure to add EMI, over voltage, and over current protection. He discusses all of these, sharing links that explain the concepts of each.

Reusing An Old Pacemaker As A Flash Timer

pacemaker-flash-timer

Most people use pacemakers to, you know, keep their heart pumping at a steady rhythm. [David Prutchi] on the other hand has found a pretty novel use for some of the old pacemakers he has in his collection.

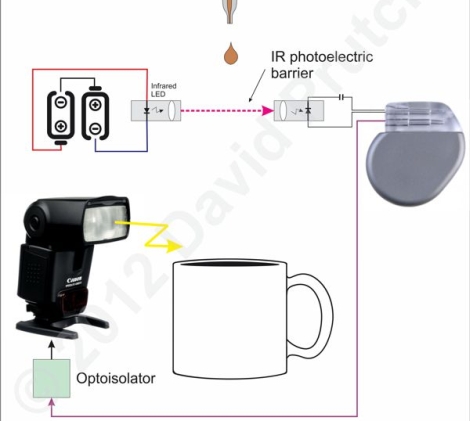
We really had no idea that pacemakers had uses outside the world of medicine, but [David] has taken advantage of their reliability in one of his favorite hobbies – high speed photography. In a darkened room, he set up an infrared barrier which feeds its signal to the atrium input of an old pacemaker. The signal is relayed through the ventricular output, which then fires his camera’s flash.

The pacemaker allows [David] to set an “AV” delay, which is the interval between when the atrium input receives an electrical impulse and when that signal is repeated from the ventricular output. This allows him to finely tune how much time elapses from when a drop of milk breaks the IR barrier to when his flash actuates.

We think this is a pretty cool way to reuse an old pacemaker, but check out the shots he has captured and judge for yourself.