Hackaday Prize Entry: Laptop Batteries For A Power Bank

USB power banks – huge batteries that will recharge your phone or tablet – are ubiquitous these days. You can buy them at a gas station or from your favorite online retailer in any capacity you would ever want. Most of these power banks have a tremendous shortcoming; they need to charge over USB. With a 10,000 mAh battery, that’s going to take a while.

We already have batteries with huge capacities, are able to charge quickly, and judging from a few eBay auctions, can be picked up for a song. [Kumar] is working on a device that leverages these batteries – and the electronics inside of them – to build a smarter power bank.

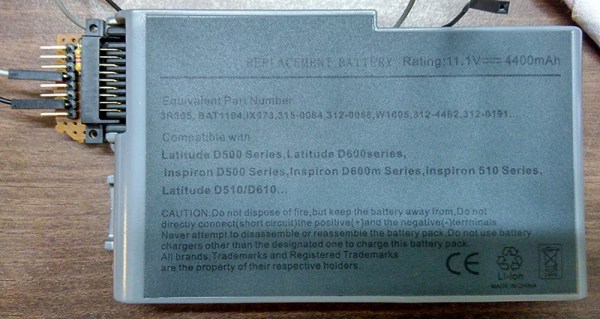
Right now, [Kumar] is working with Dell Latitude D5xx/D6xx replacement batteries that he can pick up easily. These batteries have an SMBus interface, and with a low power ARM microcontroller and a TI BQ24725a, he has everything he needs to efficiently and safely charge these batteries.

[Kumar] says he’s looking for some community suggestions and feature requests for his project. If you have any, be sure to drop them over on his project page.

The 2015 Hackaday Prize is sponsored by:

Generate Graph Paper — Complete With Jolly Wrencher

There’s a lot of talk about CAD software these days, and don’t get us wrong, they’re an essential tool of the trade. But for roughing out an idea, nothing tops paper and a pencil. Even the back of a cocktail napkin will do.

If you’re like us, at some point you may have had an engineering teacher force you to sketch your ideas out on paper, rather than in software. Or maybe you went to a university that required engineering students take a drawing/drafting class, where the first few weeks, you’re only allowed to use paper and pencil.

It may seem silly that in today’s age that one would choose to sketch an idea out by hand, but one simple drawing can communicate an idea quickly and easily – and that’s key. After all, the biggest part of engineering is communication.

If you’re a bit older you may remember a staple in every engineering office was the green graph paper – some people called it an “Engineer’s Notepad.” It’s basically perfect for jotting down an idea. Thick lined graph paper on the back of each page that lets the lines be visible on the front, without being distracting. It’s becoming harder and harder to find at your local office supply place, but if you search for “Ampad Engineering Pad” you’ll still find it. (There is also a “National” brand that this writer prefers.)

If you’re in a pinch, or don’t want to pay for a full pad, we found a wonderful alternative. This online graph paper generator will allow you to make your own graph paper, and even customize it to suit your needs. With things like multi-weight lines, and polar graphs and much more. The result is a PDF file you can download and keep for the future. Or if you’re a bit crafty, you can add your own logo in an vector-type editing program such as Inkscape for free.

Still need some pointers on how to using this for project planning? [Steve] sets the standard for graph-paper project planning.

Disassembled Mouse Keeps Track Of Gas Meter

After building devices that can read his home’s electricity usage, [Dave] set out to build something that could measure the other energy source to his house: his gas line. Rather than tapping into the line and measuring the gas directly, his (much safer) method was to simply monitor the gas meter itself.

The major hurdle that [Dave] had to jump was dealing with an ancient meter with absolutely no modern electronics like some other meters have that make this job a little easier. The meter has “1985” stamped on it which might be the manufacturing date, but for this meter even assuming that it’s that new might be too generous. In any event, the only option was to build something that could physically watch the spinning dial. To accomplish this, [Dave] used the sensor from an optical mouse.

The sensor is surrounded by LEDs which illuminate the dial. When the dial passes a certain point, the sensor alerts an Arduino that one revolution has occurred. Once the Arduino has this information, the rest is a piece of cake. [Dave] used KiCad to design the PCB and also had access to a laser cutter for the enclosure. It’s a great piece of modern technology that helps integrate old analog technology into the modern world. This wasn’t [Dave]’s first energy monitoring system either; be sure to check out his electricity meter that we featured a few years ago.

Retrotechtacular: Building Hammond Organ Tones

Here’s a short film made by the Hammond Organ Company with the intent to educate and persuade potential consumers. Right away we are assured that Hammond organs are the cream of the crop for two simple reasons: the tone generator that gives them that unique Hammond sound, and the great care taken at every step of their construction.

Hammond organs have ninety-one individual electromagnetic tone wheel assemblies. Each of these generate a specific frequency based on the waviness of a spinning disk’s edge and the speed at which it is rotated in front of an electromagnet. By using the drawbars to stack up harmonics, an organist can build lush walls of sound.

No cost is spared in Hammond’s tireless pursuit of excellence. All transformers are wound in-house and then sealed in wax to make them impervious to moisture. Each tone wheel is cut to exacting tolerances, cross-checked, and verified by an audio specialist. The assembly and fine tuning of the tone generators is so carefully performed that Hammond alleges they’ll never need tuning again.

This level of attention isn’t limited to the guts of the instrument. No, the cabinetry department is just as meticulous. Only the highest-quality lumber is carefully dried, cut, sanded, and lacquered by hand, then rubbed to a high shine. Before it leaves the shop, every Hammond organ is subject to rigorous inspection and a performance test in a soundproofed room.

Continue reading “Retrotechtacular: Building Hammond Organ Tones”

Gates To FPGAs: TTL Electrical Properties

On the path to exploring complex logic, let’s discuss the electrical properties that digital logic signals are comprised of. While there are many types of digital signals, here we are talking about the more common voltage based single-ended signals and not the dual-conductor based differential signals.

Simulated "Real Life"
Single-ended Logic Signal

I think of most logic as being in one of two major divisions as far as the technology used for today’s logic: Bipolar and CMOS. Bipolar is characterized by use of (non-insulated gate) transistors and most often associated with Transistor Transistor Logic (TTL) based logic levels. As CMOS technology came of age and got faster and became able to drive higher currents it began to augment or offer an alternative to bipolar logic families. This is especially true as power supply voltages dropped and the need for low power increased. We will talk more about CMOS in the next installment.

TTL was a result of a natural progression from the earlier Resistor Transistor Logic (RTL) and Diode Transistor Logic (DTL) technologies and the standards used by early TTL became the standard for a multitude of logic families to follow.

Continue reading “Gates To FPGAs: TTL Electrical Properties”

Talk Of The Town: Hacker Channel Tomorrow

Get in touch with Hackers everywhere. Take part in the Collabatorium tomorrow, live!

request-to-join-hacker-channelThings get started on Wednesday, July 1st at 6:30pm PDT (UTC-7). Hundreds of hackers will be on hand discussing what they’re building, all the stuff happening in the hacker-sphere these days, and joining forces for that next great hack!

All are invited to take part. Head on over the Hackaday Prize Hacker Channel right now and click on the left sidebar link that says “Request to join this project”.

We highly recommend adding a custom avatar (if you haven’t already) so that others in the Collabatorium will be able to put a picture to your personality. The interface is ready for chat, links, images, code and much more so bring your questions and share your knowledge.

Now that you’ve clicked for an invite, while away the hours until it begins by heading over to VOTE in this week’s Astronaut or Not. And soon after you run through your 50 votes we’re sure you’ll also figure out you don’t have to wait for us to get the conversation started in the Hacker Channel ;-)

Maker Faire Kansas City: Entrepreneurial Spirit Taking Shape

One of the great things about an event like the Kansas City Maker Faire is that there are so many reasons that makers sign up to show their things. Some makers come to teach a skill, and others to sell their handmade creations. Those with an entrepreneurial streak looking to launch a product might rent a booth to get a lot of eyes on their idea. That’s just what [Ted Brull] of Creation Hardware was after this weekend–exposure for Kevo, his small-scale vacuum former.

kevo-mt-dew
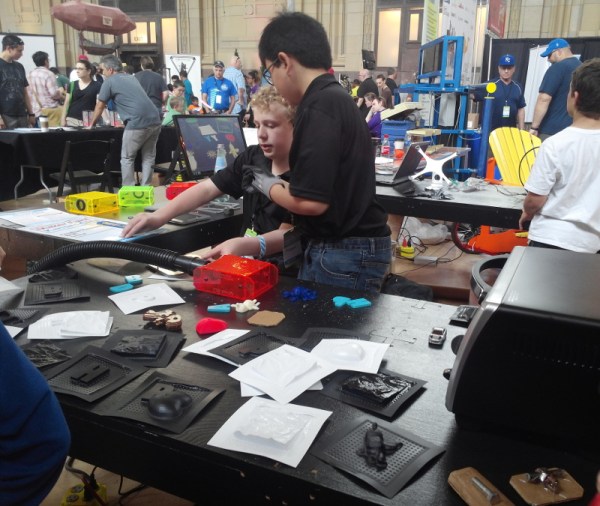
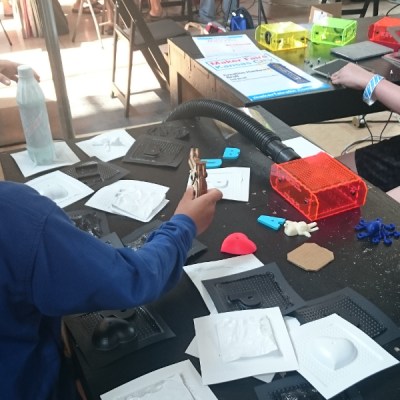
Kevo is a simple and affordable solution for makers of all stripes. It can be used to make molds, blister packaging for items, or even electronics enclosures. [Ted]’s Kickstarter campaign for Kevo has already been successfully funded, but there’s still plenty of time to get a Kevo kit for yourself. The basic reward includes the vacuum-forming chamber and two sizes of adapters that cover most vacuums. It also ships with an aluminium frame to hold polystyrene sheets during the heating and molding processes, and starter pack of pre-cut pieces in black, white, and clear plastic.

Creation Hardware had many vacuum-formed molds on display and were constantly making more from 3D-printed objects, toys, and other things. Our favorite mold was a 20oz bottle of Mountain Dew, which shows how far the small sheets of plastic can stretch.