Liquid Nitrogen in the Streets

Why Is There Liquid Nitrogen On The Street Corner?

Any NYC hackers may have noticed something a bit odd this summer while taking a walk… Giant tanks of the Liquid Nitrogen have been popping up around the city.

There are hoses that go from the tanks to manholes. They’re releasing the liquid nitrogen somewhere… Are they freezing sewer alligators? Fighting the Teenage Mutant Ninja Turtles? Or perhaps, cooling our phone lines??

Luckily, we now have an answer. Popular Science writer [Rebecca Harrington] got to investigate it as part of her job. As it turns out, the liquid nitrogen is being used to pressurize the cables carrying our precious phone and internet service in NYC. The cables have a protective sheath covering them, but during construction and repairs, the steam build up in some of the sewers can be too much for them — so they use liquid nitrogen expanding into gas to supplement the pressurized cables in order to keep the them dry. As the liquid nitrogen boils away, it expands 175 times which helps keep moisture out of the cables.

Continue reading “Why Is There Liquid Nitrogen On The Street Corner?”

Learn FPGAs In Your Browser

FPGAs aren’t really programmed, they are configured. Most designers use Verilog or VHDL to describe the desired circuit configuration. Developers typically simulate these configurations before committing them to silicon (a good habit, especially if you ever graduate from FPGAs to ASICs where changes are very expensive). That simulation takes a lot of software you have to install and learn, right?

Not necessarily. You can do e-mail, word processing, and PCB layout in your browser. Why not FPGA design? The EDAPlayground website provides two editor views: one for your main “code” and another for the testbench (the simulation driver you use to test your design). You can even open multiple files, if you have a complex design.

Once you’ve entered your Verilog or VHDL (or picked one of many examples) you can run the simulation and see the result right in your browser. No software to install, and–outside of actually learning VHDL or Verilog–not much learning curve.

As [Strauburn], [combinatorylogic], and others commented on our recent post about a VHDL CPU, you can do a lot of learning without ever having your hands on real hardware. The web site gives you access to several different tools (useful if you want to see how your code will behave on different tools) and also many standard verification libraries. There are limited synthesis tools, but honestly, if you want to go to real hardware, you are going to want the vendor tools for the specific FPGA you are using.

Continue reading “Learn FPGAs In Your Browser”

Hackaday Prize Entry: Two Factor Authentication Key

Because people are generally idiots when it comes to choosing passwords — including people who should know better — Google created Google Authenticator. It’s two-factor verification for all your Google logins based on a shared secret key. It’s awesome, and everyone should use it.

Actually typing in that code from a phone app is rather annoying, and [Alistair] has a better solution: an Authenticator USB Key. Instead of opening up the Authenticator app every time he needs an Authenticator code, this USB key will send the code to Google with the press of a single button.

The algorithm behind Google Authenticator is well documented and actually very simple; it’s just a hash of the current number of 30-second periods since the Unix epoch and an 80-bit secret key. With knowledge of the secret key, you can generate Authenticator codes until the end of time. It’s been done with an Arduino before, but [Alistair]’s project makes this an incredibly convenient way to input the codes without touching the keyboard.

The current plan is to use an ATMega328, a real-time clock, and VUSB for generating the Authenticator code and sending it to a computer. Getting the secret key on the device sounds tricky, but [Alistair] has a trick up his sleeve for that: he’s going to use optical sensors and a flashing graphic on a web page to send the key to the device. It’s a bit of a clunky solution, but considering the secret key only needs to be programmed once, it’s not necessarily a bad solution.

With a small button plugged into a USB hub, [Alistair] has the perfect device for anyone annoyed at the prospect at opening up the Authenticator app every few days. It’s not a replacement for the app, it just makes everything easier.

The 2015 Hackaday Prize is sponsored by:

program window

Flyfish FF32 Gets GUI

[CWroos] has written an impressive GUI for the Flyfish FF32. The Flyfish is a port expander of sorts, allowing the user access to a large array of I/O , analog inputs, SPI, I2C and a few other connectivity options over a USB connection. There is no driver as it uses a native HID driver in the operating system of the device it’s attached to. It’s not just tethered to a PC either. It works with Raspberry Pi, Beaglebone and several other SBCs.

program window

[CWroos]’s GUI makes it easier than ever to interact with the FF32. It has a script editor allowing you to run and edit scripts on the fly (pun intended). It appears he’s actually written his own basic like language for the scripting, which he goes into great detail on his site. There’s a blinky script example, and few more complex examples that will show you how to read temperature and control a servo.

There is also the ability to control the hardware directly allowing you to set pins, read firmware version, set the USB address and several other options. If you have an FF32 lying around, be sure to check out [CWroos]’s program and let us know how it works for you.

Automatically Designing 3D Printers From E-Waste

No one wants to design consumer electronics that last longer than a few years. This trend is an ecological disaster, with millions of tons of computers, printers, fax machines and cell phones ending up in landfills. In these landfills, all the lead and chemicals used to extract minuscule amounts of gold plating leech into the environment. Turning it all around is monumental, but reusing some of this waste can help make a difference.

[Masterperson] and [Maaphoo] have been working on a way to turn those tons of e-waste into something useful. They’ve come up with a framework for turning e-waste into 3D printers. With a clever application of Python and FreeCAD Macros, this project can generate a model of a 3D printer using motors, shafts, and bearings taken from discarded 2D printers.

Right now a printer can be configured by adding the parts you have on hand to a configuration file, running a Python macro in FreeCAD, and waiting until the macro generates the parts to build a cartesian bot. This macro also spits out the files for the parts that need to be printed, and can interface with Plater to optimize the placement of these printed parts on an existing printer.

It’s a very cool project, but it’s not done yet: the team is looking for help to refine the printer designs and possibly growing more designs than a simple cartesian bot. Anything that is explicitly designed to pick the meat off of 2D printers is a great idea, and turning those into real 3D printers is the cherry on top.

A Breadboard In A Browser

[Flownez] sent in a tip that a port of the venerable Falstad circuit simulator is now available that doesn’t require Java (it uses HTML 5). This is a welcome port since some modern browsers (particularly Chrome) make it difficult to run Java applets and prevented the Falstad simulator’s execution.

spice2
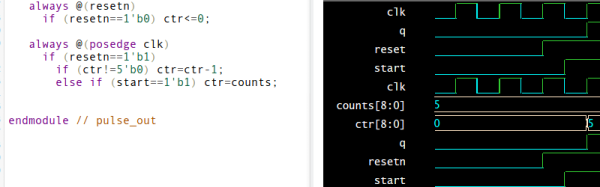
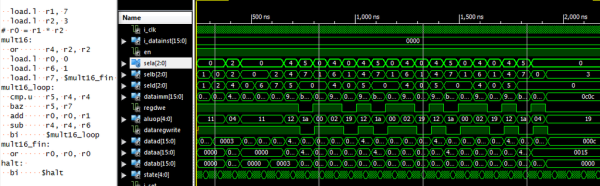
Like the original simulator, this one is great to show a classroom circuits and encourage building or studying circuits in the browser. There’s no extra software to install, which is handy for an impromptu demo. Another cool feature is the visualization of current flow as animated dots. The dots move in the direction of the current flow and the speed of motion is proportional to the amount of current. Watching a capacitor charge with the moving dots is very illustrative. You can also view data in a scope format or hover the mouse over things to read their values.

You can open a blank circuit and add quite a few components (use the right click button on your mouse or the menu to add components and wires). However, you can also pick from a number of predefined circuits ranging from the simple (a voltage divider, for example) to the illustrative (a PLL frequency doubler comes to mind). There’s even an AM radio (see below) that you can tune to find several “stations” by varying the tuning capacitor’s value. Circuit elements include many types of analog and digital components.

Continue reading “A Breadboard In A Browser”

Designing A CPU In VHDL For FPGAs: OMG.

If you’ve been thinking about playing around with FPGAs and/or are interested in CPU design, [Domipheus] has started a blog post series that you should check out. Normally we’d wait until the whole series is done to post about it, but it’s looking so good, that we thought we’d share it with you while it’s still in progress. So far, there are five parts.

minispartan6In Part One, [Domipheus] goes through his rationale and plans for the CPU. If you’re at all interested in following along, this post is a must-read. The summary, though, is that he’s aiming to make a stripped-down 16-bit processor on a Spartan 6+ FPGA with basic arithmetic and control flow, and write an assembler for it.

In Part Two, [Domipheus] goes over the nitty-gritty of getting VHDL code rendered and uploaded to the FPGA, and as an example builds up the CPU’s eight registers. If you’re new to FPGAs, pay special attention to the test bench code at the end of the post. Xilinx’s ISE package makes building a test suite for your FPGA code pretty easy, and given the eventual complexity of the system, it’s a great idea to have tests set up for each stage. Testing will be a recurring theme throughout the rest of the posts.

In Part Three, [Domipheus] works through his choices for the instruction set and starts writes up the instruction set decoder. In Part Four, we get to see an ALU and the jump commands are implemented. Part Five builds up a bare-bones control unit and connects the decoder, ALU, and registers together to do some math and count up.

pipe

We can’t wait for further installments. If you’re interested in this sort of thing, and are following [Domipheus]’s progress, be sure to let him know: we gotta keep him working.

Of course, this isn’t the first time anyone’s built a soft-CPU in an FPGA. (The OMG was added mostly to go along with the other TLAs.) Here’s a tiny one, a big one, and a bizarre one.