Learn Bluetooth Or Die Tryin

Implementing a Bluetooth Low Energy (BLE) device from scratch can be a daunting task. If you’re looking for an incredibly detailed walkthrough of developing a BLE project from essentially the ground up, you’ve now got a lot of reading to do: [Jocelyn Masserot] takes you through all the steps using the ARM-Cortex-M0-plus-BLE nRF51822 chip.

The blog does what blogs do: stacks up in reverse-chronological order. So it’s best that you roll on down to the first post at the bottom and start there. [Jocelyn] walks you through everything from setting up the ARM compiler toolchain through building up a linker script, blinking an LED, flashing the chip, and finally to advertising your device to your cell phone. It’s a lot of detail, but if you’re doing something like this yourself, you’re sure to appreciate it.

Of course, all the code is available for you to crib peruse on [Jocelyn]’s GitHub. And for yet more background reading on BLE, check out the Hackaday Dictionary.

New Angle On Raspberry Pi Zero Hub

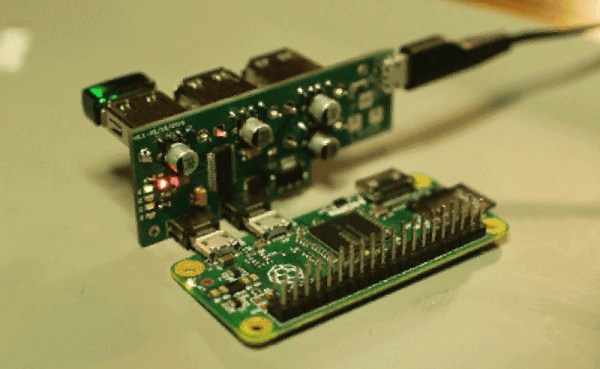
Collectively, the Hackaday readers sigh, “Not another Pi Zero hub!!!”. But [Sean Hodgins’] hub is different. It has a new angle, literally. Besides, it’s an entry in the Hackaday and Adafruit Pi Zero Contest .

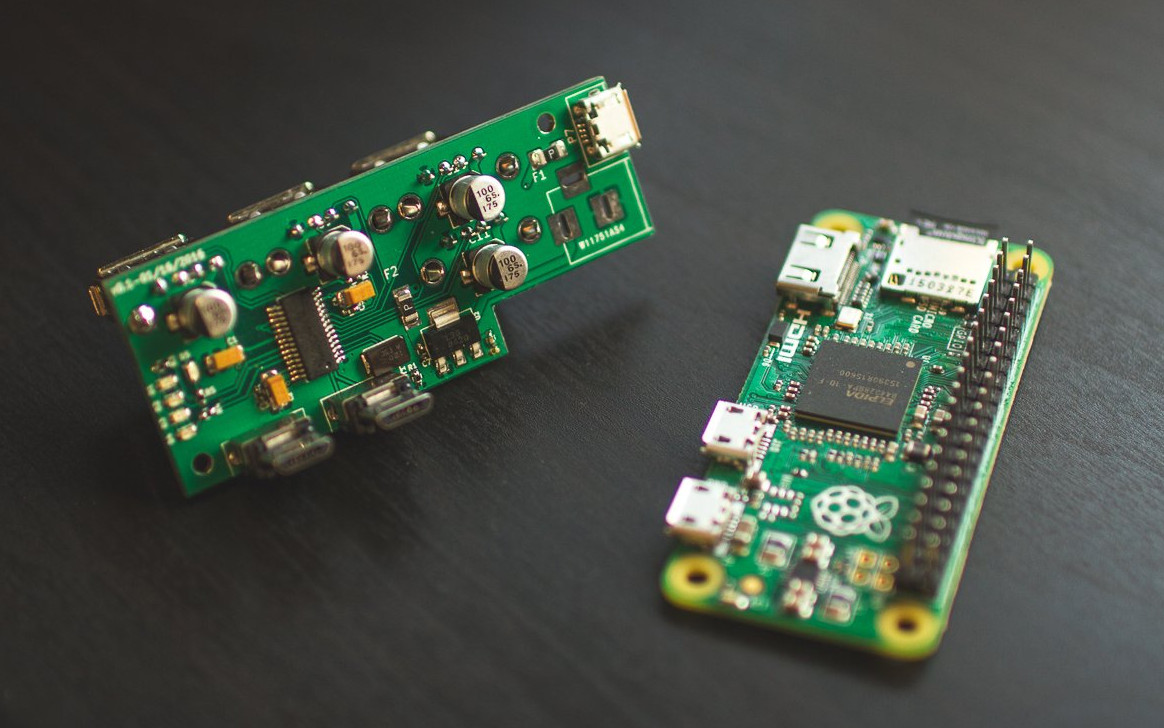
1514291454445337873[Sean Hodgins’] acute approach is orthogonal to most of the other hubs we’ve seen. He’s mating the hub at right angles to the Zero. The hub plugs into both the on-the-go USB port and the USB power port. No extra cables or wiring needed. [Sean] plans to release the design on GitHub after his Kickstarter campaign ends. He’s supplying bare boards for those who like the smell of solder paste.

This project nicely triangulates the issues of adding a hub to the Zero. The physical connection is solid with the boards connecting via the USB connectors. Power is supplied through the hub the way the Pi expects, which means all the protections the Pi Foundation built into the onboard conditioning are left in place. This also reduces surge problems that might occur when back powering through a hub and hot swapping USB devices. Another neat feature is the notched corner leaving the HDMI port accessible. Similarly, the Pi’s GPIO pins are free of encumbrance. One drawback is the hub is fused at 2 amps, just like the Pi. It would be nice to have a little more headroom for power hungry USB devices. Maybe another 0.5 amp to allow for the Zero’s usage.

[Sean] snaps the two together after the break.

Continue reading “New Angle On Raspberry Pi Zero Hub”

A DOS Education In Your Browser

In the 1970s and 1980s, a lot of us learned to program using good old-fashioned BASIC on machines ranging from Altairs, Commodores, Apple IIs, and the like. Sometime in the 80’s the IBM PC running MSDOS because the de facto standard, but it was still easy enough to launch BASIC and write a simple little program. Of course, there were other programs, some serious like C compilers, some semi-serious like flight simulators, and some pure fun like Wolfenstein 3D.

If you read Hackaday, you’ve probably noticed that a lot of people emulate old computers–including old MSDOS PCs–using a variety of techniques, including Raspberry PI boards running DOSBox or another emulator. Honestly, though, that’s a lot of effort just to run some old software, right? You can load up DOS emulators on your desktop too. That’s a little easier, but you still have to find software. But if you are as lazy as we are, you might want to check out the MSDOS collection at archive.org.

Continue reading “A DOS Education In Your Browser”

Very, Very Low Power Consumption

We’re pretty far away from a world full of wall-warts at this point, and the default power supply for your consumer electronics is either a microUSB cable or lithium batteries. USB ports are ubiquitous enough, and lithium cells hold enough power that these devices can work for a very long time.

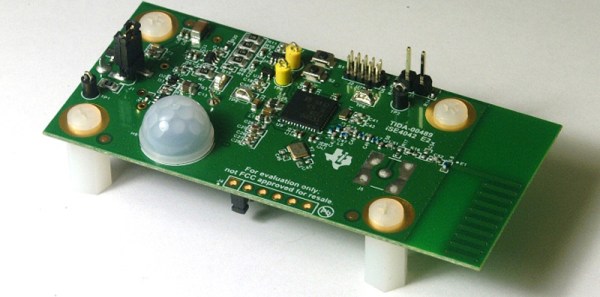
USB devices are common, and batteries are good enough for most devices, not all of them. There is still a niche where& extremely long battery lifetimes are needed and tapping into mains power is impractical. Think smoke detectors and security systems here. How do power supplies work for these devices? In one of the most recent TI application notes, TI showed off their extremely low power microcontrollers with a motion detector that runs for ten years with a standard coin cell battery. This is one of those small engineering marvels that comes by every few years, astonishing us for a few minutes, and then becomes par for the course a few years down the road.

The first thing anyone should think about when designing a battery-powered device that lasts for years is battery self-discharge. You’re not going to run a battery-powered device for ten years with a AA cell; the shelf life for an Energizer AA cell is just 10 years. Add in a few nanoAmps of drain, and you’ll be lucky to make it to 2020. The difference here is a CR2032 lithium-ion coin cell. Look at the datasheet for one of these cells, and they can easily sit on a shelf for 10 years, with 90% of the rated capacity remaining.

With the correct battery in the device, you’ll need a microcontroller that runs at a sufficiently low power for it to be useful in the mid-2020s. The product for this is the CC1310, a very, very low power ARM Cortex-M3 and sub 1GHz transmitter in one package.

Once that’s settled, it’s simply a matter of putting a sensor on the board – in this case a PIR sensor – and a few analog bits triggering an interrupt occasionally. Have the microcontroller in sleep mode most of the time, and that’s how you get a low-power device with a battery that will last a decade.

A Geek’s Revenge For Loud Neighbors

It seems [Kevin] has particularly bad luck with neighbors. His first apartment had upstairs neighbors who were apparently a dance troupe specializing in tap. His second apartment was a town house, which had a TV mounted on the opposite wall blaring American Idol with someone singing along very loudly. The people next to [Kevin]’s third apartment liked music, usually with a lot of bass, and frequently at seven in the morning. This happened every day until [Kevin] found a solution (Patreon, but only people who have adblock disabled may complain).

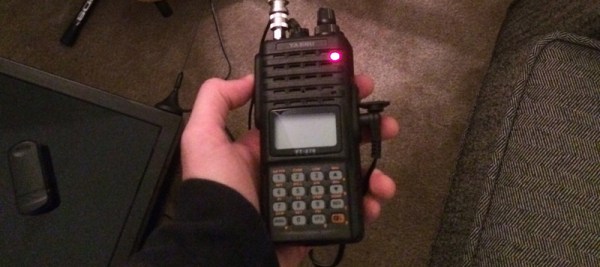
In a hangover-induced rage that began with thumping bass at 7AM on a Sunday, [Kevin] tore through his box of electronic scrap for every capacitor and inductor in his collection. An EMP was the only way to find any amount of peace in his life, and the electronics in his own apartment would be sacrificed for the greater good. In his fury, [Kevin] saw a Yaesu handheld radio sitting on his desk. Maybe, just maybe, if he pressed the transmit button on the right frequency, the speakers would click. The results turned out even better than expected.

With a car mount antenna pointed directly at the neighbor’s stereo, [Kevin] could transmit on a specific, obscure frequency and silence the speakers. How? At seven in the morning on a Sunday, you don’t ask questions. That’s a matter for when you tell everyone on the Internet.

Needless to say, using a radio to kill your neighbor’s electronics is illegal, and it might be a good idea for [Kevin] to take any references to this escapade off of the Internet. It would be an even better idea to not put his call sign online in the future.

That said, this is a wonderful tale of revenge. It’s not an uncommon occurrence, either. Wikihow, Yahoo Answers and Quora – the web pages ‘normies’ use for the questions troubling their soul – are sometimes unbelievably literate when it comes to unintentional electromagnetic interference, and some of the answers correctly point out grounding a stereo and putting a few ferrite beads on the speaker cables is the way to go. Getting this answer relies entirely on asking the right question, something I suspect 90% of the population is completely incapable of doing.

While [Kevin]’s tale is a grin-inducing two-minute read, You shouldn’t, under any circumstances, do anything like this. Polluting the airwaves is much worse than polluting your neighbor’s eardrums; one of them violates municipal noise codes and another is breaking federal law. It’s a good story, but don’t do it yourself.

Editor’s Note: Soon after publishing our article [Kevin] took down his post and sent us an email. He realized that what he had done wasn’t a good idea. People make mistakes and sometimes do things without thinking. But talking about why this was a bad idea is one way to help educate more people about responsible behavior. Knowing you shouldn’t do something even though you know how is one paving stone on the path to wisdom.
–Mike Szczys

Bubble Free Resin Casting With A Modified Paint Tank

[thelostspore] was experimenting with resin casting, and discovered that he needed a pressure casting chamber in order to get clear casts. There are commercial solutions for sale, and they are really nice. However, many hackers are on a budget, and if you’re only casting every now and then you don’t need such a fancy set-up.

Re-purposing equipment like this is pretty common in the replica prop making community. Professional painters use a pressurized pot filled with paint to deliver to their spray guns. These pots can take 60-80 PSI and are built to live on a job site. By re-arranging some of the parts you can easily get a chamber that can hold 60 PSI for enough hours to successfully cast a part. Many import stores sell a cheap version, usually a bit smaller and with a sub-par gasket for around 80 US Dollars. [thelostspore] purchased one of these, removed the feed tube from lid and plugged the outlet. He then attached a quick release fitting to the inlet of the regulator.

Alternative pressure casting set-up.

We used this guide to build our own pressure casting set-up. Rather than plug up the outlet on ours, we put a ball valve with a muffler in its place to quickly and safely vent the chamber when the casting has set. We recommend putting a female quick connect coupling or another ball valve in combination with the male fitting (if your hose end is female). It is not super dangerous to do it the way the guide recommends, but this is safer, and you can disconnect the compressor from the tank without losing pressure.

All that was left was to test it. He poured an identical mold and it came out clear!

Replacing The IPhone 6 Button Bricks The Phone

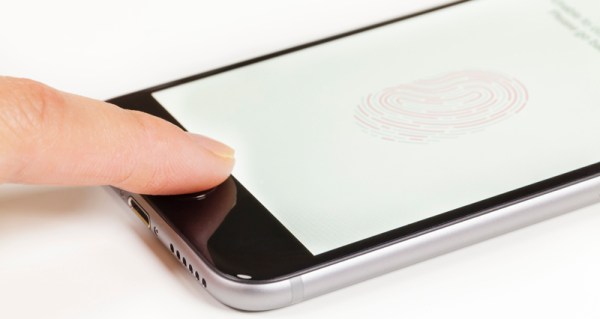
News comes from The Guardian that the iPhone 6 will break because of software updates due to non-authorized hardware replacements. Several thousand iPhone 6 users are claiming their phones have been bricked thanks to software updates if the home button – and the integrated TouchID fingerprint sensor – were replaced by non-Apple technicians.

For the last few iPhone generations, the TouchID fingerprint sensor has been integrated into the home button of every iPhone. This fingerprint sensor provides an additional layer of security for the iPhone, and like everything on smartphones, there is a thriving market of companies who will fix broken phones. If you walk into an Apple store, replacing the TouchID sensor will cost about $300. This part is available on Amazon for about $10, and anyone with a pentalobe screwdriver, spudger, and fine motor control can easily replace it. Doing so, however, will eventually brick the phone, as software updates render the device inoperable if the TouchID sensor is not authorized by Apple.

According to an Apple spokeswoman, the reason for the error 53 is because the fingerprint data is uniquely paired to the touch ID sensor found in the home button. If the TouchID sensor was substituted with a malicious TouchID sensor, complete and total access to the phone would be easy, providing a forehead-slapping security hole. Error 53 is just Apple’s way of detecting devices that were tampered with.

In fairness to Apple, not checking the authenticity of the touch ID would mean a huge security hole; if fingerprint data is the only thing keeping evil balaclava-wearing hackers out of your phone, simply replacing this sensor would grant them access. While this line of reasoning is valid, it’s also incredibly stupid: anyone can get around the TouchID fingerprint sensor with a laser printer and a bit of glue. If you ever get ahold of the German Defense Minister’s iPhone, the fingerprint sensor isn’t going to stop you.

This is a rare case where Apple are damned if they do, damned if they don’t. By not disabling the phone when the TouchID sensor is replaced, all iPhones are open to a gaping security hole that would send the Internet into a tizzy. By bricking each and every iPhone with a replacement TouchID sensor, Apple gets a customer support nightmare. That said, the $300 replacement cost for the TouchID sensor will get you a very nice Android phone that doesn’t have this problem.