Remote Sensing Bombs Could Stem Terrorism

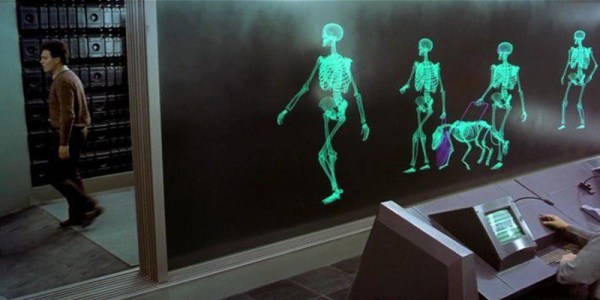
If you understand technology, there were a lot of things hard to explain on Star Trek. Transporters, doors that were smart enough to open unless you hit them during a fight, and the universal translator all defy easy explanation. But one of the hardest things to explain were Mr. Spock’s sensors. From the ship or with a tricorder, Spock could sense at a distance just about anything from chemical compositions, to energy, and even the presence of life (which, today, at least, is difficult to determine even what that means).

Remote sensing would have a very distinct use in today’s world: finding terrorist bombs earlier. A recent article published on New Scientist by [Debora MacKenzie] points out that stopping attacks like the recent one in Brussels is difficult without increasing congestion. For example, putting checkpoints at doors instead of inside transit stations is common in Asia, but causes lines and delays.

detec
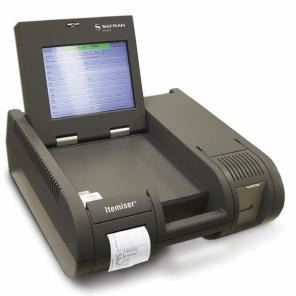
The United States has used ion mobility spectrometry (IMS) to detect explosive traces on swabs (using machines like the one on the left). However in the early 2000’s they experimented with a version of the device that used puffs of air to determine if people had explosives while they passed by the machine. By 2010, officials decided the machines broke down too often and stopped using them.

Remote Sensing in Practice

According to an expert at Rand Corporation, remote sensing is likely to employ imaging or sniffers. However, imaging solutions are easy to fool since a bomb can take the shape of an ordinary object. Sniffers, including biological sniffers (known as dogs), are harder to fool. The problem is that deploying thousands of dogs to cover the world’s airports is difficult.

Continue reading “Remote Sensing Bombs Could Stem Terrorism”

Spark Gap And Coherer Meet Beagle Bone

Getting back to basics is a great way to teach yourself about a technology. We see it all the time with computers built from NAND gates or even discrete transistors. It’s the same for radio – stripping it back to the 19th century can really let you own the technology. But if an old-school wireless setup still needs a 21st-century twist to light your fire, try this spark gap transmitter and coherer receiver with a Beagle Bone Morse decoder.

At its heart, a spark gap transmitter is just a broadband RF noise generator, and as such is pretty illegal to operate these days. [Ashish Derhgawen]’s version, which lacks an LC tuning circuit, would be especially obnoxious if it had an antenna. But even without one, the 100% electromechanical transmitter is good for a couple of feet – more than enough for experimentation without incurring the wrath of local hams.

The receiver is based on a coherer, a device that conducts electricity only when a passing radio wave disturbs it. [Ashish]’s coherer is a slug of iron filings between two bolts in a plastic tube. To reset the coherer, [Ashish] added a decoherer built from an electromagnetic doorbell ringer to tap the tube and jostle the filings back into the nonconductive state. He also added an optoisolator to condition the receiver’s output for an IO pin on the Beagle, and a Python script to decode the incoming Morse. You can see it in action in the video below.

If this build looks familiar, it’s because we’ve covered [Ashish]’s efforts before. But this project keeps evolving, and it’s nice to see where he’s taken it and what he’s learned – like that MOSFETs don’t like inductive kickback much.

Continue reading “Spark Gap And Coherer Meet Beagle Bone”

Dirt-Cheap USB Arduino Hack From The Past

Mass production is a wonderful thing. Prices fall, and hobby hackers get cheap gear. The mind then wanders towards what can be done with it. So it’s little wonder that someone like [Aaron Christophel] would try to repurpose those sub-$3 AVR programmers that are all over eBay (translated poorly out of German here, but demonstrated in the video embedded below).

[Aaron] didn’t have to do much, really. The only trick is that you’ll first need to re-flash the existing ISP firmware with one that lets you upload code to the device itself over USB. If you don’t have an Arduino on hand to re-flash, buy at least two of the cheap programmers — one to program the other ones. Once you’ve done that, you have essentially an Arduino with limited pinout and two onboard LEDs, but in a nice small form-factor and with built-in USB. [Aaron] even provides an Arduino boards.txt file to make it all work smoothly within the IDE.

Continue reading “Dirt-Cheap USB Arduino Hack From The Past”

Two-Sided Laser Etching

[Dan Royer] explains a simple method to engrave/etch on both sides of a material. This could be useful when you are trying to build enclosures or boxes which might need markings on both sides. There are two hurdles to overcome when doing this. The first is obviously registration. When you flip your job, you want it re-aligned at a known datum/reference point.

The other is your flip axis. If the object is too symmetric, it’s easy to make a mistake here, resulting in mirrored or rotated markings on the other side. Quite simply, [Dan]’s method consists of creating an additional cutting edge around your engraving/cutting job. This outline is such that it provides the required registration and helps flip the job along the desired axis.

You begin by taping down your work piece on the laser bed. Draw a symmetrical shape around the job you want to create in your Laser Cutter software of choice. The shape needs to have just one axis of symmetry – this rules out squares, rectangles or circles – all of which have multiple axes of symmetry. Adding a single small notch in any of these shapes does the trick. Engrave the back side. Then cut the “outside” outline. Lift the job out and flip it over. Engrave the front side. Cut the actual outline of your job and you’re done.

Obviously, doing all this requires some preparation in software. You need the back engrave layer, the front engrave layer, the job cut outline and the registration cut outline. Use color coded pen settings in a drawing to create these layers and the horizontal / vertical mirror or flip commands. These procedures aren’t groundbreaking, but they simplify and nearly automate a common procedure. If you have additional tricks for using laser cutters, chime in with your comments here.

Improving The RTL-SDR

The RTL-SDR dongle is a real workhorse for radio hacking. However, the 28.8 MHz oscillator onboard isn’t as stable as you might wish. It is fine for a lot of applications and, considering the price, you shouldn’t complain. However, there are some cases where you need a more stable reference frequency.

[Craig] wanted a stable solution and immediately thought of a TCXO (Temperature Compensated “Xtal” Oscillator). The problem is, finding these at 28.8 MHz is difficult and, if you can find them, they are relatively expensive. He decided to make an alternate oscillator using an easier-to-find 19.2 MHz crystal.

Continue reading “Improving The RTL-SDR”

Start Your Poultry Brood With This DIY Egg Incubator

You’d think that hatching chicks from eggs would be easy – after all, birds do it. But it turns out to be a fussy business for humans, and what momma bird does naturally isn’t necessarily easy for us. If your goal is to raise your own brood of peeps, fear not – this DIY egg incubator makes the process much easier.

While [Chris Raynerd]’s incubator was built for quail eggs, pretty much any domestic fowl – chickens, turkeys, ducks, pheasants – will work. The key is temperature control – momma bird’s rump is a natural heat source, and her downy feathers keep the eggs insulated and toasty. That’s a little hard to replicate in a free-air incubator, so [Chris] started with a polystyrene box for insulation. A halogen lamp on a digital thermostat provides most of the heat and keeps the temperature within a degree or two of 37°C. As a backup, a 12 volt halogen bulb on a dimmer keeps the chamber at a minimum of 36°, just in case the main lamp burns out. A small fan and a pan for humidifying water complete the atmospheric controls, although personally we’d arrange the fan to blow across the water to aid evaporation. And a simple grid lets [Chris] turn the eggs regularly, which is another vital service mom provides to her brood.

Sure, it could be Arduino-fied and servo driven, but why bother? This is a simple yet thoughtful build that should see a clutch through to hatching. We’ve seen a few egg incubators before, but even if you’re not interested in raising fowl, the techniques here could easily apply to incubators for biohacking or yogurt making, too.

Continue reading “Start Your Poultry Brood With This DIY Egg Incubator”

White Oak Illuminated Bluetooth Speaker

Besides being common tools available to most hackers and makers out there, 3D printing, CNC machines, and cheap Chinese electronics have one more things in common: they were all used by [Nick] to build a bluetooth speaker system that has some interesting LED effects built into the case.

This is fresh on the heels of another hack that used similar construction methods to build a “magic” wood lamp. [Nick] takes it a step further, though. His case is precisely machined in white oak and stuffed with the latest China has to offer: a bank of lithium-ion batteries, a DC-DC converter to power the amplifier, and a Bluetooth module. After some sanding, the speakers look professional alongside the blue light features hiding behind the polycarbonate rings.

Of course you’ll want to visit the project site for all the details of how [Nick] built his speaker case. He does admit, however, that the electronics are fairly inefficient and need a little work. All in all though, it’s a very refined set of speakers that’ll look great on a bookshelf or on a beach, workshop bench, or anyplace else that you could take them.

Continue reading “White Oak Illuminated Bluetooth Speaker”