If you have ever worked on a motorcycle on a regular basis with a limited workshop, you’ll know the challenge of taking off one or other of the wheels. You’ll probably have plenty of tales of bikes balanced precariously on blocks or suspended from the ceiling on a web of cargo straps, and if you are really unlucky you’ll have the Dented Tank Of Shame from the whole edifice tumbling down.
Month: September 2016
SNES Micro Is A Pi Z Of Art
Clay is a shapeless raw material that’s waiting to be turned into awesomeness by your creativity. So is the Raspberry Pi. [Dorison Hugo] brought the two together in his artfully crafted SNES micro – a tiny retro gaming console sculpted from clay.
Hackaday Prize Entry: Autonomous Kayaks
[Barry] has an expedition planned. He’s going to be exploring coastlines, inlets, and other shallow waters where even small ROVs are too big. [Barry] wants an autonomous vehicle on this expedition, though, and that means he must build his own. This led to The Julius Project, repurposed kayaks, and all the techniques that go into making proper maritime electronics.
The first question [Barry] gets is, ‘why kayaks?’ A quick cruise around Craigslist is enough to answer that – they’re cheap, and they’re available in almost infinite variety from big touring kayaks to small play boats, all built for different conditions and expeditions. With a few motors and modular parts to this build, [Barry] has an autonomous aquatic vessel built for every condition imaginable.
Right now, [Barry]’s focus is getting the propulsion working. This comes in the form of a few brushless motors bolted to the underside of the kayak. A tethered test was very successful, demonstrating this tiny boat can turn on a dime. Integration with an autopilot is coming, but until then [Barry] has a neat little boat puttering around a river. You can check out a video of that below.
3D Printing School Of Knocks
Unless you are under age 20, there are probably things you know now that you wish you knew growing up. Even on hacker projects, it isn’t unusual to do better on your second whatchamacallit than on your first one. After all, you learn something each time and apply it to subsequent builds.
[James Lewis] (sometimes known as the [Bald Engineer]) has spent a couple of years with a 3D printer. He says that as of March this year, he had used the machine for about 75 hours. Since then his usage went up to 300 hours because he’s finally learned his lessons about how to get good prints.
If you are experienced, you might not be surprised at the first tip: level the bed. Don’t let that fool you, though. [James] has some good tips on advanced bed materials and print filament, too.
Raspberry Pi Plays All That Jazz
[James Bellafaire] wanted a good looking old radio with a modern sound. Granted, you could hollow the case out and replace it with an iPod. Or you could convert the thing to an Internet radio. But where’s the fun in that?
[James] took a different approach. Part woodworking project, part Raspberry Pi project, and part microcontroller project, he wound up with a hard drive-based music player in a 1930’s case with knobs that control the playback.
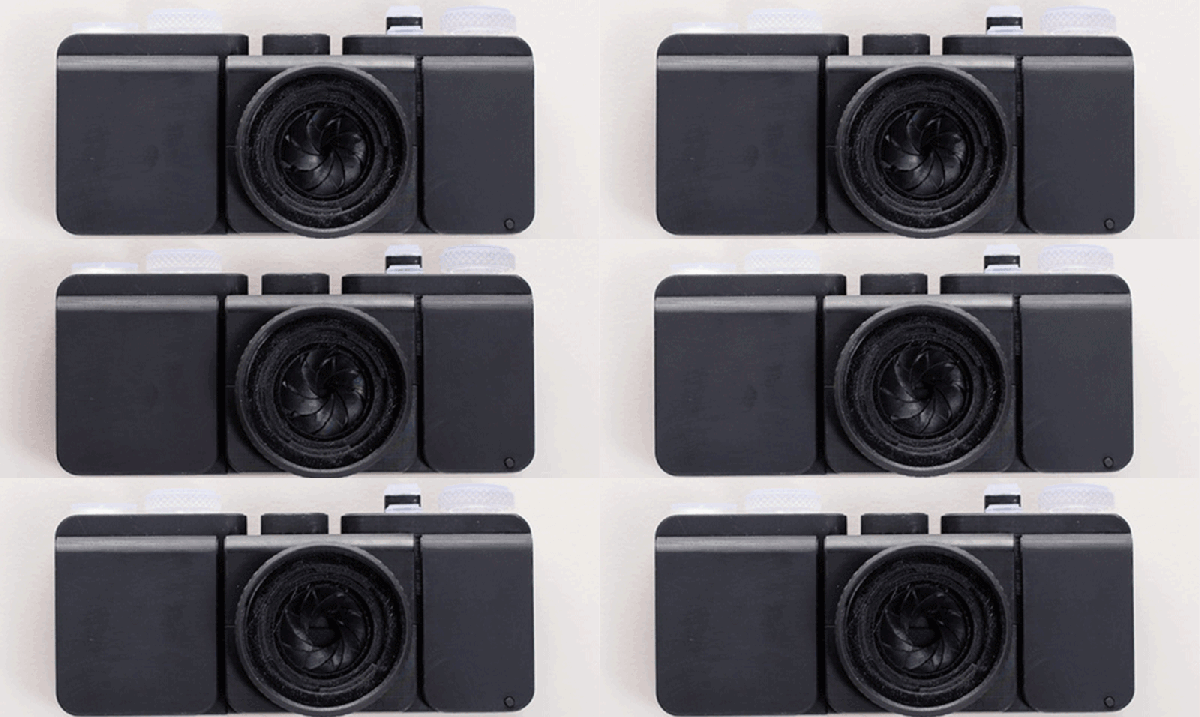
A 3D Printed Camera (Including The Lens)
Barring the RepRap project, we usually see 3D printers make either replacement parts or small assemblies, not an entire finished product. [Amos] is the exception to this rule with his entirely 3D-printed camera. Everything in this camera is 3D printed, from the shutter to the lightproof box to the lens itself. It’s an amazing piece of engineering, and a testament to how far 3D printing has come in just a few short years.
35mm film is the most common film by far, and the only one that’s still easy to get and have developed at a reasonable price. This 3D-printed camera is based on that standard, making most of the guts extremely similar to the millions of film cameras that have been produced over the years. There’s a film cartridge, a few gears, a film takeup spool, and a lightproof box. So far, this really isn’t a challenge for any 3D printer.
The fun starts with the lens. We’ve seen 3D printers used for lens making before, starting with a 3D print used to create a silicone mold where a lens is cast in clear acrylic, 3D printed tools used to grind glass, and an experiment from FormLabs to 3D print a lens. All of these techniques require some surface finishing, and [Amos]’ lens is no different. He printed a lens on his Form 2 printer, and started polishing with 400 grit sandpaper. After working up to 12000 grit, the image was still a bit blurry, revealing microscopic grooves that wouldn’t polish out. This led him to build a tool to mechanically polish the lens. This tool was, of course, 3D printed. After polishing, the lens was ‘dip polished’ in a vat of uncured resin.
The shutter was the next challenge, and for this [Amos] couldn’t rely on the usual mechanisms found in film cameras. he did find a shutter mechanism from 1885 that didn’t take up a lot of depth, and after modeling the movement in Blender, designed a reasonable shutter system.
Building an entire camera in a 3D printer is a challenge, but how are the pictures? Not bad, actually. There’s a weird vignetting, and everything’s a little bit blurry. It’s hip, trendy, and lomo, and basically amazing that it works at all.
Hacklet 124 Running Robots And The Claw
You never know what you’ll find when you open the projects feed on Hackaday.io. Most weeks, The Hacklet follows a theme of some sort. Sometimes I find projects that just look so cool that I have to get the word out about them.
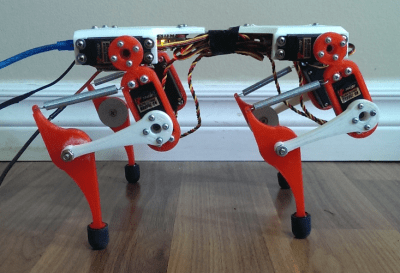 Such is the case with this week’s first project, Mr. Runner created by [Alex Martin]. Mr. Runner is a quadruped robot that really looks the part. In fact, I’d say it looks like it’s ready to jump off the bench top. Like many of us, [Alex] has been inspired by Boston Dynamics, specifically their Wildcat robot. Wildcat had [Alex] searching the net for walking robot designs. He struck up something he liked with the work of [Dr. Fumiya Iida] and [Dr. Rolf Pfiefer]. In the mid 2000’s, the pair worked out of the University of Zurich. Mr. Runner is based upon their work, with plenty of design tweaks from [Alex].
 The basic design is a quadruped with two servos per leg. The servos are at the body and the upper half of the leg. The knee and lower leg are connected by levers and a spring, forming something of a 4 bar linkage. The spring acts as a tendon, absorbing shock, and allowing energy from the servo to be stored and released while the robot runs. [Alex] is experimenting with gaits, controlled by a PC.
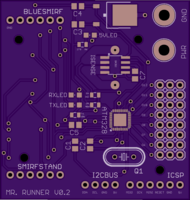
Mr. Runner wouldn’t be doing much running without a way to control those 8 servos. [Alex] started with an Arduino and a LynxMotion serial servo controller. This pairing served him well for the first generation of Mr. Runner. For the new version of the robot, he’s rolling his own board based upon Lynxmotion’s
BotBoarduino. The Gerber files have been sent off to OSH Park, and in about a week, Mr. Runner will be off to the races.
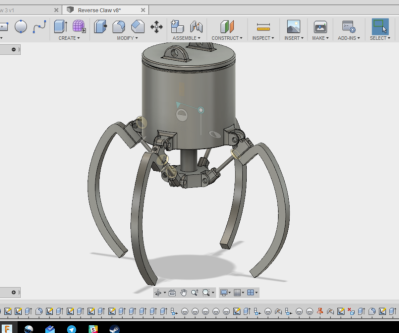 Another great recently updated project is Arcade Claw Game Claw Build by [Alex Anderson]. I spent way too many hours of my youth in arcades, and more than a few quarters went into claw games. Sure, they’re usually rigged, but who hasn’t been pulled in by the chance to test your skill and win a prize? A friend asked [Alex] to design an arcade style claw for a game. A seasoned CNC and 3D printing master, [Alex] grabbed his notebook and started sketching. Rack and pinion designs would work well, but didn’t within the constraints of the game. A leadscrew based design would also work, but would be two expensive. Finally, [Alex] settled on a design and fired up his CAD software. He started with two jaw systems to prove out the basic system. Once that was complete, [Alex] moved to a 4 jaw setup.
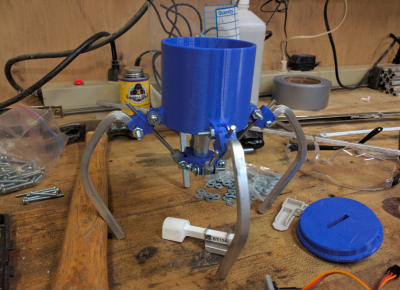 Much like the arcade games, the claw is actuated by a central plunger. The plunger drives linkages which move the 4 claw jaws. Everything looks good on paper, but when the CAD drawings meet the real world, things get complicated quickly. The initial design relied on a 3D printed part which connected the plunger to the jaw linkages. Any slop in this part would be magnified through the rest of the mechanical system. 3D printers aren’t perfect, and there was some slop — enough that the parts would pinch and bind up while moving.
[Alex] already has a revised design in mind. This is very much a work in progress. That’s the beauty of well documented projects on Hackaday.io — you get to see what works, as well as all the trials and tribulations it took to get to a final working project. Keep at it [Alex], you’re almost there!
That’s it for this week’s Hacklet, As always, see you next week. Same hack time, same hack channel, bringing you the best of Hackaday.io!


