Arcade1up Cabinet Mod Raspberry Pi 3

Arcade1up Cabinet Solderless Upgrade With A Side Of Raspberry Pi

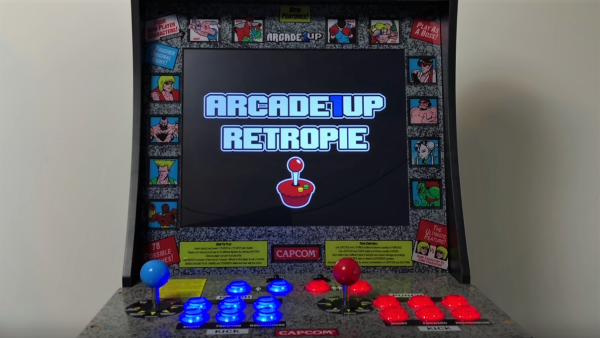
Upon announcement of the Arcade1up replica arcade cabinets earlier this year, many laid in waiting for the day they could see a teardown. A four foot tall cab with an LCD outputting the proper 4:3 aspect ratio and the simple construction of IKEA furniture certainly seemed appealing. In theory, it wouldn’t take long to customize such a piece of hardware provided the internals lent themselves to that sort of thing. Now that the cabinets are on store shelves, [ETA Prime] made a tutorial video on his method for upgrading the Arcade1up cabinet with a Raspberry Pi calling the shots.

The entirety of the mod is solder-free and uses plenty of readily available parts from your favorite online reseller. The brains of the operation is a Raspberry Pi 3 Model B+ running Emulation Station. The Arcade1up Street Fighter 2 cabinet’s less than stellar audio receives an upgrade in a 2x20W car audio amp, while the middling joysticks are swapped out for some more robust Sanwa-clone ball tops.

Since there is no “select/coin” button natively, [ETA Prime] added some and in the process replaced them all with beefier LED-lit 30mm buttons. The replacement joysticks and buttons were all part of a kit, so they plug-in conveniently to a plug and play USB encoder. To adapt the 17″ LCD’s output over LVDS, [ETA Prime] elected to go with an LCD controller board that outputs DVI, VGA, or HDMI. Luckily the Arcade1up cabinet’s 12V power supply could be reused to power the LCD controller board and in the process bring down the overall cost of the upgrade.

While this Arcade1up cabinet mod won’t solve the whole “bats versus ball tops” argument, it does provide a template to build on. The tutorial video is below and the list of parts used can be found in the YouTube description.

Continue reading “Arcade1up Cabinet Solderless Upgrade With A Side Of Raspberry Pi”

Homebrew SNES Mini Aims For Historical Accuracy

While “normies” are out fighting in the aisles of Walmart to snap up one of the official “Classic Mini” consoles that Nintendo lets slip out onto the market every once and awhile, hackers have been perfecting their own miniature versions of these classic gaming systems. The “Classic Mini” line is admittedly a very cool way to capitalize on nostalgic masses who have now found themselves at the age where they have disposable income, but the value proposition is kind of weak. Rather than being stuck with the handful of generation-limited games that Nintendo packed into the official products, these homebrew consoles can play thousands of ROMs from systems that stretch across multiple generations and manufacturers.

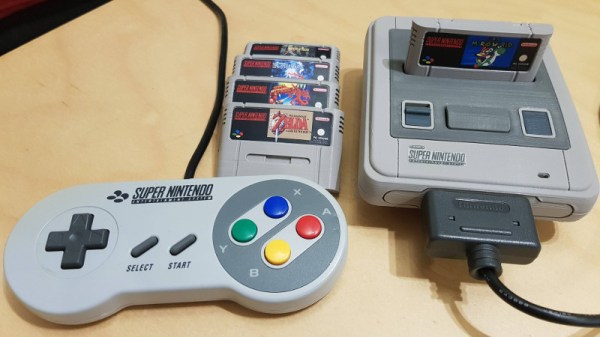
But for those old enough to remember playing on one of these systems when they first came out, these modern reincarnations always lack a certain something. It never feels quite right. That vaguely uncomfortable feeling is exactly what [ElBartoME] is aiming to eliminate with his very slick miniature SNES build. His 3D printed case doesn’t just nail the aesthetics of the original (PAL) console, but the system also uses real SNES controllers in addition to NFC “cartridges” to load different ROMs.

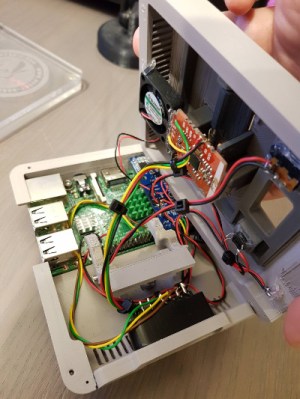
The project’s page on Thingiverse has all the wiring diagrams and kernel configuration info to get the internal Raspberry Pi 3 to read an original SNES controller via the GPIO pins. He also gives a full rundown on the hardware and software required to get the NFC-enabled cartridges working with EmulationStation to launch the appropriate game when inserted. Though he does admit this is quite a bit trickier than the controller setup.

[ElBartoME] has put a video up on YouTube that shows him inserting his mock cartridges and navigating the menus with an original SNES controller. If it wasn’t for the fact that the console is the size of a smartphone and the on-screen display is generations beyond what the SNES could pull off, you’d think he was playing on the real thing.

We’ve seen some incredibly impressive emulation boxes based on the Raspberry Pi, and builds which tried to embrace original hardware components, but this particular project may represent the best of both worlds.

Continue reading “Homebrew SNES Mini Aims For Historical Accuracy”

SegaPi Zero Shows Game Gear Some Respect

If you were a gamer in 1991, you were presented with what seemed like an easy enough choice: you could get a Nintendo Game Boy, the gray brick with a slightly nauseating green-tinted screen that was already a couple of years old, or you could get yourself a glorious new Sega Game Gear. With full color display and games that were ported straight from Sega’s home consoles, it seemed like the Game Gear was the true future of portable gaming. But of course, that’s not how things actually went. In reality, technical issues like abysmal battery life held the Game Gear back, and conversely Nintendo and their partners were able to squeeze so much entertainment out of the Game Boy that they didn’t even bother creating a true successor for it until nearly a decade after its release.

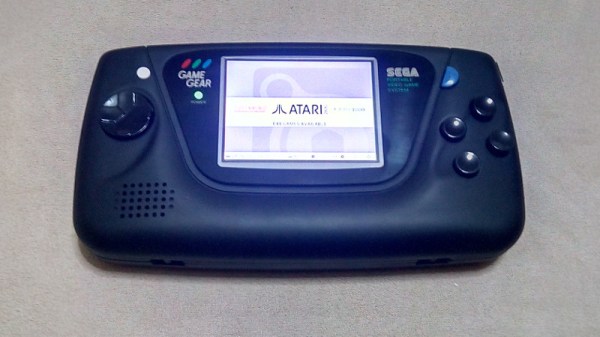
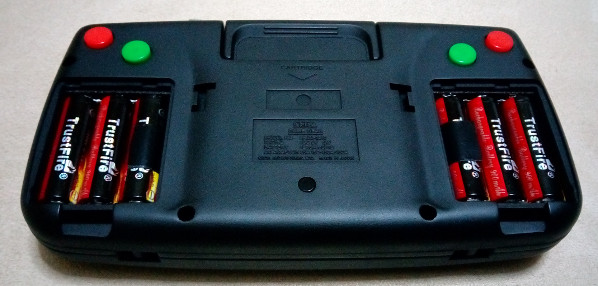
While the Game Gear was a commercial failure compared to the Game Boy back in the 1990s and never got an official successor, it’s interesting to think of what may have been. A hypothetical follow-up to the Game Gear was the inspiration for the SegaPi Zeo created by [Halakor]. Featuring rechargeable batteries, more face buttons, and a “console” mode where you can connect it to a TV, it plays to the original Game Gear’s strengths and improves on its weaknesses.

As the name implies the SegaPi Zero is powered by the Raspberry Pi Zero, and an Arduino Pro Micro handles user input by tactile switches mounted behind all the face buttons. A TP4056 charging module and step-up converter are also hiding in there, which take care of the six 3.7 lithium-Ion 14500 batteries nestled into the original battery compartments. With a total capacity of roughly 4,500 mAh, the SegaPi Zero should be able to improve upon the 3 – 4 hour battery life that helped doom the original version.

There’s no shortage of projects that cram a Raspberry Pi into a classic game system, but more often than not, they tend to be Nintendo machines. It could simply be out of nostalgia for Nintendo’s past glories, but personally we’re happy to see another entry into the fairly short list of Sega hacks.

DIY Nintendo Switch May Be Better Than Real Thing

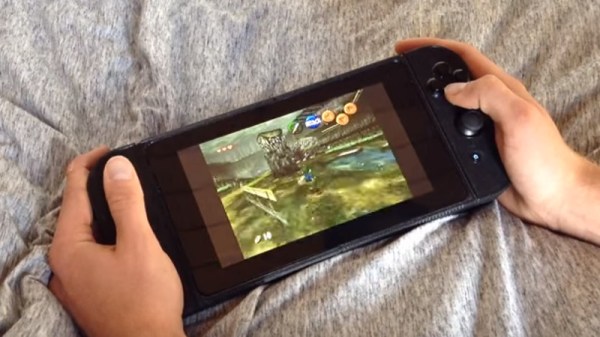
Nintendo’s latest Zelda-playing device, the Switch, is having no problems essentially printing money for the Japanese gaming juggernaut. Its novel design that bridges the gap between portable and home console by essentially being both at the same time has clearly struck a chord with the modern gamer, and even 8 months after its release, stores are still reporting issues getting enough of the machines to meet demand.

But for our money, we’d rather have the Raspberry Pi powered version that [Tim Lindquist] slaved over for his summer project. Every part of the finished device (which he refers to as the “NinTIMdo RP”) looks professional, from the incredible job he did designing and printing the case down to the small details like the 5 LED display on the top edge that displays volume and battery level. For those of you wondering, his version even allows you to connect it to a TV; mimicking the handheld to console conversion of the real thing.

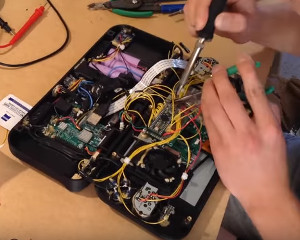
[Tim] has posted a fascinating time-lapse video of building the NinTIMdo RP on YouTube that covers every step of the process. It starts with a look at the 3D model he created in Autodesk Inventor, and then goes right into the post-printing prep work where he cleans up the printed holes with a Dremel and installs brass threaded inserts for strength. The bulk of the video shows the insane amount of hardware he managed to pack inside the case, a true testament to how much thought was put into the design.

For the software side, the Raspberry Pi is running the ever popular RetroPie along with the very slick EmulationStation front-end. There’s also a Teensy microcontroller on board that handles the low-level functions such as controlling volume, updating the LED display, and mapping the physical buttons to a USB HID device the Raspberry Pi can understand.

The Teensy source code as well as the 3D models of the case have been put up on GitHub, but for a project like this that’s just the tip of the iceberg. [Tim] does mention that he’s currently working on creating a full build tutorial though; so if Santa doesn’t leave a Switch under the tree for you this year, maybe he can at least give you a roll of filament and enough electronics to build your own.

While this isn’t the first time a Raspberry Pi has dressed up as a Nintendo console, it may represent the first time somebody has tried to replicate a current-generation gaming device with one.

Continue reading “DIY Nintendo Switch May Be Better Than Real Thing”

SNES Micro Is A Pi Z Of Art

Clay is a shapeless raw material that’s waiting to be turned into awesomeness by your creativity. So is the Raspberry Pi. [Dorison Hugo] brought the two together in his artfully crafted SNES micro – a tiny retro gaming console sculpted from clay.

Continue reading “SNES Micro Is A Pi Z Of Art”

Vintage 16mm Film Editor Is Now Retro Arcade

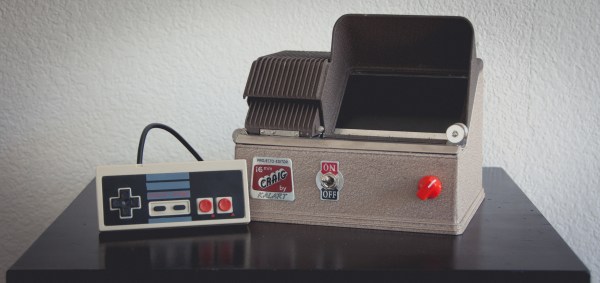
When [Douglas Welcome] found a disposed Kalart Craig 16 mm Projecto-Editor on the curb, he knew it was destined for retro-greatness. This vintage looking device was once used to view and cut 16 mm film strips, and still in mint condition, it was just too cool to pass up. With help of a similarly historic Raspberry Pi 1 Model B, and a little LCD screen, [Douglas] now turned the little box into an awesome retro arcade game console

Continue reading “Vintage 16mm Film Editor Is Now Retro Arcade”