Hijacking The Sonoff OTA Mechanism

ITEAD’s Sonoff line is a range of Internet-of-Things devices based around the ESP8266. This makes them popular for hacking due to their accessibility. Past projects have figured out how to reflash the Sonoff devices, but for [mirko], that wasn’t enough – it was time to reverse engineer the Sonoff Over-The-Air update protocol.

[mirko]’s motivation is simple enough – a desire for IoT devices that don’t need to phone home to the corporate mothership, combined with wanting to avoid the labor of cracking open every Sonoff device to reflash it with wires like a Neanderthal. The first step involved connecting the Sonoff device to WiFi and capturing the traffic. This quickly turned up an SSL connection to a remote URL. This was easily intercepted as the device doesn’t do any certificate validation – but a lack of security is sadly never a surprise on the Internet of Things.

After capturing the network traffic, [mirko] set about piecing together the protocol used to execute the OTA updates. After a basic handshake between client and server, the server can ask the client to take various actions – such as downloading an updated firmware image.  After determining the messaging format, [mirko] sought to create a webserver in Python to replicate this behaviour.

There are some pitfalls – firmware images need to be formatted slightly differently for OTA updates versus the usual serial upload method, as this process leaves the stock bootloader intact. There’s also the split-partition flash storage system to deal with, which [mirko] is still working on.

Nevertheless, it’s great to see hackers doing what they do best – taking control over hardware and software to serve their own purposes. To learn more, why not check out how to flash your Sonoff devices over serial? They’re just an ESP8266 inside, after all.

Hackaday Prize Entry: 3D Printed Mini-Lathe

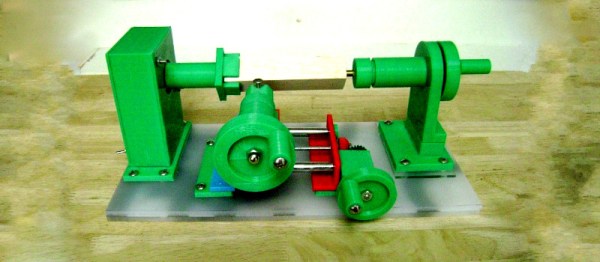
Lathes can be big, powerful, dangerous machines. But sometimes there’s a call for making very small parts out of soft materials, like plastic and wood. For jobs like this, you could use something like this 3D printed mini-lathe.

The benefits of 3D printing a tool like this are plentiful. The design can be customized and refined by the end user; [castvee8] notes that the machine can be made longer simply by increasing the length of the lead screw and guide rails. The machine does rely on some metal parts and a motor; but the real power here is that if you can’t source the exact components, you can always customize the files to suit what you have on hand.

[castvee8] aimed to make the entire build as easy as possible for the novice – even the motor and speed controller are off-the-shelf modules. It’s a testament to the golden age we live in that an entire lathe can be built out of modules and 3D printed parts. The project makes up another member of the family of 3D printed tools [castvee8] is showing off on Hackaday.io.

Interview: Francesco De Comité Makes Math Visually Awesome

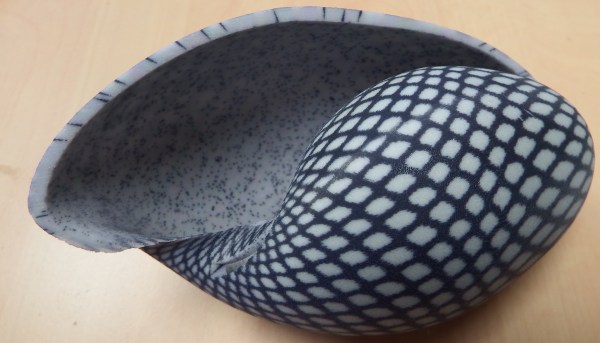
Francesco de Comité is an Associate Professor in Computer Science at the University of Sciences in Lille, France, where he researches the 2D and 3D representation of mathematical concepts and objects. He’s presented papers on a variety of topics including anamorphoses, experiments in circle packing, and Dupin cyclides. His current project involves modeling and 3D printing sea shells. He’ll be presenting a paper on the topic at Bridges Conference in July. You can find his projects on Flickr as well as on Shapeways.

Hackaday: One of your recent projects involves creating fractal patterns and warping them into biologically-correct sea shell shapes, which you then print.

FdC: Modeling seashell shapes is an old topic–Moseley, 1838, D’Arcy Thompson beginning of 20th century. A seashell can be defined as a curve turning around an axis, while translating in the direction of this axis (i.e. on a helicoidal trajectory), and growing in size at the same time. This was modeled for computers in the ’60s by David Raup.

Drawing patterns on seashells was described by Hans Meinhardt using a model of chemical reactions (activator-inhibitor), in the same spirit as Turing’s work on morphogenesis. Combining these two works, and using 3D printers instead of 2D renderers, we can build realistic seashells, either by copying existing shells, or inventing new ones. A 3D model is not just a juxtaposition of a huge number of 2D views: manipulating 3D models can help you understand the object, find details, and so on.

I was curious to see if making a 3D seashell was possible. Moreover, I show that this can be done with simple tools — well, except the 3D printer.
Continue reading “Interview: Francesco De Comité Makes Math Visually Awesome”

Friday Hack Chat: Audio Systems

Join us this Friday for a Hack Chat on Audio Systems. It’s going down June 2 at noon PDT (handy time zone converter thing).

Every Friday, we gather round the campfire with the best in the business to tease out whatever secrets are stored in their mind. This is the Hack Chat, and this week, we’re going to be talking about audio systems with [Dafydd Roche]. Bring your low-distortion volume knobs and porcelain speaker cable risers, this is going to be a good one.

[Dafydd] got his start in electronics in an application for a music degree. He mentioned he’d built a few guitar pedals, which landed him a call from the electronics department at York University. They told him he was a terrible musician, but that he might excel at electronics.

Many years later he’s still going strong with audio applications with Expat Audio, manufacturers of fine preamps. [Dafydd] is also the Audio Strategic Marketing Manager at Dialog, and spends his days arguing with engineers and doing his best to solve customer problems. [Dafydd] has been on The Amp Hour, and has published articles on audio systems.

For this Hack Chat, we’re going to be running the gamut of audio, electronics, and small business. The questions on audio mythbusting are sure to entertain, and we’ll also be discussing audio signal chains and small business production. Bring your questions and put them on the sheet to guide the discussion.

Here’s How To Take Part:

join-hack-chatOur Hack Chats are live community events on the Hackaday.io Hack Chat group messaging.

Log into Hackaday.io, visit that page, and look for the ‘Join this Project’ Button. Once you’re part of the project, the button will change to ‘Team Messaging’, which takes you directly to the Hack Chat.

You don’t have to wait until Friday; join whenever you want and you can see what the community is talking about

Additive + Subtractive = One Powerful Machine

It says it right on the title of the video below: it was bound to happen eventually. It’s only natural that somebody would stick a 3D printer extruder on the business end of a CNC machine. The long-awaited convergence of additive and subtractive manufacturing is here.

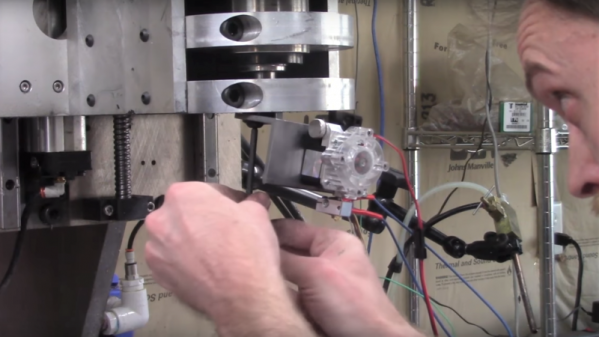
OK, that may be overstating things a bit, but we think [Chris DePrisco] is on to something here. Given the considerable investment he’s made in his DIY CNC machine, an enormous vertical machining center that looks a little like a homebrew Bridgeport, it was a no-brainer to take advantage of the huge XYZ stage. Mounting the Titan Aero extruder to the quill required some custom parts; fair warning that the video below is heavy on machining, but it’s not the seven hours of video he streamed when he milled the heated aluminum bed. Skip ahead to about the six-minute mark if you want to see the first prints and how he optimized the setup.

As we watched [Chris]’ video, we were struck by the potential for adding 3D printing to CNC milling machines. What we’d like to see is a setup where the spindle and the extruder work together to build more complex parts. Or maybe a tool-changing CNC that can pick up a spindle, an extruder, and maybe even a laser or plasma cutter head. Now that would be a powerful machine!

Continue reading “Additive + Subtractive = One Powerful Machine”

Malduino Elite – First Impressions

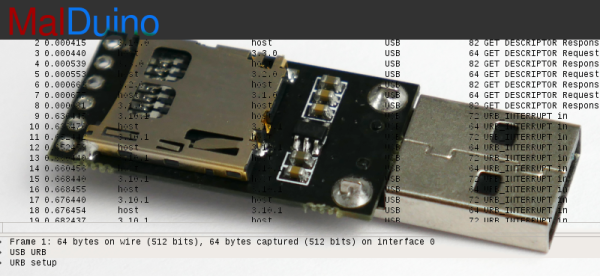
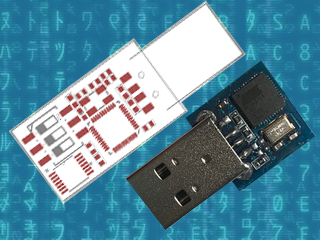
A while back, I wrote an article about Malduino, an Arduino-based, open-source BadUSB device. I found the project interesting so I signed up for an Elite version and sure enough, the friendly postman dropped it off in my mail box last Friday, which means I got to play around with it over the weekend. For those who missed the article, Malduino is USB device which is able to emulate a keyboard and inject keystrokes, among other things. When in a proper casing, it will just look like a USB flash drive. It’s like those things you see in the movies where a guy plugs in a device and it auto hacks the computer. It ships in two versions, Lite and Elite, both based on the ATmega32U4.

The Lite version is really small, besides the USB connector it only contains a switch, which allows the user to choose between running and programming mode, and a LED, which indicates when the script has finished running.

Original Malduino Elite sketch and Lite prototype

The Elite version is bigger, comes with a Micro-SD card reader and four DIP switches, which allow the user to choose which script to run from the card. It also has the LED, which indicates when a script has finished to run. This allows the user to burn the firmware only once and then program the keystroke injection scripts that stored in the Micro-SD card, in contrast to the Lite version which needs to be flashed each time a user wants to run a different script.

These are the two Malduinos and because they are programmed straight from the Arduino IDE, every feature I just mentioned can be re-programmed, re-purposed or dropped all together. You can buy one and just choose to use it like a ‘normal’ Arduino, although there are not a lot of pins to play around with. This freedom was one the first things I liked about it and actually drove me to participate in the crowd-funding campaign. Read on for the full review.
Continue reading “Malduino Elite – First Impressions”

Hacking An External Mic Port Onto A Camera

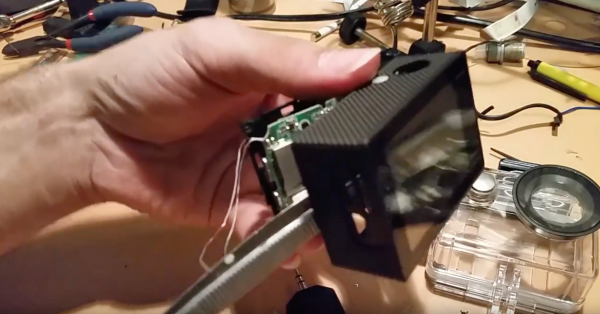
A sub-$100 camera competing in the 4K market, the Akaso EK7000 has a few features typical for the range: wifi, 12MP photos at 30 frames per second, and the like. [Foxx D’Gamma] wanted to add an external mic jack to his camera, replacing the internal mic, which featured poor sound pickup due to being buried in the heart of the camera. [Foxx] spent a considerable amount of effort getting the enclosure apart, working gingerly to avoid damaging the display’s ribbon cable, which can’t be disconnected. He also had to deal with the button covers falling out when the case was opened.

[Foxx] desoldered the button mic and added the jack’s wires, and the next challenge presented itself: getting it back together again with the mic port looking good. He had to make sure the jack projected just the right amount from the housing, to ensure the external mic could plug in. Check out both videos below the break.

We’ve featured several cheap camera hacks recently on Hackaday: the ruggedized cheap camera, the cheap 360 degree camera, and the full-spectrum camera all come to mind. It’s a fertile field for not a lot of money!

Continue reading “Hacking An External Mic Port Onto A Camera”