Review: Antex TCS 50W Digital Temperature Controlled Soldering Iron.

Sometime last summer, I suffered a very sad loss indeed. My soldering iron failed, and it was not just any soldering iron, but the Weller Magnastat temperature-controlled iron that had been my iron of choice since my student days. It was time to buy a replacement, and a whole world of soldering equipment lay before me. In the end I settled on a choice that might seem unexpected, I bought an Antex TCS 50W temperature controlled iron with a digital temperature controller and LCD display in its handle.

No room for a poor iron

When looking at a new iron it’s worth considering for a moment what requirements you might have.  After all, while we’d all love to own a top-of-the range soldering station it’s sometimes necessary to target your purchase carefully for an acceptable blend of affordability, reliability, and performance. It’s possible to find temperature controlled irons for astoundingly low prices these days, thanks to the wonders of globalised manufacturing. But the irons themselves will not be of good quality, their bits will be difficult to replace, and sometimes they are better described as variable temperature rather than temperature controlled. If I was to escape a poor choice I’d have to set my sights a little higher.

Antex are a perennial in the world of British electronics, their signature yellow-handled irons have been around for decades. They aren’t priced at the top end of the market yet they have a pretty good reputation, but could their all-in-one temperature controlled iron be a good alternative to a unknown-name iron that came with a soldering-station-style controller? I parted with my £55 (about $68) before taxes, and waited for the delivery.

All-in-one, win or bin?

The iron I chose is the latest in a long line of their all-in-one temperature controlled irons, and so the blurb tells me, the first with digital control. Previous models had an analogue adjustment which if I recall correctly was achieved by means of a screw, while this one has an LCD display with up and down buttons on its handle.
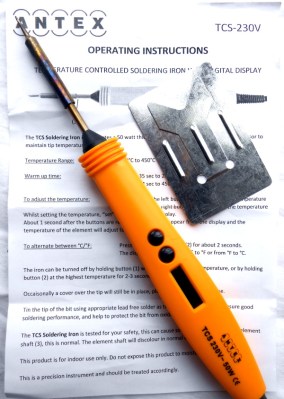
I haven't bothered with the supplied stand, as you can see.
I haven’t bothered with the supplied stand, as you can see.

In the box are the iron, a rather useless stand made from metal sheet, and an instruction leaflet. Fortunately my requirements included a decent stand, so I’d already ordered the more substantial companion product with a sponge. Out went the sponge and in went a bundle of brass turnings, but the stand itself is fine.

The iron has the usual Antex bit that fits as a sleeve over the cylindrical element. I bought a range of bits of different sizes, it’s never a bad thing to have choice. The handle is bigger than their standard irons as you might expect, but has a flattened and curved profile that’s easy on the hand. It’s noticeably lighter than the Magnastat, which along with its extra-flexible silicone cable makes it easier to use than its predecessor.

In use, the extra length of the handle doesn’t compromise soldering ability. In the time since purchase it has been used to construct multiple projects, and everything from the smaller surface-mount components upwards are taken in its stride. The 50 W element has plenty of power for soldering to PCB planes that suck away the heat, though you probably wouldn’t use it to solder heavy-gauge copper.

The temperature range of 200 to 450 Celcius is ample for my requirements, in fact once I’d set it to my normal 360 degrees I’ve never changed it. Time from power-on to full working temperature is about 45 seconds, which isn’t the fastest on the block, but then again since I turn it on when I sit down it’s not ever been an issue.

A match made in heaven

So, based on quite a few months of regular use, I’m happy with my iron. The question is though, was it the best choice? I think so, given that the competition at the price would almost certainly not come with such readily available support. There’s almost an instinctive distrust of all-in-one temperature-controlled irons that I haven’t found to be justified by the reality. An alternative might have been to build one of the clever designs that adds a temperature controller to a Weller tip, but given that this is an iron I sometimes use to earn a living I’d rather be working for cash than working on my iron. There are certainly cheaper irons and there are probably better irons, but for me this one hits the sweet spot between the two sets of being a good enough iron without being too expensive.

Chicago To Host Hackaday Unconference

We’re excited to announce that Chicago will play host to the Hackaday Unconference on March 18th. We are happy to expand our unconference plans to include this event at Pumping Station One from 1-8pm on 3/18.

Astute readers will notice that this is the second location we have announced this week. On Monday we shared the news that San Francisco would host an unconference. Hackaday’s [Sophi Kravitz] and [Jordan Bunker] are organizing things in SF. [Brian Benchoff], [Bob Baddeley], and [Mike Szczys] will be in Chicago for this event that takes shape based on what you find most interesting.

We’re excited that PS:One is opening their doors for us. We’ll make sure there’s food, beverage, some exciting hardware-based door prizes, and other select swag.

Hackaday Unconference is Based on You

The Hackaday Unconference is all about finding interesting talks from anyone who attends. If you go, and you definitely should, be ready to stand up and deliver eight minutes on something that you find interesting right now. The day will start by going around and asking everyone for a talk title or topic. We’ll all make a collective decision on the schedule for the day and roll with it as talks are bound to spawn extemporaneous discussion and follow up presentations that build on the most exciting of concepts. Unconferences are interactive and not bound by the traditional presenter/audience divide of a conference.

You may speak about anything you like, but it sometimes deciding what to talk about is easier if there are some constraints. Consider the theme of the Hackaday Unconference to be Build Something That Matters. You hear this a lot from us because we think it is important. There is immense talent and incredible experience found in the Hackaday community and we like to take some time in life to direct that for the good of all people. If you have an idea to direct creative energy toward high ideal, it’s likely to make a great presentation.

Soak Up the Excitement to Propel Your Next Project

Pressure is low, excitement is high, and the potential for something spontaneous and awesome to happen is palpable. The ‘here and now’ aspect of an unconference sets it apart from events where speakers, talk subjects, and slide decks are decided upon weeks ahead of time. RSVPs will fill up. Don’t miss out on this chance to jumpstart your excitement for a current project, or to discover the direction of your next adventure.

Origin Of Wireless Security: The Marconi Radio Hack Of 1903

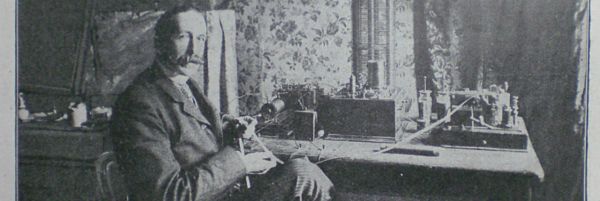
The place is the historic lecture theater of the Royal Institution in London. The date is the 4th of June 1903, and the inventor, Guglielmo Marconi, is about to demonstrate his new wireless system, which he claims can securely send messages over a long distance, without interference by tuning the signal.

The inventor himself was over 300 miles away in Cornwall, preparing to send the messages to his colleague Professor Fleming in the theater. Towards the end of Professor Flemings lecture, the receiver sparks into life, and the morse code printer started printing out one word repeatedly: “Rats”. It then spelled out an insulting limerick: “There was a young man from Italy, who diddled the public quite prettily”. Marconi’s supposedly secure system had been hacked.

Continue reading “Origin Of Wireless Security: The Marconi Radio Hack Of 1903”

Making A Mega LED Desk

Few things beat a sturdy, home-built desk — especially when it’s jam-packed with over 1200 WS2812 LEDs.

[nolobot] and his bother struggled with setting up and squaring-off the t-slotted, extruded aluminium frame which makes up the desk. He recommends practicing with a smaller frame for anyone else attempting a similar build. The surface of the desk has a few inches between the polycarbonate top and the 1/4″ plywood painted black serving as the substrate for the LEDs. Those LEDs come in strip form but still required several hundred solders, and wiring headaches in an attempt to make future upgrades manageable. Dozens of support bolts with adjustable feet support the desk surface throughout. These all had to be individually adjusted and can be made out if you look closely at the demo videos.

An Arduino Mega controls the LEDs with the help of the FastLED library. Custom code was necessary because one of the major issues [nolobot] faced was the power draw. 1200 LEDs at 5V draw quite a bit of current, so the LEDs were coded to peak at about 50% brightness. The matrix was split into different banks, while also limiting the 40A PSU to only 15A.

Continue reading “Making A Mega LED Desk”

Unique Planetary Gearbox Can Be Custom Printed For Steppers

Stepper motors are a staple in all sorts of projects, but it’s often the case that a gearbox is needed, especially for applications like the linear drives in CNC machines and 3D printers. In those mechanisms, a high-torque, low backlash gearbox might be just the thing, and a 3D printable split planetary harmonic drive for the popular NEMA 17 motors would be even better.

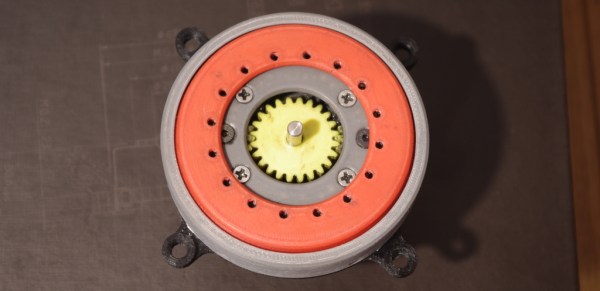
Right up front, we’ll say that we’re skeptical that any plastic gearbox can stay as backlash free as [SirekSBurom] claims his creation is. But we can see the benefits of the design, and it has some nice features. First off, of course, is that it’s entirely 3D printed, except for a few screws. That it mates perfectly with a NEMA 17 motor is a really nice feature, too, and with the design up on Thingiverse it shouldn’t be too tough to scale it up and down accordingly. The videos below show you the theory: the stepper drives a sun gear with two planet gears orbiting, each of which engages a fixed ring of 56 teeth, and an output ring of 58 teeth. Each revolution of the planets around the fixed ring rotates the output ring by one tooth, leading to almost 100:1 reduction.

We think the ‘harmonic’ designation on this gearbox is a little of a misnomer, since the defining feature of a harmonic drive seems to be the periodic deformation of a flex spline, as we saw in this 3D-printed strain wave gear. But we see the resemblance to a harmonic drive, and we’ll admit this beastie is a little hard to hang a name tag on. Whatever you call it, it’s pretty cool and could be a handy tool for all kinds of builds.

Continue reading “Unique Planetary Gearbox Can Be Custom Printed For Steppers”

The Enchanting Power Of SDDSbot

Who doesn’t love a good robot? If you don’t — how dare you! — then this charming little scamp might just bring the hint of a smile to your face.

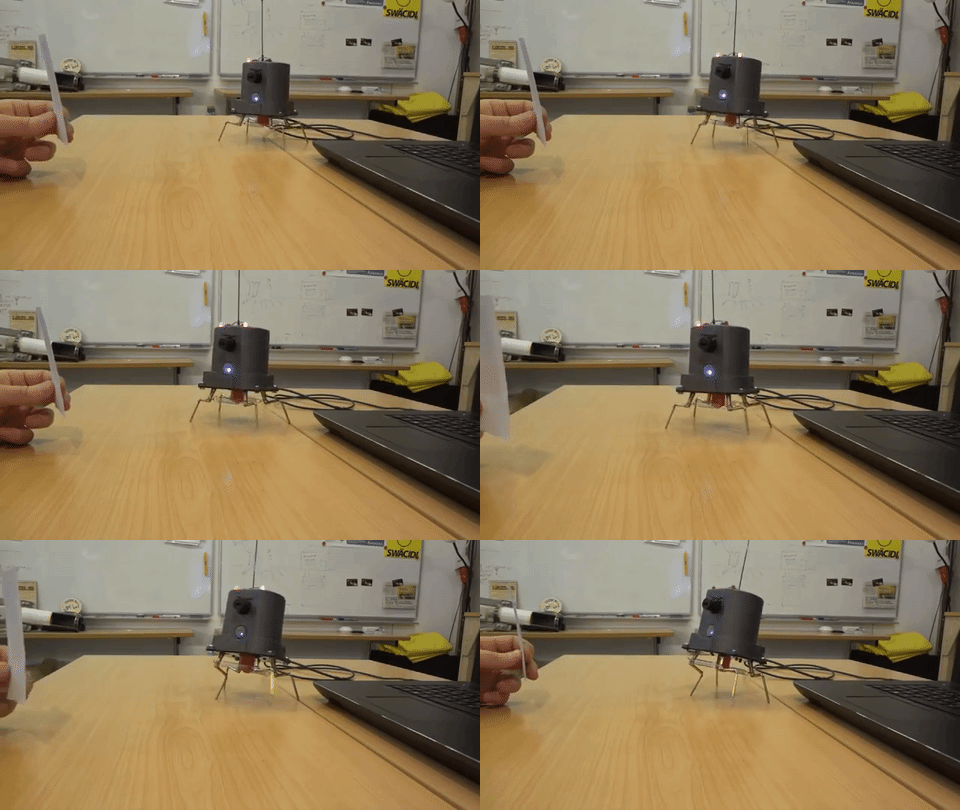
SDDSbot — built out of an old Sony Dynamic Digital Sound system’s reel cover — can’t do much other than turn left, right, or walk forwards on four D/C motor-controlled legs, but it does so using the power of a Pixy camera and an Arduino. The Pixy reads colour combinations that denote stop and go commands from sheets of paper, attempting to keep it in the center of its field of view as it toddles along. Once the robot gets close enough to the ‘go’ colour code, the paper’s  orientation directs the robot to steer itself left or right — the goal being the capacity to navigate a maze. While not quite there yet, it’s certainly a handful as it is.

Continue reading “The Enchanting Power Of SDDSbot”

ESP32 Tutorials

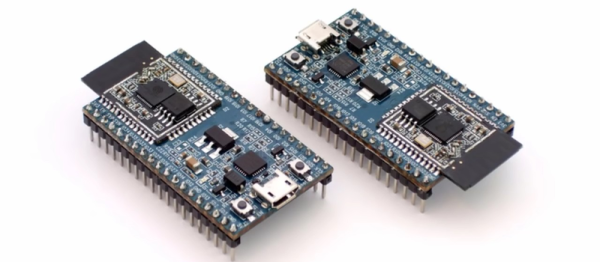
The ESP8266 has become one of those ubiquitous parts that everyone knows. However, the new ESP32 has a lot of great new features, too. If you want to take the ESP32 for a spin, you should check out [Neil Kolban’s] video series about the device. When we say series, we aren’t kidding. At last count, there were nineteen videos. Some are only a few minutes long, but some weigh in at nearly twenty minutes and the average is somewhere in between.

The topics range from setting up tools and using Eclipse and GDB. There are also tutorials on specific tasks like PWM, analog conversion, real-time operating systems, and more.

Continue reading “ESP32 Tutorials”