Firing Up 750 Raspberry Pis

Creating Raspberry Pi clusters is a popular hacker activity. Bitscope has been commercializing these clusters for a bit now and last year they created a cluster of 750 Pis for Los Alamos National Labs. You might wonder what an institution know for supercomputers wants with a cluster of Raspberry Pis. Turns out it is tough to justify taking a real high-speed cluster down just to test software. Now developers can run small test programs with a large number of CPU cores without requiring time on the big iron.

On the face of it, this doesn’t sound too hard, but hooking up 750 of anything is going to have its challenges. You have to provide power and carry away heat. They all have to communicate, and you aren’t going to want to house the thing in a few hundred square feet which makes heat and power even more difficult.

Continue reading “Firing Up 750 Raspberry Pis”

DIY Dungeon Crawler Game Plays On Single LED Strip

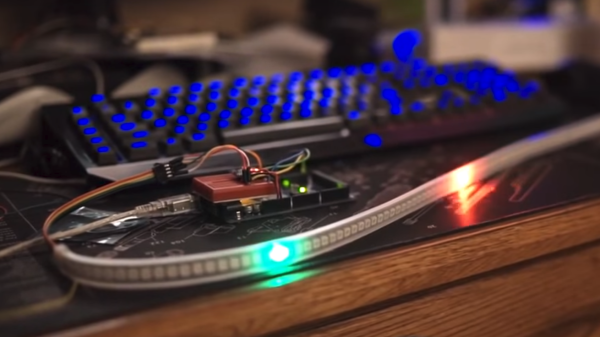
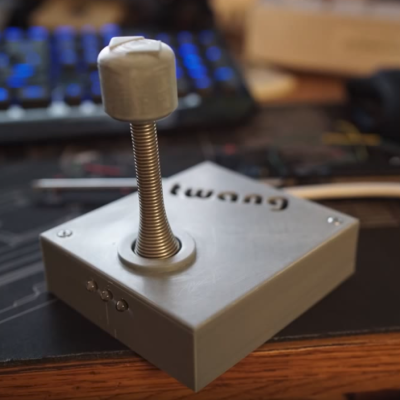
A delightful version of a clever one-dimensional game has been made by [Critters] which he calls TWANG! because the joystick is made from a spring doorstop with an accelerometer in the tip. The game itself is played out on an RGB LED strip. As a result, the game world, the player, goal, and enemies are all represented on a single line of LEDs.

How can a dungeon crawler game be represented in 1D, and how is this unusual game played? The goal is for the player (a green dot) to reach the goal (a blue dot) to advance to the next level. Making this more difficult are enemies (red dots) which move in different ways. The joystick is moved left or right to advance the player’s blue dot left or right, and the player can attack with a “twang” motion of the joystick, which eliminates nearby enemies. By playing with brightness and color, a surprising amount of gameplay can be jammed into a one-dimensional display!

Code for TWANG! is on github and models for 3D printing the physical pieces are on Thingiverse. The video (embedded below) focuses mainly on the development process, but does have the gameplay elements explained as well and demonstrates some slick animations and sharp feedback.

Continue reading “DIY Dungeon Crawler Game Plays On Single LED Strip”

An ADS-B Antenna Built From Actual Garbage

With the advent of low-cost software defined radio (SDR), anyone who’s interested can surf the airwaves from the FM band all the way up to the gigahertz frequencies used by geosynchronous satellites for about $20 USD. It’s difficult to overstate the impact this has had on the world of radio hacking. It used to be only the Wizened Ham Graybeards could command the airwaves from the front panels of their $1K+ radios, but now even those who identify as software hackers can get their foot in the door for a little more than the cost of a pizza.

But as many new SDR explorers find out, having a receiver is only half the battle: you need an antenna as well. A length of wire stuck in the antenna jack of your SDR will let you pick up some low hanging fruit, but if you’re looking to extend your range or get into the higher frequencies, your antenna needs to be carefully designed and constructed. But as [Akos Czermann] shows on his blog, that doesn’t mean it has to be expensive. He shows how you can construct a very capable ADS-B antenna out of little more than an empty soda can and a bit of wire.

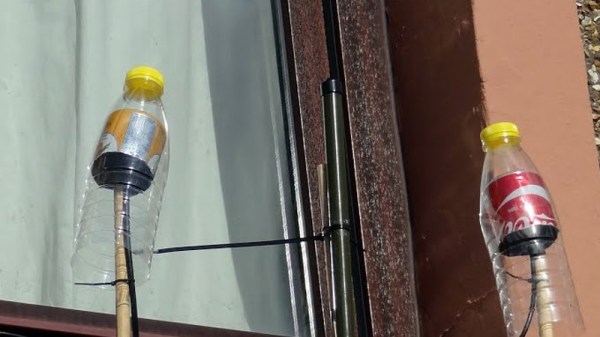
He makes it clear that the idea of using an old soda can as an antenna is not new, another radio hacker who goes by the handle [abcd567] popularized their own version of the “cantenna” some time ago. But [Akos] has made some tweaks to the design to drive the bar even lower, which he has dubbed the “coketenna”.

The primary advantages of his design is that you no longer need to solder anything or even use any special connectors. In fact, you can assemble this antenna with nothing more than a pocket knife.

You start by cutting the can down to around 68 mm in length, and cutting an “X” into the bottom. Then strip a piece of coax, and push it through the X. The plastic-coated center conductor of the coax should emerge through the bottom of the can, while the braided copper insulation will bunch up on the other side. If you want to make it really fancy, [Akos] suggests cutting a plastic drink bottle in half and using that as a cover to keep water out of the “coketenna”.

How well does it work? He reports performance being very similar to his commercial ADS-B antenna which set him back $45 USD. Not bad for some parts of out the trash.

We’ve covered the math of creating an ADS-B antenna in the past if you’d like to know more about the science of how it all works. But if you just want an easy way of picking up some signals, this “coketenna” and an RTL-SDR dongle will get you started in no time.

Making Prints More Resilient With Fibre-Filled Filament

For all that we love 3D printers, sometimes the final print doesn’t turn out as durable as we might want it to be.

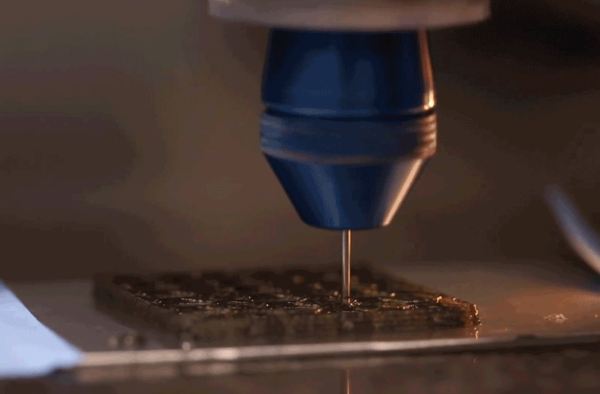
Aiming to mimic the properties of natural structures such as wood, bone, and shells, a research team lead by [Jennifer A. Lewis] at Harvard John A. Paulson School of Engineering and Applied Sciences’ Lewis Lab have developed a new combined filament and printing technique which they call rotational 3D printing.

Minuscule fibres are mixed in with the epoxy filament and their controlled orientation within the print can reinforce the overall structure or specific points that will undergo constant stresses. To do so the print head is fitted with a stepper motor, and its precisely programmed spin controls the weaving of the fibres into the print. The team suggests that they would be able to adapt this tech to many different 3D printing methods and materials, as well as use different materials and printed patterns to focus on thermal, electrical, or optical properties.

Be it adding carbon nano-tubes or enlisting the expertise of spiders to refine our printed materials, we’re looking forward to the future of ever stronger prints. However, that doesn’t mean that existing methods are entirely lacking in endurance.

[Thanks for the tip, Qes!]

Retro Flip Clock Gets A Retrofit

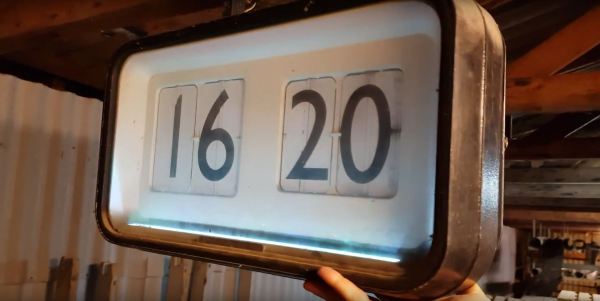
Retro tech is almost always ripe for the hacking — be it nostalgia, an educational teardown, or acknowledging and preserving the shoulders upon which we stand. Coming across an old West-German built flip clock, YouTuber [Aaron Christophel] retrofitted the device while retaining its original mechanical components!

No modern electronics are complete without LEDs of some kind, so he has included a strip in the base of the clock face for visibility and cool factor. He doesn’t speak to the state of the clock beforehand, but he was able to keep the moving bits of the clock working for its second shot at life.

Continue reading “Retro Flip Clock Gets A Retrofit”

DIY Graphene Putty Makes Super Sensitive Sensor

It is sort of an electronics rule 34 that if something occurs, someone needs to sense it. [Bblorgggg], for reasons that aren’t immediately obvious, needs to sense ants moving over trees. No kidding. How are you going to do that? His answer was to use graphene.

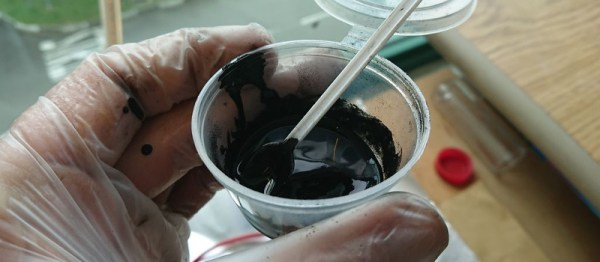
Actually, his super sensitive sensors mix graphene in Silly Putty, an unlikely combination that he tried after reading (on Hackaday, no less) about similar experiments at Trinity College resulting in Gputty. The Gputty was highly sensitive to pressure, and so it appears is his DIY version called Goophene. At Trinity they claimed to be able to record the footsteps of a spider, so detecting ant stomping didn’t seem too far-fetched. You can see a video of the result, below.

Continue reading “DIY Graphene Putty Makes Super Sensitive Sensor”

3D Printed Desk Harnesses The Power Of Fusion 360 And McMaster-Carr

Black pipe furniture is all the rage now, and for good reason — it has a nice industrial aesthetic, it’s sturdy, and the threaded fittings make it a snap to put together. But if you’ve priced out the fittings lately, you know that it’s far from cheap, so being able to 3D-print your own black pipe fittings can make desks and tables a lot more affordable.

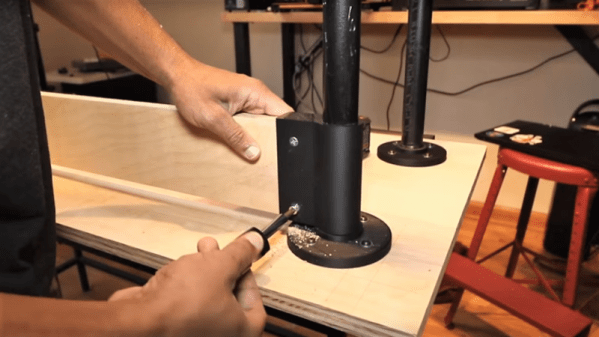
Cheapness comes at a price, of course, and [Vladimir Mariano] takes pains to point out that his desk is a light-duty piece that would likely not stand up to heavy use. But since the flange fittings used to connect the plywood top to the legs and as feet would cost about $64 all by themselves from the local home center, printing them made sense. Together with custom pieces to mount stretchers between the legs, the 3D-printed parts made for a decently sturdy base.

But the end product isn’t the main point of the video below. Thanks to the ability to browse the McMaster-Carr catalog from within Fusion 360, [Mariano] was able to seamlessly import the CAD model of a suitable iron flange and quickly modify it to his needs. The power of this feature is hard to overstate; you can literally browse through a catalog of engineered parts and print usable replicas instantly. Sure, it’s not made of metal, but it’s a huge boon to designers to be able to see how the final product would look, especially in the prototyping phase of a project.

Not familiar with McMaster-Carr? It’s an engineer’s online playground, and we covered the ins and outs of doing business with McMaster a while back.

Continue reading “3D Printed Desk Harnesses The Power Of Fusion 360 And McMaster-Carr”