Don’t Hang Christmas Lights, Embed Them

Finding it hard to get into the holiday spirit this year? Maybe you just need a timely project to light up the evenings until Santa (or Krampus) pays your house a visit. Whoever visits this season, delight or distract them with a 3D printed tree featuring embedded RGB LEDs.
[MakeTVee] printed this tree in four stages to make it a little bit easier to wire everything up. Each stage has six LEDs embedded in a 5mm transparent layer at the bottom. The top stage has a second color change to make a tree topper that holds a single LED. The color change feature in PrusaSlicer 2.0 made it easy to pause the print, insert the wired-up LEDs, and resume seamlessly in green filament. There’s a hidden base of what appears to be appropriately delicious cinnamon filament that holds the Trinket M0 and the power switch.

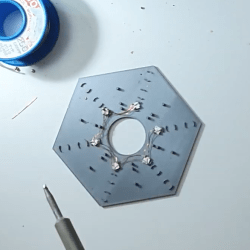
This lil’ tree looks great, especially considering how fiddly and nerve-wracking the wiring and assembly must have been. [MakeTVee] made it easier on himself with a printed wiring stencil that holds the LEDs in their star formation while he solders them up with magnet wire (a solid choice in our book). He thoughtfully included that stencil in the files which are up on the Prusa site. Dim the lights, grab a hot beverage, and check out [MakeTVee]’s build video after the break.

If you want a holiday hack that people can play with, invite them to paint your addressable tree.

Continue reading “Don’t Hang Christmas Lights, Embed Them”

Patch, Or Your Solid State Drives Roll Over And Die

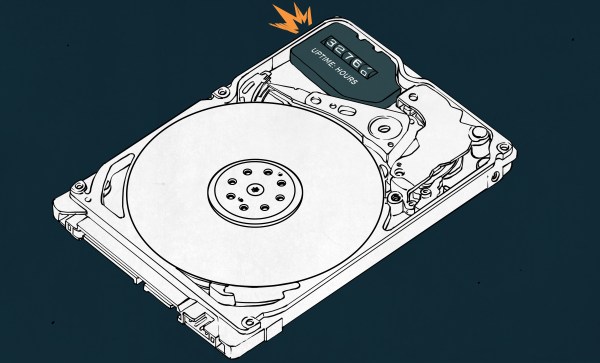
Expiration dates for computer drives? That’s what a line of HP solid-state drives are facing as the variable for their uptime counter is running out. When it does, the drive “expires” and, well, no more data storage for you!

There are a series of stages in the evolution of a software developer as they master their art, and one of those stages comes in understanding that while they may have a handle on the abstracted world presented by their development environment they perhaps haven’t considered the moments in which the real computer that lives behind it intrudes. Think of the first time you saw an SQL injection attack on a website, for example, or the moment you realised that a variable type is linked to the physical constraints of the number of memory locations it has reserved for it. So people who write software surround themselves with an armoury of things they watch out for as they code, and thus endeavour to produce software less likely to break. Firmly in that arena is the size of the variables you use and what will happen when that limit is reached.

Your Drive Is Good For About 3 Years And 9 Months

Sometimes though even developers that should know better get it wrong, and this week has brought an unfortunate example for the enterprise wing of the hardware giant HP. Their manufacturer has notified them that certain models of solid-state disk drives supplied in enterprise storage systems contain an unfortunate bug, in which they stop working after 32,768 hours of uptime. That’s a familiar number to anyone working with base-2 numbers and hints at a 16-bit signed integer in use to log the hours of uptime. When it rolls over the value will then be negative and, rather than the drive believing itself to be in a renewed flush of youth, it will instead stop working.

Egg on the faces of the storage company then, and an urgently-released patch. We suspect that if you own a stack of these drives you will already know about the issue and be nervously pacing the racks of your data centre.

Continue reading “Patch, Or Your Solid State Drives Roll Over And Die”

Journey Through The Inner Workings Of A PCB

Most electronics we deal with day to day are comprised of circuit boards. No surprise there, right? But how do they work? This might seem like a simple question but we’ve all been in the place where those weird green or black sheets are little slices of magic. [Teddy Tablante] at Branch Eduction put together a lovingly crafted walkthrough flythrough video of how PCB(A)s work that’s definitely worth your time.

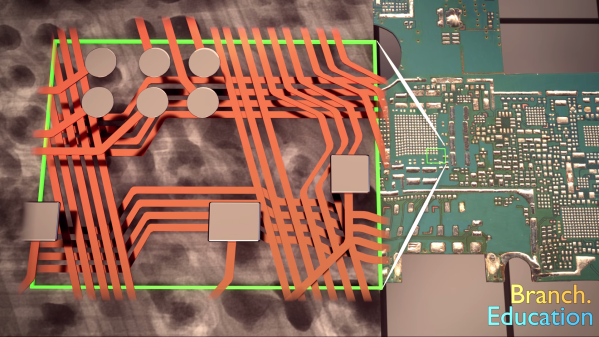
[Teddy]’s video focuses on unraveling the mysteries of the PCBA by peeling back the layers of a smartphone. Starting from the full assembly he separates components from circuit board and descends from there, highlighting the manufacturing methods and purpose behind what you see.

What really stands out here is the animation; at each step [Teddy] has modeled the relevant components and rendered them on the PCBA in 3D. Instead of relying solely on hard to understand blurry X-ray images and 2D scans of PCBAs he illustrates their relationships in space, an especially important element in understanding what’s going on underneath the solder mask. Even if you think you know it all we bet there’s a pearl of knowledge to discover; this writer learned that VIA is an acronym!

If you don’t like clicking links you can find the video embedded after the break. Credit to friend of the Hackaday [Mike Harrison] for acting as the best recommendation algorithm and finding this gem.

Continue reading “Journey Through The Inner Workings Of A PCB”

Laptop Like It’s 1979 With A 16-Core Z80 On An FPGA

When life hands you a ridiculously expensive and massively powerful FPGA dev board, your first reaction may not be to build a 16-core Z80 laptop with it. If it’s not, perhaps you should examine your priorities, because that’s what [Chris Fenton] did, with the result being the wonderfully impractical “ZedRipper.”

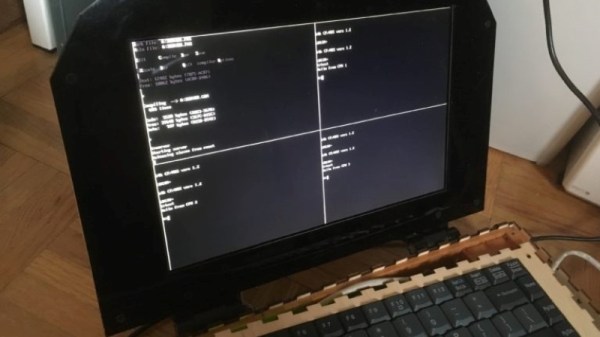
Our first impression is that we’ve got to start hanging around a better class of lab, because [Chris] came by this $6000 FPGA board as the result of a lab cleanout; the best we ever scored was a few old Cat-5 cables and some power strips. The Stratix FPGA formed the heart of the design, surrounded by a few breakout boards for the 10.1″ VGA display and the keyboard, which was salvaged from an old PS/2. The 16 Z80 cores running in the FPGA are connected by a ring-topology network, which [Chris] dubs the “Z-Ring”. One of the Z80 cores, the server core, runs CP/M 2.2 and a file server called CP/NET, while the other fifteen machines are clients that run CP/NOS. A simple window manager shows 80 x 25 character terminal sessions for the server and any three of the clients at once, and the whole thing, including a LiPo battery pack, fits into a laser-cut plywood case. It’s retro, it’s modern, it’s overkill, and we absolutely love it.

Reading over [Chris]’s build log puts us in the mood to break out our 2019 Superconference badge and try spinning up a Z80 of our own. If you decide to hack the FPGA-est of conference badges, you might want to check out what [Sprite_TM] has to say about it. After all, he designed it. And you’ll certainly want to look at some of the awesome badge hacks we saw at Supercon.

Thanks to [yNos] for the tip.