Modular Mouse Packs Features

Not only do console gamers complain about the use of a mouse, but PC users themselves often don’t have kind words to say even about some of the higher-end options. Granted, their gripes aren’t about game experience or balance, they’re usually about comfort, features, or longevity of the mice themselves. So far we haven’t seen many people try to solve these problems, but [benw] recently stepped on the scene with a modular mouse that can fit virtually any need.

Called the RX-Modulus, this mouse has been designed from the ground up to be completely open source from hardware to software. Most of the components can be 3D printed to suit an individual’s particular grip style by making adjustments. The electronics can be custom fitted as well. Users can swap out mouse buttons and wheels in any number of positions, and replace them when they wear out. To that end, one of the goals of this project is also to avoid any planned obsolescence that typically goes along with any current consumer-level product.

While [benw] currently only has a few prototypes under his belt, he’s far enough along with the project that he’s willing to show it off to the community. His hopes are that there are others that see a need for this type of mouse and can contribute to the final design. After all, there are all kinds of other custom mice out there that would have been much easier builds with [benw]’s designs at hand.

Beam Your Program To Another Computer

If you’ve programmed much in Linux or Unix, you’ve probably run into the fork system call. A call to fork causes your existing process — everything about it — to suddenly split into two complete copies. But they run on the same CPU. [Tristan Hume] had an idea. He wanted to have a call, telefork, that would create the copy on a different machine in a Linux cluster. He couldn’t let the idea go, so he finally wrote the code to do it himself.

If you think about it, parts of the problem are easy while others are very difficult. For example, creating a copy of the process’s code and data isn’t that hard. Since the target is a cluster, the machines are mostly the same — it’s not as though you are trying to move a Linux process to a Windows machine.

Continue reading “Beam Your Program To Another Computer”

A Flag-Waving Hat For All Occasions

When [Taste the Code] saw that his YouTube channel was approaching 1,000 subscribers, it was time to do something special. But celebration is no reason to be wasteful. This flag-waving celebratory hat has endless possibilities for the future.

The build is simple, which is just right for these strange times of scarcity. An Arduino Uno hot-glued to the back of the hat is directly driving a pair of 9g servos on the front. [Taste the Code] made the flags by sticking two stickers back to back with a bamboo skewer in between. The code is flavored such that the flags will wave in one of three randomly-chosen patterns — swing around, swing in reverse, and wild gesticulations.

After the novelty of the whole 1k subs thing wears off, [Taste the Code] can change the flags over to Jolly Rogers to help with social distancing. And someday in the future when things are really looking up, they can be changed over to SARS-CoV-2 victory flags, or fly the colors of a local sports team. We think it would be way cool to program some kind of real semaphore message into the flags, though the mobility might be too limited for that. Check out the build video after the break, which happens picture-in-picture as [Taste the Code] dishes out a channel retrospective and lays out a course for the future.

Even though YouTube messed with subscriber counts, we think it’s still worth making a cool counter. Here’s one with a Tetris twist.

Continue reading “A Flag-Waving Hat For All Occasions”

Get Your Microcontroller Online At The Speed Of Light

When developing a network-enabled project with the ESP8266 or ESP32, the easiest way to handle WiFi credentials is to just hardcode the access point and encryption key into the program. But that means recompiling the firmware if you ever want to use it on a different network, which isn’t really an option if you’re trying to make something that other people can easily use. If you’re expecting grandma to bust out the UART cable, we’ve got bad news for you.

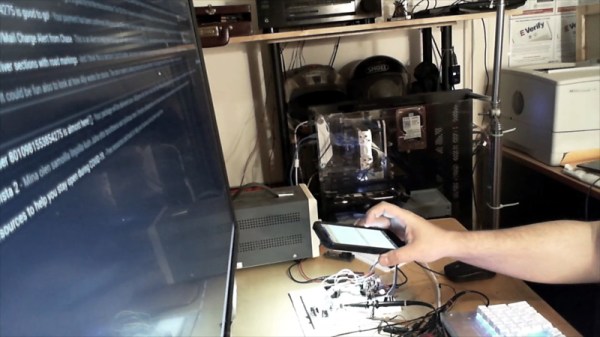
There are various ways around this problem, but we think the one developed by [Pekka Lehtikoski] is particularly clever. With a simple application, network credentials can be literally “flashed” to the waiting microcontroller by rapidly blinking the flash LED on an Android device. This allows the information to be transferred quickly and easily regardless of the user’s technical proficiency. One could even make the argument that it’s more secure than some of the other methods of doing initial setup, since an eavesdropper would literally need to see you do it if they wanted to steal your encryption key.

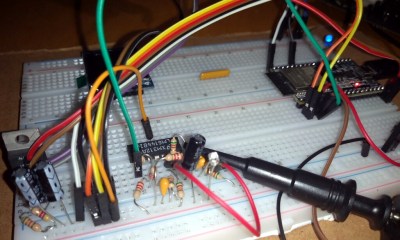
[Pekka] has made the source code for the Android application and the “Gazerbeam” library open for anyone who wants to include the capability in their own projects. To pick up the blinking light you just need to add a phototransistor, an opamp, and a handful of passives to your circuit; making this solution cheap enough that you could even use it in a small-scale production run. The concept isn’t limited to network credentials either. Whenever we can hold conferences again, it could be an interesting way to let attendees customize their badge.

Of course, [Pekka] isn’t the first person to use this trick. Hackers well versed in the history of WiFi MCUs may recall that the Electric Imp used a very similar method of configuration called BlinkUp. If you ever come across a device that asks you to put your phone’s screen down on a little window to perform the initial setup, there’s a good chance it has an Imp inside.

Beat Your Coat Hangers Into Antennas, Not Plowshares

If you are looking for a fun project while you are cooped up and you have some spare coathangers, why not try this 4-element Yagi antenna (PDF)? [Pete N8PR] showed it off at his local ham radio club and it looked like something good for a lazy afternoon. If you aren’t a ham, you could adjust it all for a different VHF or UHF frequency.

For the boom, [Pete] mentions you can use wood, but it isn’t weather resistant. He chose half-inch PVC pipe. He also offers you a choice of material for the elements: #8 wire, welding rod, or — our favorite — coat hangers.

This is a big upgrade from a simple dipole or a vertical made from coax. The yagi should have about 8 dBi gain in the direction it is pointing. The center of the boom doesn’t have any elements, so that simplifies mounting. The insulating boom also makes mounting the driven element a breeze.

If you use the coat hangers, we’ve heard an easy way to get them very straight is to put one end on a vise and the other end in a drill chuck (see the video below). The method will weaken the wire, but the elements won’t have much stress. If it worries you, just go slow on the drill and you might consider annealing the wire with a torch afterward.

It would be easy to make this portable like some other designs we’ve seen. If you want the history and theory behind the venerable yagi antenna, you’ll want to revisit this post.

Continue reading “Beat Your Coat Hangers Into Antennas, Not Plowshares”

NASA Readies New Electric X-Plane For First Flight

Since 1951, NASA (known in those pre-space days as NACA) and the United States Air Force have used the “X” designation for experimental aircraft that push technological boundaries. The best known of these vehicles, such as the X-1 and X-15, were used to study flight at extreme altitude and speed. Several fighter jets got their start as X-planes over the decades, and a number of hypersonic scramjet vehicles have flown under the banner. As such, the X-planes are often thought of as the epitome of speed and maneuverability.

So the X-57 Maxwell, NASA’s first piloted X-plane in two decades, might seem like something of a departure from the blistering performance of its predecessors. It’s not going to fly very fast, it won’t be making any high-G turns, and it certainly won’t be clawing its way through the upper atmosphere. The crew’s flight gear won’t even be anything more exotic than a polo and a pair of shorts. As far as cutting-edge experimental aircraft go, the X-57 is about as laid back as it gets.

But like previous X-planes, the Maxwell will one day be looked back on as a technological milestone of its own. Just as the X-1 helped usher in the era of supersonic flight, the X-57 has been developed so engineers can better understand the unique challenges of piloted electric aircraft. Before they can operate in the public airspace, the performance characteristics and limitations of electric planes must be explored in real-world scenarios. The experiments performed with the X-57 will help guide certification programs and government rule making that needs to be in place before such aircraft can operate on a large scale.

Continue reading “NASA Readies New Electric X-Plane For First Flight”

A Lego Tensegrity Structure

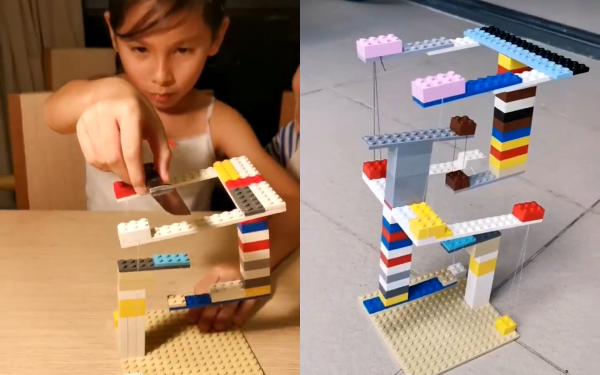
Tensegrity structures are an impressive demonstration of how to achieve mechanical stability through tensile forces. Since the topic is currently trending it was probably only a matter of time before somebody like [Alexandre Thiery] came with the idea to build a tensegrity model from Lego.

In the GIF below that [Alexandre Thiery] shared on his Twitter account you can see his kids admiring the model. Tensegrity structures consist of elements under constant tension – in most cases strings – and components under compression, in this case beams of Lego. By combining these elements, one can build stable structures that seem to float in midair. A simple daily-life example for tensegrity is a balloon where the skin is the tensional element while the air inside is the component under compression.

[Alexandre Thiery] has come up with the clever idea to simply clamp the strings between two Lego blocks. This certainly paves the way for other more complicated Lego-based tensegrity structures that we will likely see in the future. [Alexandre Thiery] also recently extended his model by stacking an identical structure on top of it.

If you do not have any Lego at hand just fire up your 3D printer to make a tensegrity physics toy or a floating table.

Continue reading “A Lego Tensegrity Structure”