DIY HID, OMG!

William English, one of the creators of the mouse back in the 60s, passed away last week. And that got me thinking of how amazing it would have been to be in the place that was inventing what would become modern computing interfaces. What a special time! Of course, they probably had no idea.

From here, it looks like the mouse changed everything, but you have to realize that they were working in a world with light-pens, where you could actually draw on the screen. In contrast, the mouse seems positively non-futuristic. They must have known they’d come up with an improvement over the status quo, but did they know they’d created a revolution?

So where has the revolutionary spirit in DIY human interface devices gone? I’d claim it’s still alive and kicking. Indeed our own Kristina Panos has a series called “Inputs of Interest” and we’ve seen a ton of DIY keyboards of late. Then there are many varieties of dial inputs. I used to have a dedicated scroll wheel made out of a hard-drive platter, and when I was reading lots of PDFs on-screen, I have to say it earned its desk-space. Heck, we’ve even seen people make their own mouse.

But what I love about the story of the development of the mouse is that they asked the question “what is the best way to locate a point on a screen” and tried to answer it. Half of their success is probably in simply asking the right question, and the other half in prototyping something half-workable. My gut says that we don’t have inputs figured out 100% on mobile yet. This sounds like a job for Hackaday. What’s the next big human-interface design need? And have you got any crazy ideas to solve it?

Hackaday Remoticon

And this week, we announced the Hackaday Remoticon, our shelter-in-place version of the Supercon. It’s going to take place in November as usual, but online instead of IRL.

The good news? It’s going to be chock full of workshops, all streamed online and recorded for posterity. And for that we need your proposals. If you’d like to teach a group of distributed hackers learning your favorite techniques and tricks, this is your chance!

The bad news is of course that we won’t get to see you all in person. That’s going to make the 2021 Hackaday Supercon seem even more super.

Why Buy The Newer Model, When You Can Just Replicate Its User Interface?

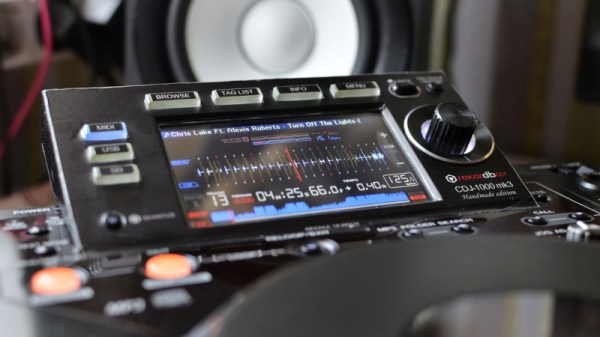
Every now and then, along comes an awesome hack from years past that we missed at the time. We kick ourselves for somehow missing such amazing work, and since it’s that good, we share it with you with apologies. Such is the case with [Andrei Anatska]’s faithful replication of the Pioneer CDJ-2000 user interface as an upgrade to the earlier CDJ-1000 DJ controller, a piece of work of such quality that you could almost mistake it for being a commercial product.

At its heart is the STM32F746G Discovery board, which for some reason it pleases us greatly in this context that he refers to as the Disco board. If you’re hazy on the details of the various STM dev boards, this is the all-singing all-dancing one with the fancy colour LCD display. Out comes the VFD on the CDJ-1000 and a set of wires are soldered to its main board, then the Disco board is hooked up with the project firmware installed. The piece de résistance is the case, for which he eschews 3D-printing and instead cuts out from black plastic. Full instructions can be found in this PDF, so should you happen to have a CDJ-1000 that’s seen better days, you can join in the fun. See it in action in the video below.

DJ controllers may be run-of-the-mill today, but to those of us whose DJing days were in the era of a pair of Technics SL1200s and a stack of vinyl to the sound of early ’90s house music they are still nothing short of miraculous. We’ve featured plenty of hacks involving them here but they don’t always involve professional kit. Even a game controller can be pressed into service.

Continue reading “Why Buy The Newer Model, When You Can Just Replicate Its User Interface?”

An Amiga Sampler 30 Years Later

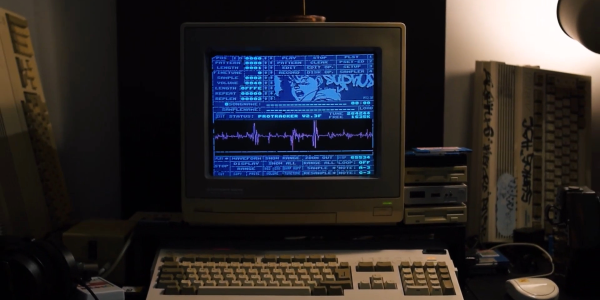
There was a magic moment for a few years around the end of the 1980s, when home computers were better than professional ones. That’s a mighty grand pronouncement, but it refers to the crop of 16-bit home computers that genuinely were far better than nearly all PCs at the time for multimedia tasks. You could plug a sampler cartridge into your Amiga and be in the dance charts in no time, something which sparked a boom in electronic music creativity. As retrocomputing interest has soared so have the prices of old hardware, and for those still making Amiga music that cart can now be outrageously expensive. it’s something [echolevel] has addressed, with an open-source recreation of an Amiga sampler.

As anyone who peered inside one back int he day will tell you, an Amiga sampler was a very simple device consisting of a commonly-available 8-bit A to D converter, a CMOS switch for right and left samples, and maybe an op-amp preamplifier. This is exactly what he’s produced, save fpr the CMOS switch as he points out that Amiga musicians use mono samples anyway. At its heart is an ADC0820 half-flash ADC chip, and the whole thing is realised on a very retro-looking through-hole PCB.

For a Hackaday scribe with a Technosound Turbo still sitting in a box somewhere it’s a real trip down memory lane. It was a moment of magic to for the first time be able to edit and manipulate audio on a computer, and we’re glad to see that something of those days still lives on. See it in action in the video below the break.

Continue reading “An Amiga Sampler 30 Years Later”

Virtual Software Defined Radio

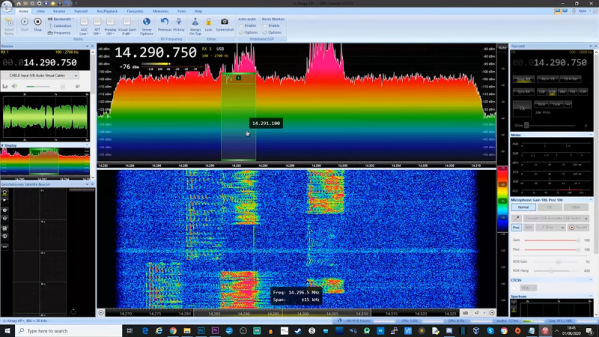
Software defined radio or SDR has changed the radio landscape forever. But to use one you need to buy some kind of hardware right? Maybe not. As [Tech Minds] shows in a recent video there are plenty of SDRs publically available on the Internet. We know that isn’t news, but the video does cover several different methods of finding and using SDR receivers including many that run totally in the browser.

Of course, there are a lot of reasons you might want to borrow an alien radio receiver, even if you have your own hardware. Maybe you don’t have a great antenna or maybe you want to hear a signal — maybe even your own — from a different location.

Continue reading “Virtual Software Defined Radio”

Tired Of Regular Keebs? Might Be Time To Split

No matter how much geek cred your old vintage keyboard pulls, it’s not worth suffering through wrist pain or any other discomfort while using it. Especially now, when there are so many points of entry into the rabbit hole world of DIY mechanical keebs.

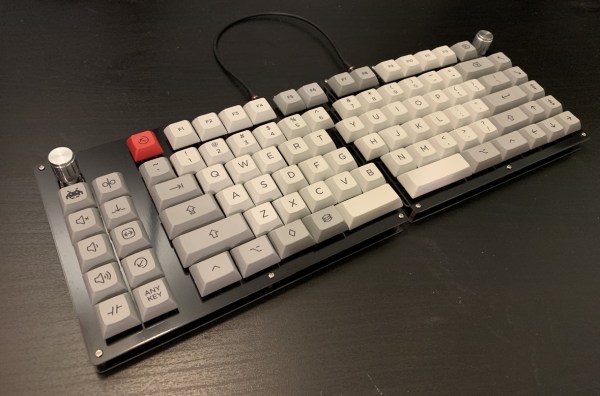
Once the wrist pain started, [Ben Congdon] switched from a big old Apple keeb to a Kinesis Freestyle — it’s basically a regular keyboard, but in two halves that can be placed far enough apart that [Ben]’s wrists are straight while typing. Comfortable as that split rectangle may be, it’s just not that cool looking, and he was ready to build something new, as long as it had enough keys.

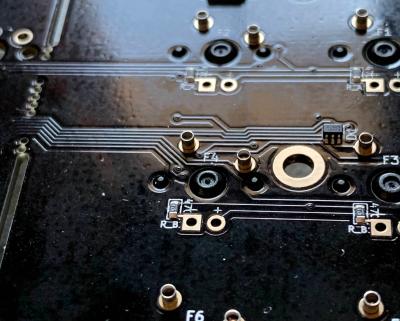
[Ben] settled on building a Keebio Sinc, a new board which comes mostly soldered already and supports a handful of layouts. In the spirit of leaving doors open, [Ben] soldered in hot-swap sockets instead of permanently attaching the key switches to the PCB. This way, those Gateron reds can be easily switched out for something else, for instance should [Ben] want to try a little tactility down the road.

We think the Sinc is a cool offering precisely because it is such a full keyboard. Not everyone is ready to jump into 60% layouts or thumb clusters, and it’s nice to have options. This is entry-level ergo and DIY all at once. What’s not to like? Even if you want to go for something small and ortholinear, there are options. Here’s a build we saw recently that starts with a breakaway PCB that lets you choose between small and smaller.

Via reddit

HAWT Wind Turbine Is Mostly 3D Printed

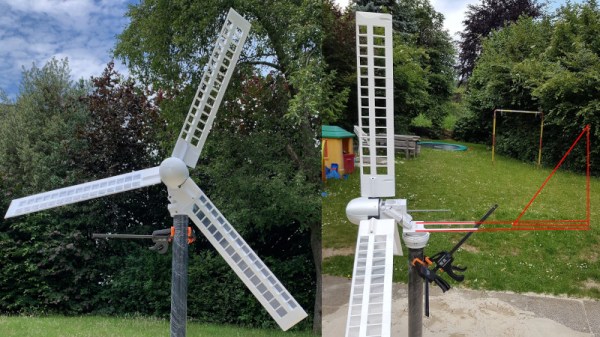
Wind turbines are a great source of renewable energy, and a great DIY project, too. They can be built with all kinds of materials and the barrier for entry is low for the beginner. [Fab] has built just such a device, taking advantage of modern construction techniques, and dubbed it the WinDIY.

The WinDIY design is mostly 3D printed, with a familiar three-bladed design. The diameter of the rotor is 1.2 m, meaning that braking and regulating the turbine is required for safety in high winds. [Fab] is aiming to achieve this control with a combination of mechanical and electronic braking, as well as variable-pitch blades. The benefit of 3D printing the design is it allows iterations to be made quickly, particularly of parts with complex geometries that would be too time-consuming or expensive to machine otherwise.

[Fab]’s writeup goes into great detail on topics like the design of the pitch control systems and other minutae, which should serve as a great reference for anyone else working on a similar project. If you’re looking for something with more of a sci-fi future vibe, consider attempting a vertical-axis build instead.

Hands-On: AND!XOR Unofficial DC28 Badge Embraces The Acrylic Stackup

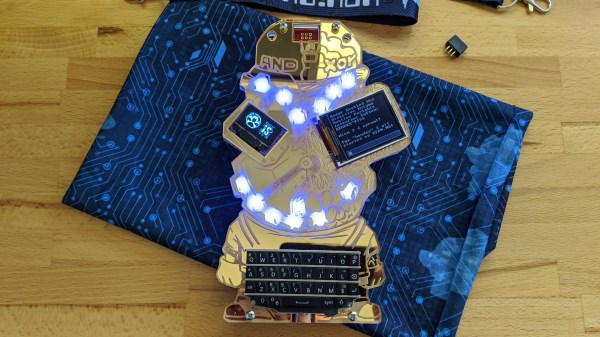
Still hot from the solder party, a new AND!XOR badge just landed on my desk courtesy of the hacking crew that has been living the #badgelife for the past five years. Originally based on the Futurama character Bender, the design has morphed to the point that it’s no longer recognizable as a descendant of that belligerent robot. Instead we have a skeletal midget whose face is half covered by a gear-themed mask.

Continue reading “Hands-On: AND!XOR Unofficial DC28 Badge Embraces The Acrylic Stackup”